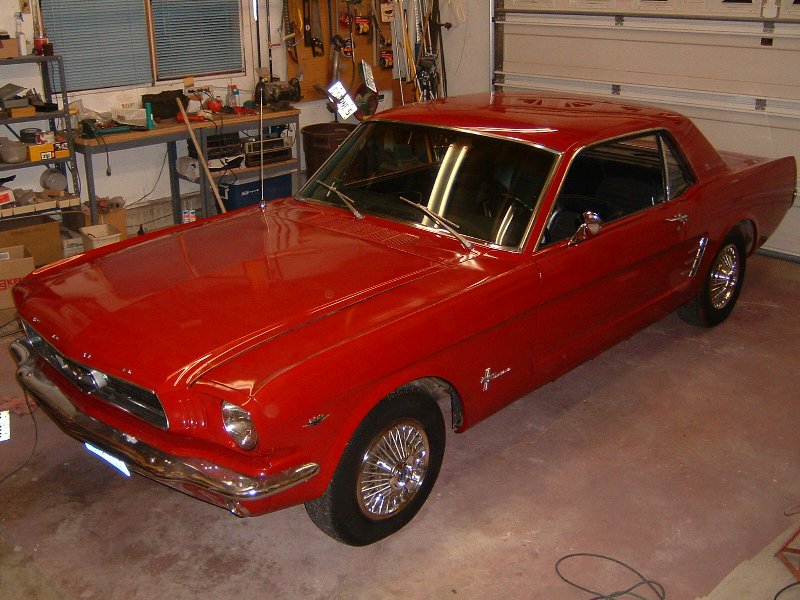
1966 Mustang Coupe
1. Intro
6. Assembly Begins
2. The Beginning
7. Assembly Continues
3. Strip Down
8. Final Touches
4. Paint Booth
9. The money pit
5. Finally Red
10. The Grand Finale
7. Assembly continues
 December
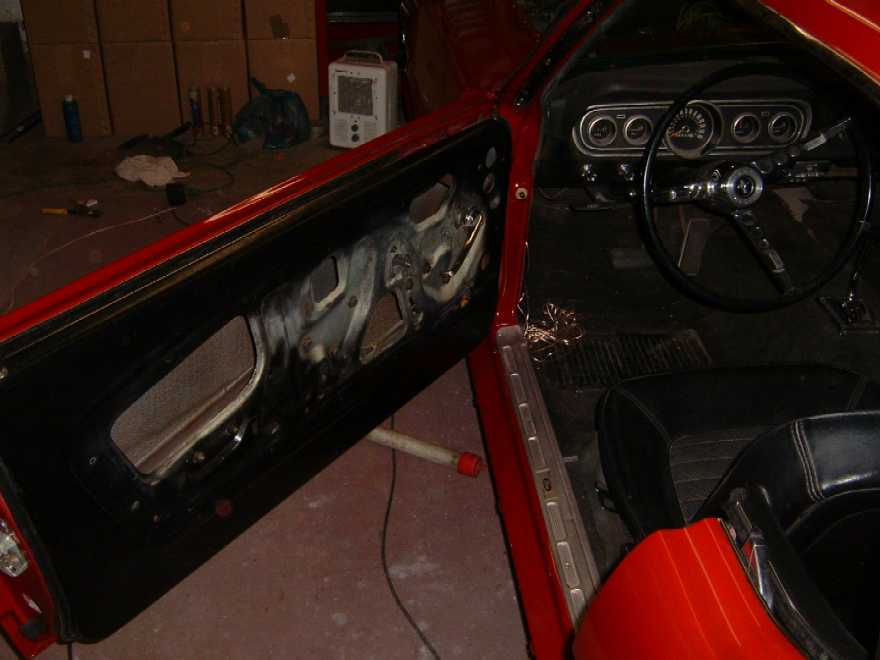
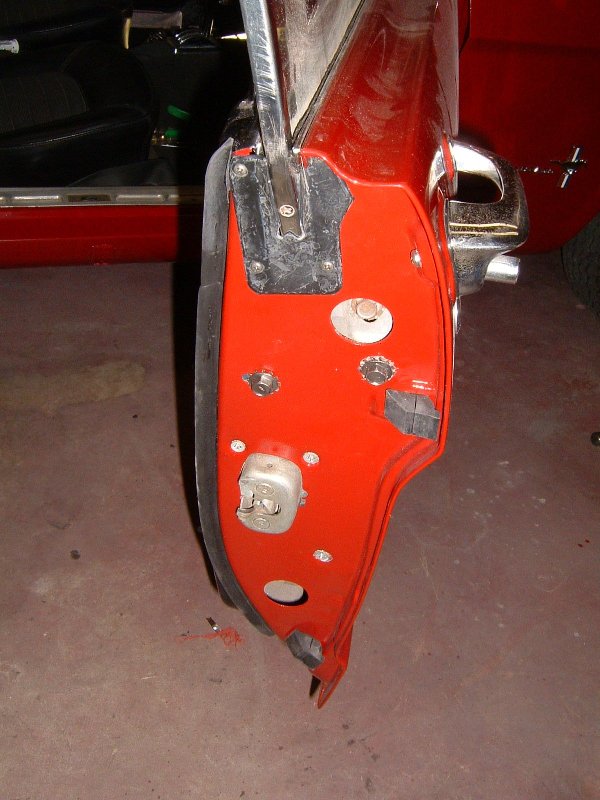
9: Installed the driver's side door. It's a lot lighter without
the window and door latch mechanisms in it. Still had problems putting
on the top hinge to the body. The backer plate is way up inside the body
where you can't hold it in place with your hands. Used a piece of wire
and hooked it into one of the screw holes in the backer plate to
hold in place while screwing in the other screws. Adjusting the door is
tricky too.
December
9: Installed the driver's side door. It's a lot lighter without
the window and door latch mechanisms in it. Still had problems putting
on the top hinge to the body. The backer plate is way up inside the body
where you can't hold it in place with your hands. Used a piece of wire
and hooked it into one of the screw holes in the backer plate to
hold in place while screwing in the other screws. Adjusting the door is
tricky too.
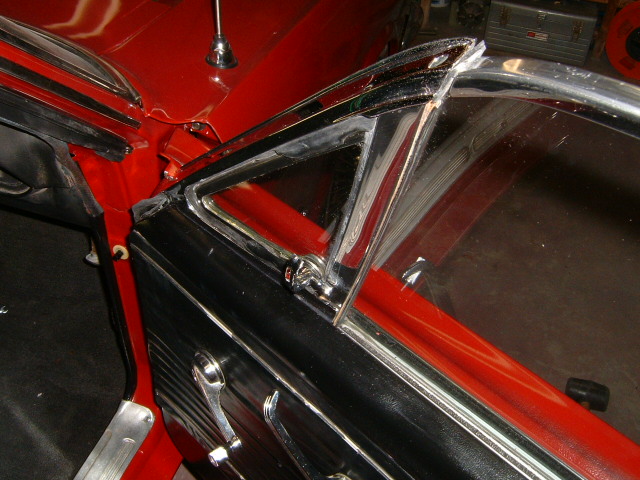
Took apart the vent window to replace the seals. Polished
it up with steel wool and put in new weather-stripping. Lots of rivets
makes it a real challenge without the proper tools. Still need two rivets
to fasten the divider bar onto the vent window frame, so progress is slowed.
Painted the head light buckets with gloss black. Installed the driver's
side door latch and lock. This is a bit tricky because of all the rods
hanging all over.
December 10: Ordered more parts from Mustangs
Unlimited. Web site wouldn't let me order so I had to call them this morning.
Ordered antenna, side mirror, door hinge bolts for the other side (didn't
have enough for the passenger side), head light frame bolts, glove box
insert (the original is shot), the "FORD" letters for the front of the
hood, divider (press board between rear seat and trunk - didn't have one
to start with), watershield kit (for waterproofing the space between the
door panels and the door - plastic coated paper), and miscellaneous screws
that I couldn't find.
December 11-12: Installed the right side door.
Just as tricky as the left side. Installed the windshield washer tubes.
Painted the package tray gloss black, several times. Wood tends to soak
up the paint. Painted the hood/cowl seal brackets as well. Installed the
rain gutter chrome trim on both sides.
 December
14: Assembled the head light buckets into the head light extension.
Found out that the new head light trim screws I bought have heads that
are too big for the trim ring. They would work if you completely remove
the screws, but they are supposed to designed to unscrew just a little
bit, then the trim ring can be rotated a little and the heads of
the screws pass through to remove the head light. I put the old ones back
in. Installed the backup lights with new body gaskets. Found out that the
right side light is missing one of the studs that holds in onto the rear
valance. Installed it anyway. Seems to hold o.k. Installed the rear bumper
guards (bumperettes). Installed the rear
drain grommet on both sides. These came with the complete rubber plug
kit , and at first I didn't know where they belonged, but when I installed
the back up lights, I found out where they went. On the bottom of the rear
quarter panel just behind the rear wheel. This is where there was a big
oval slot with two different sized holes on either side to drain water
out of the trunk (if any gets in). The left side was covered with bondo,
so I had to drill out the plastic, but that was easy. Pushing the plugs
into the holes wasn't so easy. Next came the felt kit for the front doors.
Then the door light switches. Installed the hood to cowl seal. Installed
the windshield trim pieces and new rear view mirror with old bracket.
Finished polishing up the windshield and rear window trim chrome and installed
them. Cleaned the side panels that go into the back seat area. Installed
the right side door latch and lock. Closed the door only to find that I
couldn't open it from the outside. The door lock didn't work too well either.
Took the door latch mechanism out to inspect it and determined it just
needed cleaning and lubrication. Took it apart to clean and lube it but
broke the plastic pawl the door latch rod plugs into. Put it back together
and installed it, and it worked a lot better, except that the door latch
rod doesn't stay in. Another part to replace. Looked over the insides of
the window crank mechanisms and found out the driver's side had a broken
roller. Probably why the window
looks crooked in the photo. More parts to order. Installed the chrome
roof rail weather-stripping retainers on both sides, but not the rubber.
Installed the windshield wipers.
December
14: Assembled the head light buckets into the head light extension.
Found out that the new head light trim screws I bought have heads that
are too big for the trim ring. They would work if you completely remove
the screws, but they are supposed to designed to unscrew just a little
bit, then the trim ring can be rotated a little and the heads of
the screws pass through to remove the head light. I put the old ones back
in. Installed the backup lights with new body gaskets. Found out that the
right side light is missing one of the studs that holds in onto the rear
valance. Installed it anyway. Seems to hold o.k. Installed the rear bumper
guards (bumperettes). Installed the rear
drain grommet on both sides. These came with the complete rubber plug
kit , and at first I didn't know where they belonged, but when I installed
the back up lights, I found out where they went. On the bottom of the rear
quarter panel just behind the rear wheel. This is where there was a big
oval slot with two different sized holes on either side to drain water
out of the trunk (if any gets in). The left side was covered with bondo,
so I had to drill out the plastic, but that was easy. Pushing the plugs
into the holes wasn't so easy. Next came the felt kit for the front doors.
Then the door light switches. Installed the hood to cowl seal. Installed
the windshield trim pieces and new rear view mirror with old bracket.
Finished polishing up the windshield and rear window trim chrome and installed
them. Cleaned the side panels that go into the back seat area. Installed
the right side door latch and lock. Closed the door only to find that I
couldn't open it from the outside. The door lock didn't work too well either.
Took the door latch mechanism out to inspect it and determined it just
needed cleaning and lubrication. Took it apart to clean and lube it but
broke the plastic pawl the door latch rod plugs into. Put it back together
and installed it, and it worked a lot better, except that the door latch
rod doesn't stay in. Another part to replace. Looked over the insides of
the window crank mechanisms and found out the driver's side had a broken
roller. Probably why the window
looks crooked in the photo. More parts to order. Installed the chrome
roof rail weather-stripping retainers on both sides, but not the rubber.
Installed the windshield wipers.
 December
15: Put the right fender on. Made a mistake - left the fender to cowl
bolt off and tried to put it on with the fender bolted on the top. This
only nicked the paint off a small corner of the 'A' pillar where the fender
almost touches. Other spots were also nicked in the process. I was a bit
frustrated to say the least. Colleen came out to the garage and told me
to 'keep it down'. I guess I was more than a bit frustrated. Damn fender.
It was on for only a short time. I still had to drill the hole for the
antenna. I used a template I found on the Internet. I needed to drill a
5/16" hole (for the locating tab) first. Then I needed a 1 1/8" hole but
I don't have a 1 1/8" drill. Basically, I drilled a circular pattern of
1/4" holes and knocked out the plug, then filed down the rough edges. It
looks ugly, but it gets covered up, so I wasn't too worried about it. I
needed Chris to hold the fender while I feed the antenna cable through
the opening (it has a rubber bushing that is quite difficult to seat in
the hole). It is almost impossible to do this yourself! After the fender
was on, the head light assembly was installed. This went on easily, except
it doesn't line up perfectly with the fender. Oh, well. I eventually
took it off again because I had to adjust the fender and put the lower
fender to cowl nut into the cowl (which I did't have at the time). Spray
painted the rear quarter trim panels for the interior semi-flat black.
Apparently, it is different than semi-gloss black. Painted the edge
trim used on the edge of the quarter trim panel.
December
15: Put the right fender on. Made a mistake - left the fender to cowl
bolt off and tried to put it on with the fender bolted on the top. This
only nicked the paint off a small corner of the 'A' pillar where the fender
almost touches. Other spots were also nicked in the process. I was a bit
frustrated to say the least. Colleen came out to the garage and told me
to 'keep it down'. I guess I was more than a bit frustrated. Damn fender.
It was on for only a short time. I still had to drill the hole for the
antenna. I used a template I found on the Internet. I needed to drill a
5/16" hole (for the locating tab) first. Then I needed a 1 1/8" hole but
I don't have a 1 1/8" drill. Basically, I drilled a circular pattern of
1/4" holes and knocked out the plug, then filed down the rough edges. It
looks ugly, but it gets covered up, so I wasn't too worried about it. I
needed Chris to hold the fender while I feed the antenna cable through
the opening (it has a rubber bushing that is quite difficult to seat in
the hole). It is almost impossible to do this yourself! After the fender
was on, the head light assembly was installed. This went on easily, except
it doesn't line up perfectly with the fender. Oh, well. I eventually
took it off again because I had to adjust the fender and put the lower
fender to cowl nut into the cowl (which I did't have at the time). Spray
painted the rear quarter trim panels for the interior semi-flat black.
Apparently, it is different than semi-gloss black. Painted the edge
trim used on the edge of the quarter trim panel.
December 16: Worked on the left side today:
Installed the watershield on the rear quarter. Used an adhesive
recommended by Mustangs
Unlimited which is used for sanding discs. It was runny at first, but
later when I had to reposition it, it seemed to re-adhere. Good stuff.
Then I remembered I needed to run speaker wire from the front to the rear
and needed the panel off to get access. So it came off, I ran the wire,
and it went back on. Installed the quarter window felt (beltline weatherstrip)
on the quarter trim panel. Had to drill the holes into the quarter trim
panel because the new felt had pre-drilled holes for the stainless steel
staples that didn't line up with the original's. Installed the rear quarter
trim panel. Cleaned the window crank and installed it. Installed the edge
trim. Installed the door sill plate.
After painting both quarter trim panels, the right side
didn't come out as good as the left side. It looked like it had a scratch
in it (from before) near the window crank. I thought I could sand it down
and feather the edges and paint it again but when I sanded it down, the
fresh paint wouldn't feather. I ended up scraping it all off then
taking it down to bare metal with a rotary scotch pad and wire wheel just
like the door panels. Re-painted the right side
trim panel (again).
December 17: Installed the right side quarter
window felt onto the trim panel and installed it into the car, just like
the left side. Installed the trunk/backseat divider and cut holes into
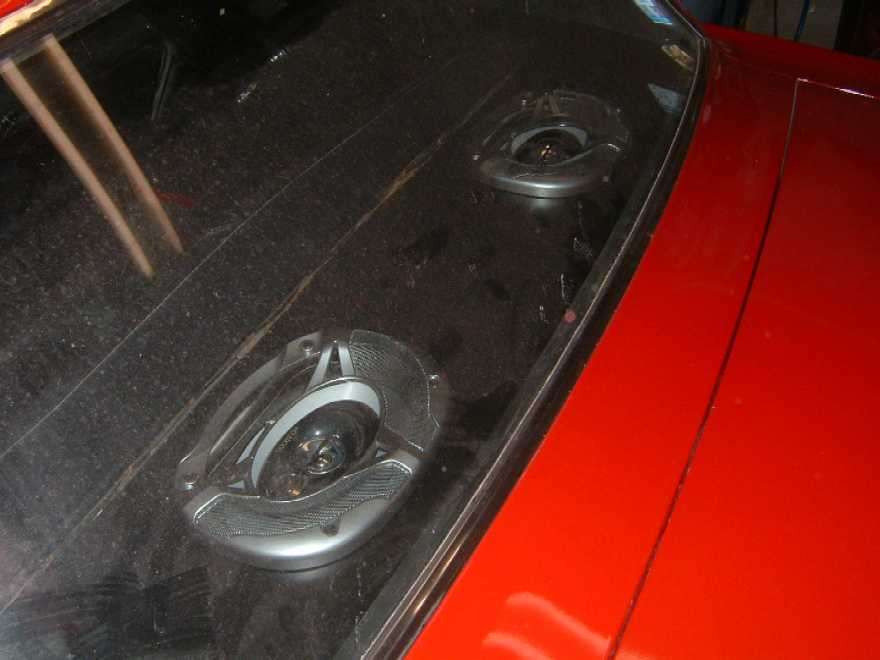
the package tray for the speakers.
 December
18: Installed the package tray and rear speakers. Kenwoods. Chris'
choice. I didn't want to cut out the sheetmetal in the back to make the
6x9's fit, so I mounted them from the underside and left a gap between
the speaker and the speaker grilles. It looks OK but it's not the correct
way. Sacrifices.
December
18: Installed the package tray and rear speakers. Kenwoods. Chris'
choice. I didn't want to cut out the sheetmetal in the back to make the
6x9's fit, so I mounted them from the underside and left a gap between
the speaker and the speaker grilles. It looks OK but it's not the correct
way. Sacrifices.
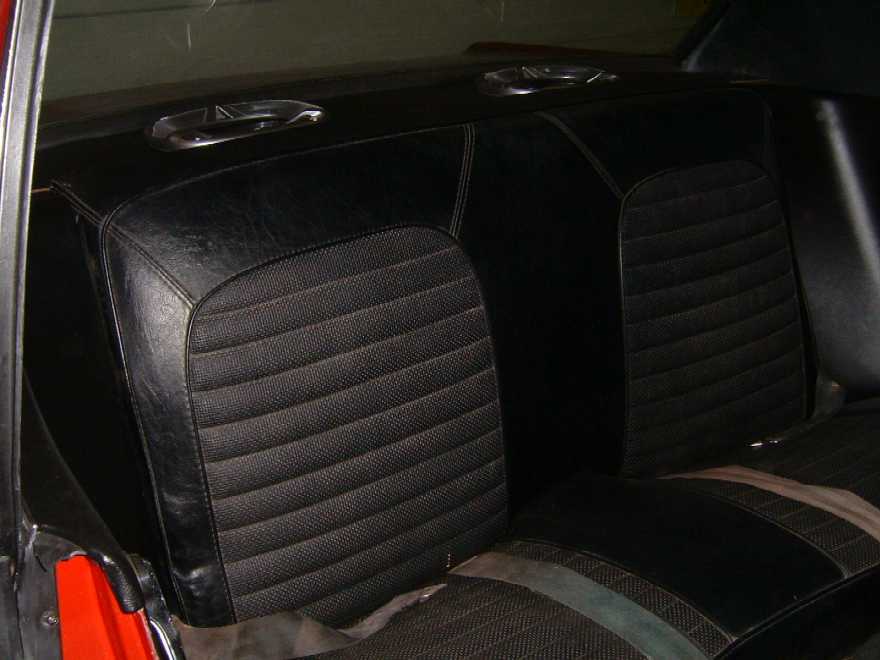
December 19: Put the rear seat in. Had to adjust
the wire frame where the hook hooks onto the seat bottom so it wouldn't
squeak so loud when you sit down. It still squeaks, but not as loud.
 December
20-28 Went on a Christmas break. Don't remember too much about what
I did on the weekend. Mostly sitting around and waiting for parts. I think
I put the left fender on just to see what it looks like. Chipped off some
more paint where the door meets the fender and on the bottom of the cowl.
Still need some nuts to do a complete job.
December
20-28 Went on a Christmas break. Don't remember too much about what
I did on the weekend. Mostly sitting around and waiting for parts. I think
I put the left fender on just to see what it looks like. Chipped off some
more paint where the door meets the fender and on the bottom of the cowl.
Still need some nuts to do a complete job.
December 29: Got a care package from Mustangs
Unlimited AND American Pony. Window rollers, door latch pawls, grille and
stone guard mounting kits, 120 Watt kick-panel speakers, and radiator to
hood seal. American Pony backordered the vent window lock part I need.
I guess I have to wait. I thought I ordered the fender to cowl nuts that
hold the fenders on at the bottom, near the door, but I was mistaken.
Installed the window rollers and door latch pawls on both doors. This fixes
the driver's side window and the right side door latch problems described
earlier.
December 30: Ordered rivets for the vent window.
Had to buy 100 even though I only need 4. Also ordered the fender/cowl
nuts I thought I ordered before. Also ordered more mounting screws/nuts
for the grille mount and stone guard to make it seem worth while to spend
8.95 for shipping.
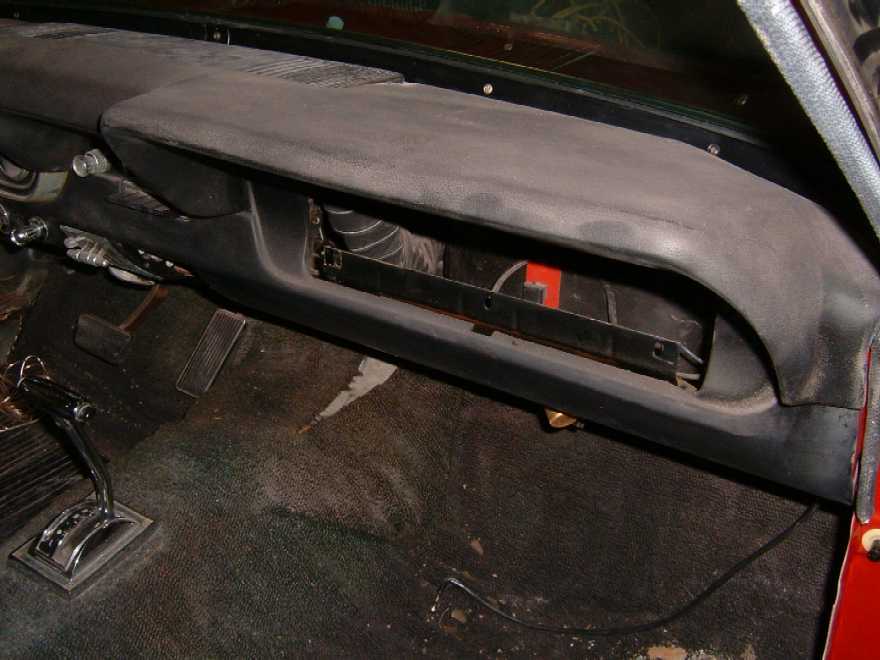
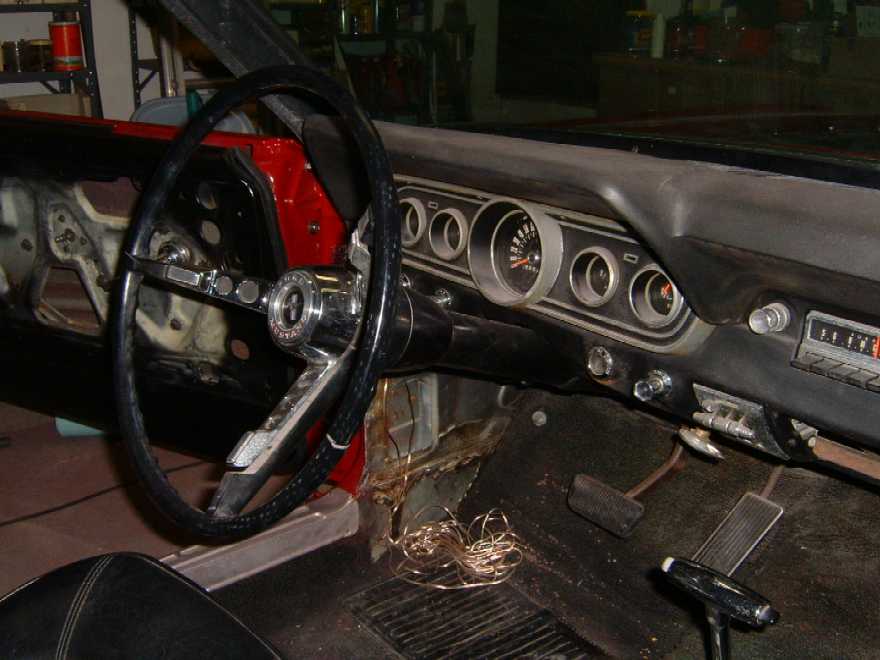 Started
on the new stereo deck installation. The original thought was to mount
the stereo into the glove box because the air conditioning vents were hogging
the center console under the dash and I didn't want to rip up the dash
(I wanted to keep the original AM radio configuration), so the cardboard
insert (literally a cardboard box) was removed. After seeing how much room
was there, I decided to remove the air conditioning vent box because there
wasn't any air conditioning compressor and hoses anyway. The under dash
mounting scheme was reinstated. Wires from the rear speakers were already
routed to the front kick-panel, but still needed routing to the center
of the dash. Found out that the plastic 'tray' the DIN mounted stereo goes
into doesn't have anything to support the back end. Went to Best Buy, Radio
Shack, Circuit City but none of these had anything I could use. Lowe's
home improvement store had metal strapping for hanging ducts that I could
use.
Started
on the new stereo deck installation. The original thought was to mount
the stereo into the glove box because the air conditioning vents were hogging
the center console under the dash and I didn't want to rip up the dash
(I wanted to keep the original AM radio configuration), so the cardboard
insert (literally a cardboard box) was removed. After seeing how much room
was there, I decided to remove the air conditioning vent box because there
wasn't any air conditioning compressor and hoses anyway. The under dash
mounting scheme was reinstated. Wires from the rear speakers were already
routed to the front kick-panel, but still needed routing to the center
of the dash. Found out that the plastic 'tray' the DIN mounted stereo goes
into doesn't have anything to support the back end. Went to Best Buy, Radio
Shack, Circuit City but none of these had anything I could use. Lowe's
home improvement store had metal strapping for hanging ducts that I could
use.
Spent most the night wiring up the wiring harness to
various connections under the dash. Battery (continuous 12V for memory),
accessory, illumination, ground, and 4 speaker connections kept me busy.
Didn't get around to installing the actual 'tray'.
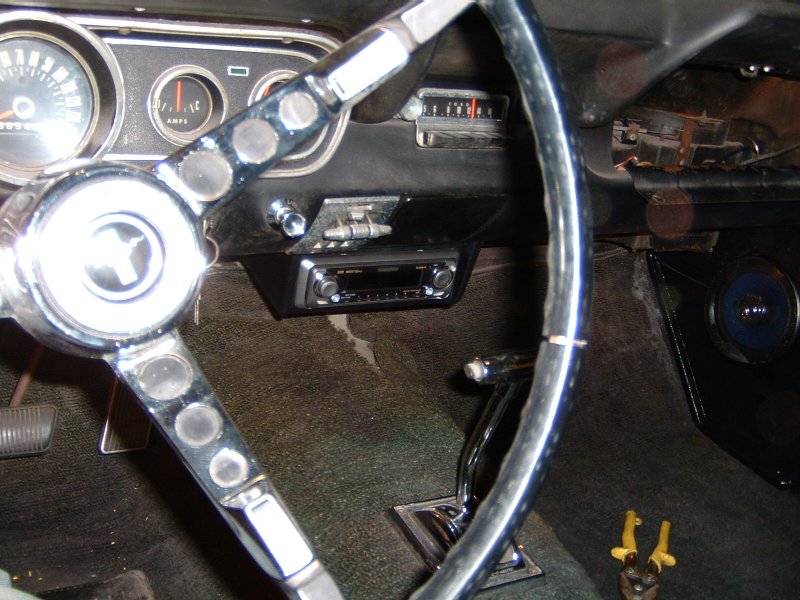
 December
31: Finished installing the stereo. Mounted the 'tray' under the dash
and plugged in the unit. Temporarily hooked up the front speaker kick-panels
to give it a listen. Sounds really nice (sweet). I'll have to wait until
the fenders can be bolted on permanently to install the front speaker kick-panels.
Fixed the driver's side courtesy lamp.
December
31: Finished installing the stereo. Mounted the 'tray' under the dash
and plugged in the unit. Temporarily hooked up the front speaker kick-panels
to give it a listen. Sounds really nice (sweet). I'll have to wait until
the fenders can be bolted on permanently to install the front speaker kick-panels.
Fixed the driver's side courtesy lamp.
January 3: Found out that the stereo turns off
when you close the doors. I discovered this when I was checking on
the car late at night and saw that the courtesy lamps were on even though
the doors were shut. It turns out that the light switch was turned so the
courtesy lamps were continuously on. After turning the switch 'off', and
shuting the doors, the stereo went dead. Apparently I mis-wired the power
leads to the courtesy lamp circuit, so I re-wired it to the cigarette lighter
circuit (I couldn't find any other readily available outlet.)


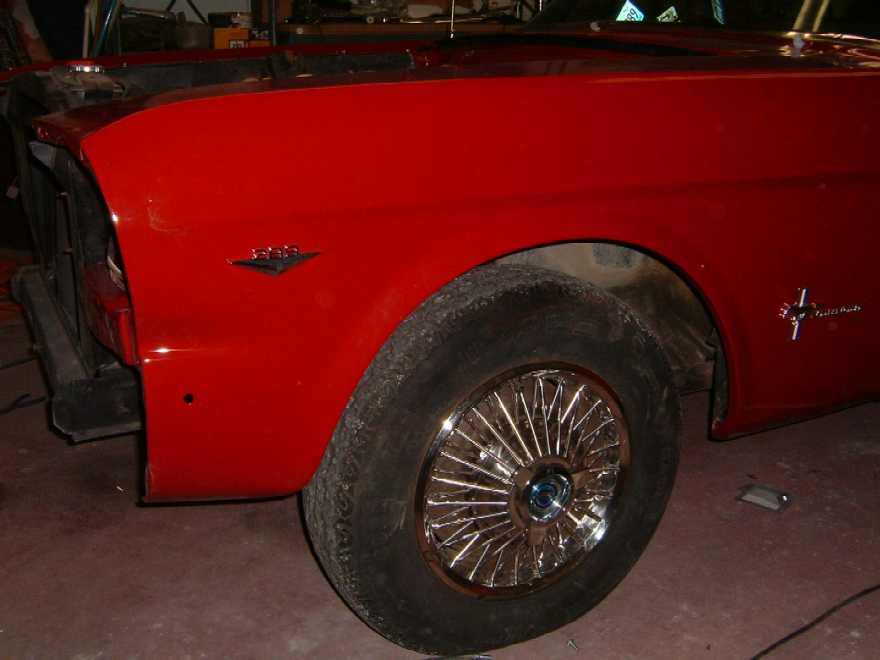
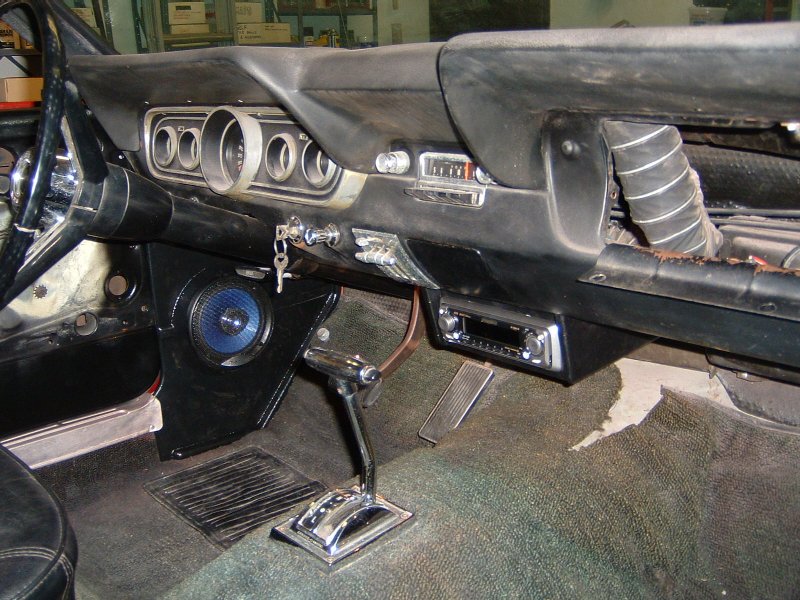
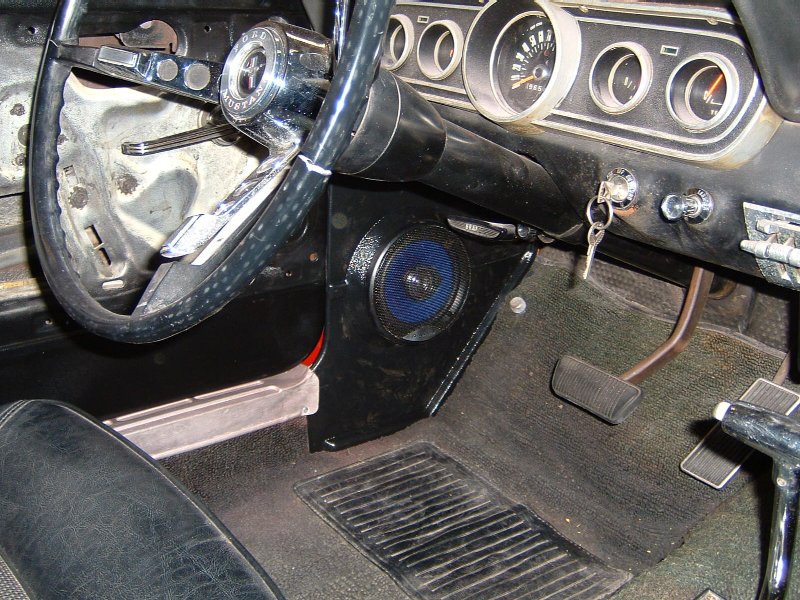
January 5: Finally got the parts I needed to finish
installing the fenders completely (the fender to cowl nuts). Installed
the fender to cowl nuts and fastened both fenders down. Now that that was
done, I could put the finishing touches on the interior by installing the
speaker-kick panels and rocker trim panels. Installed the hood hinges and
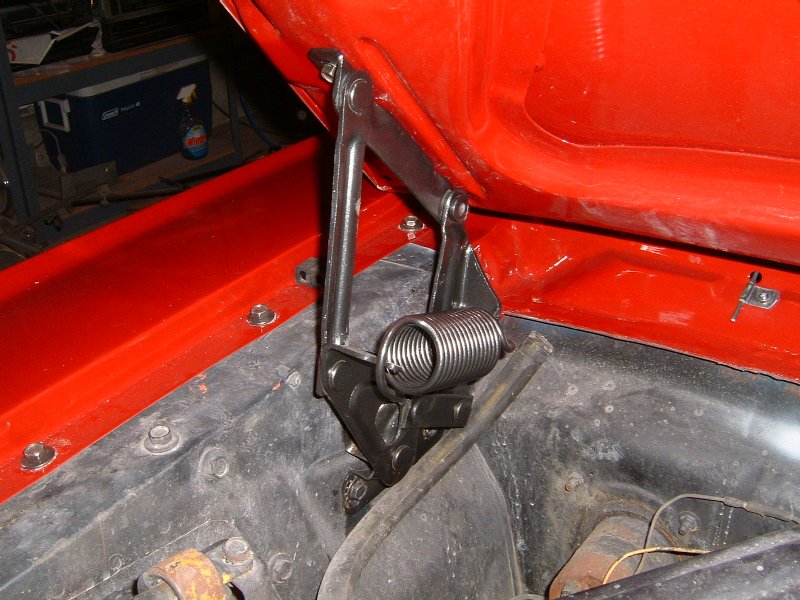
the hood. It's finally starting to come together.
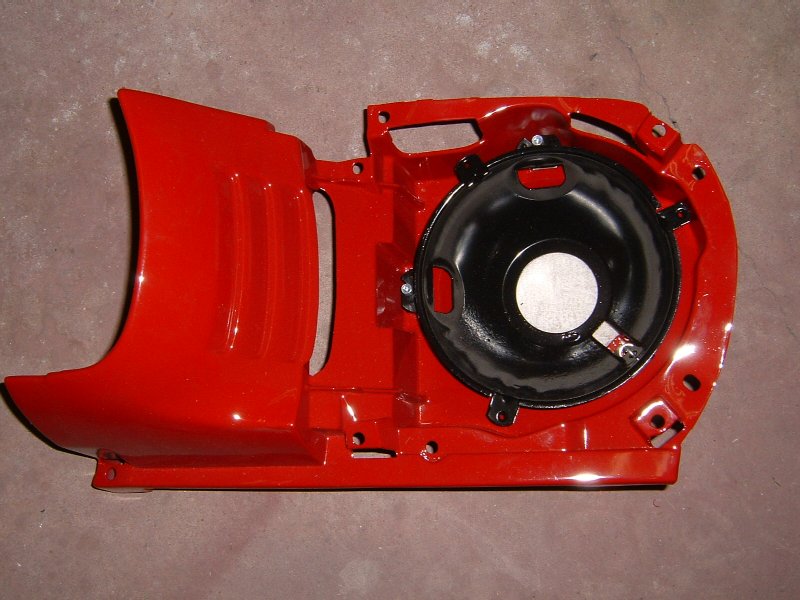
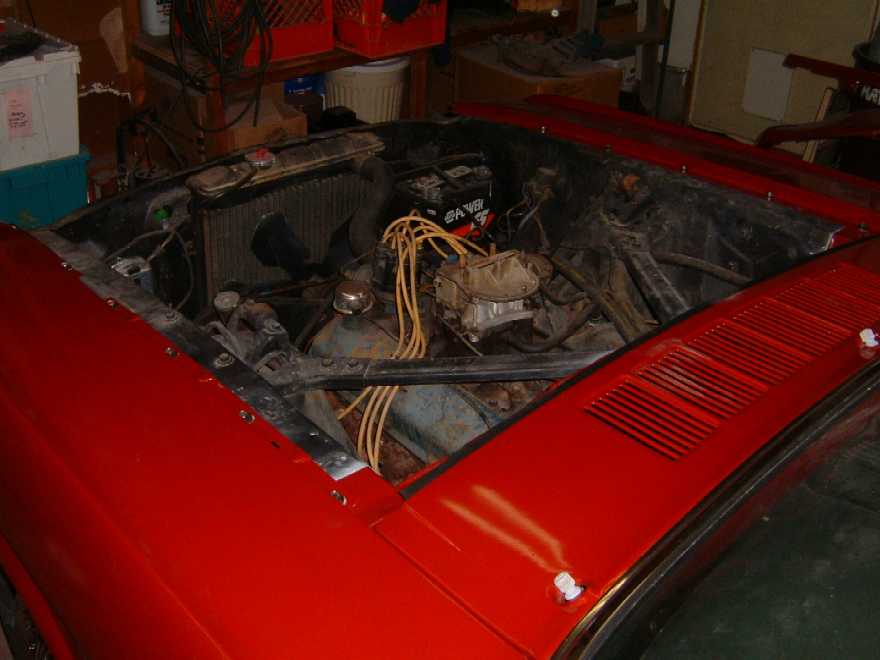
January 7: Installed the "FORD" letters onto the
front of the hood. The "O" gave me a little trouble because one of its
pegs was hitting the underside of the hood where there should have been
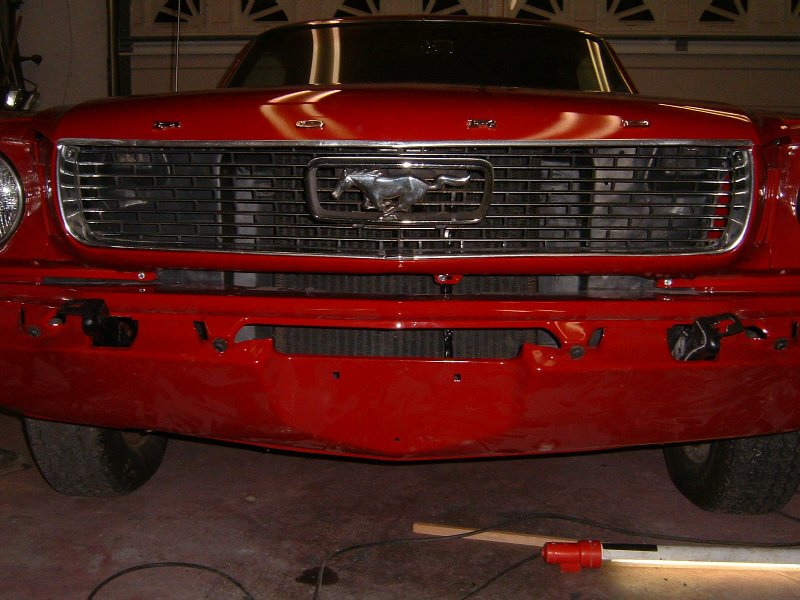
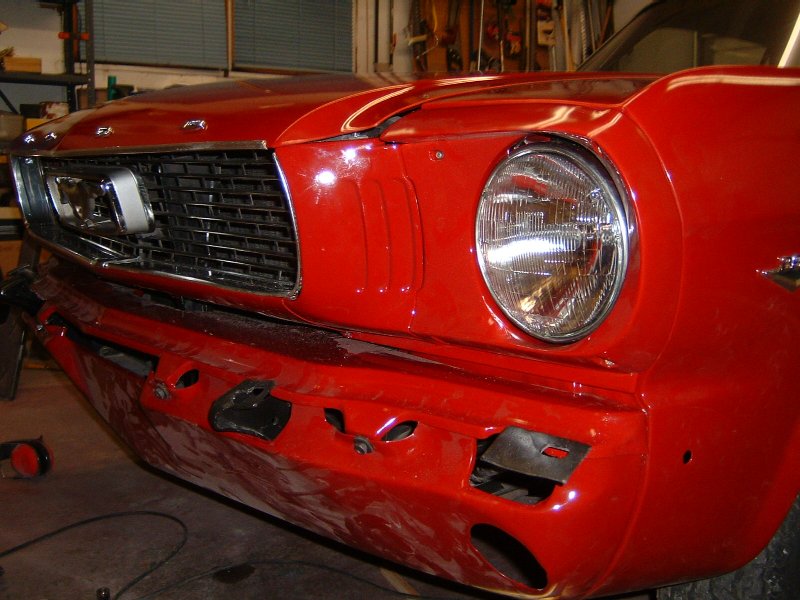
an open space. Fixed that problem with the Dremel Tool. Installed the front
bumper brackets, headlight buckets, valence, stone guard, grille support
and the grille. There is some mis-alignment between the parts, but it went
together fairly easily. Of course, some paint chipped off where parts were
hitting each other or rubbing.
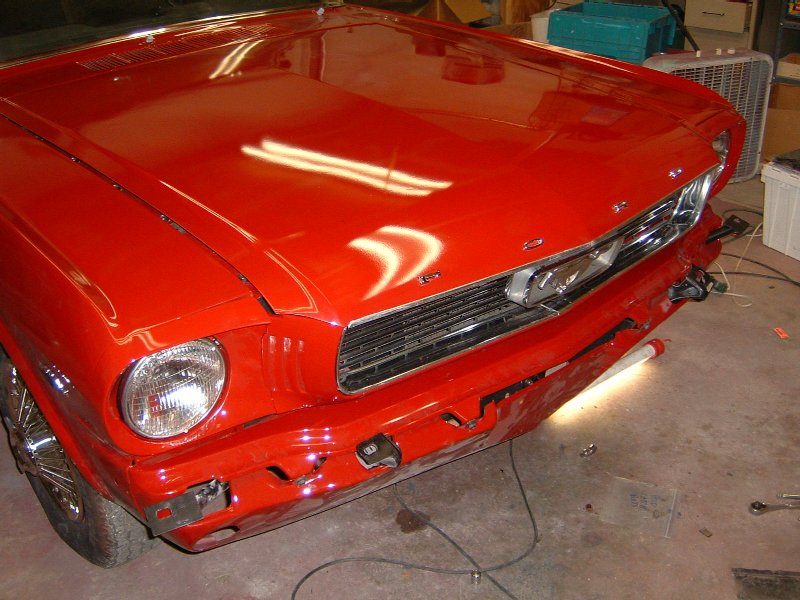
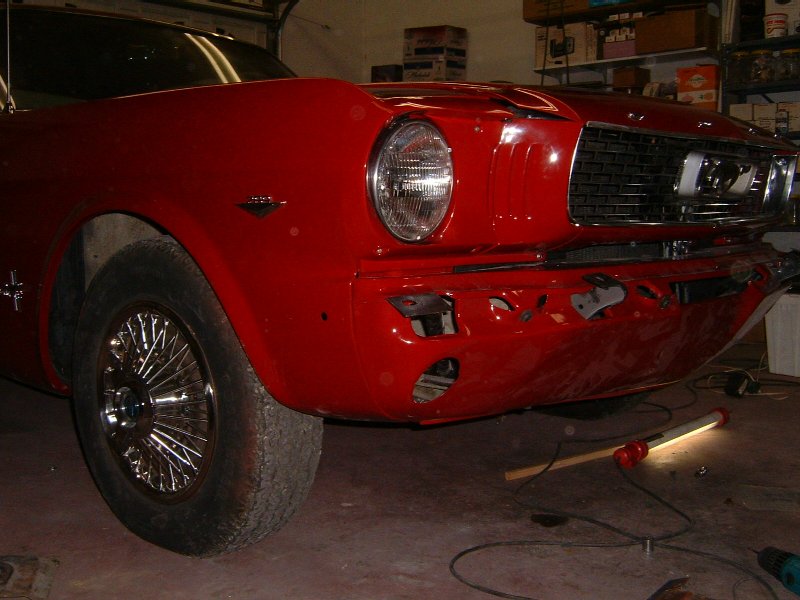
 The
hood comes down and touches the right headlight bucket. Installed the chrome
trim that goes inside the opening for the grille. It had a silver-gray
paint on the inside track, but I steel woolled it to shiny aluminum.
Installed the front edge trim of the hood after polishing it with steel
wool and chrome polish.
The
hood comes down and touches the right headlight bucket. Installed the chrome
trim that goes inside the opening for the grille. It had a silver-gray
paint on the inside track, but I steel woolled it to shiny aluminum.
Installed the front edge trim of the hood after polishing it with steel
wool and chrome polish.
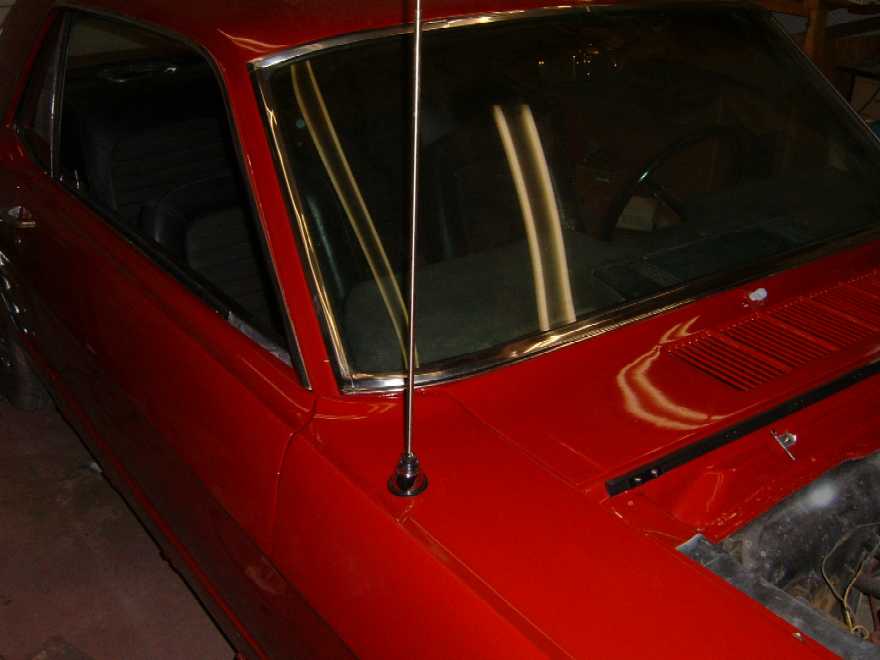
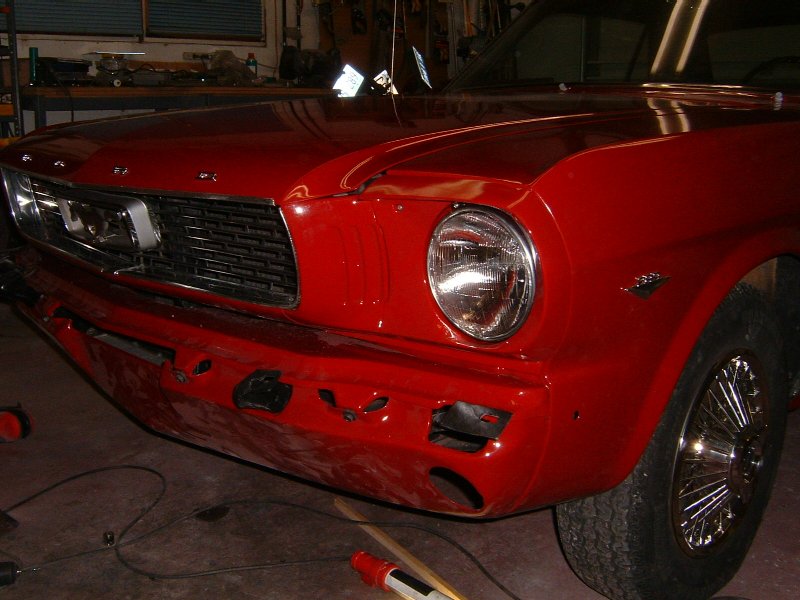
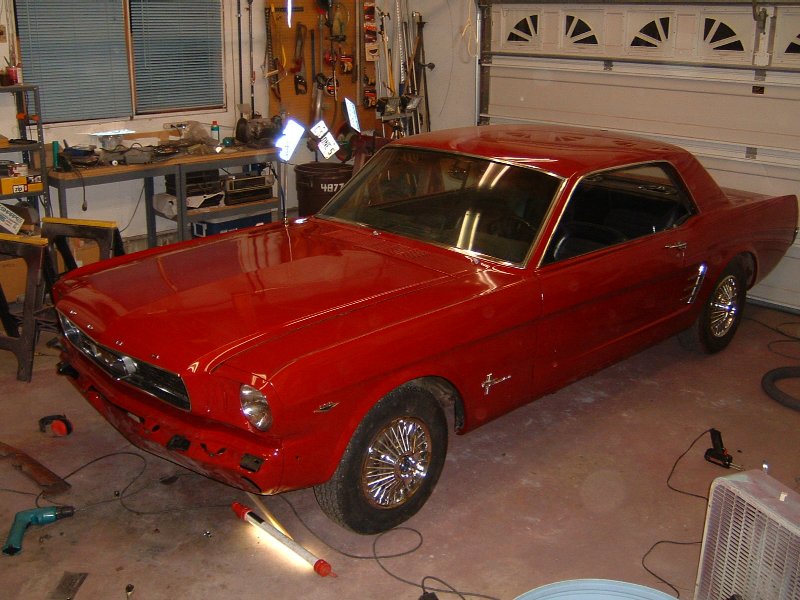
January 8: Installed the front bumper and turn
signal lights. Put the license plates on. Took out for a test drive. It
was late at night and the headlights needed adjusting. I drove to the local
Meijer store and parked in one of their darker streets where traffic is
almost non-existant and adjusted the headlights. 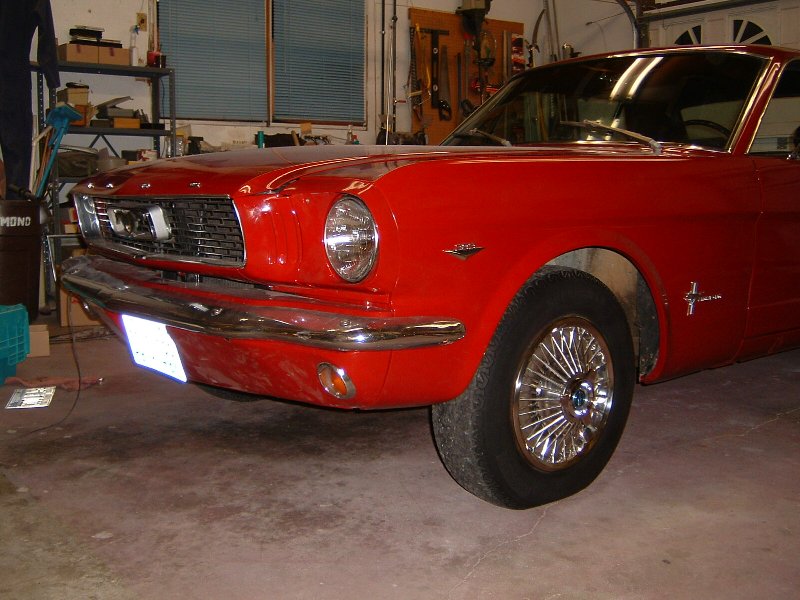
 Drove back home and asked Chris if he wanted to go for a ride. I drove
the both of us down some country roads and pointed out the quirks of this
old beast. It hesitates a little when you 'get on it' and it pulled slightly
to the right when you braked. Then I let him drive it. After driving into
town it started to make a weird wobbling noise and it shook just a little.
Then after a little while more it got worse. I took the reins and thought
it was really bad. I drove it a little and thought the wheel bearings were
shot, but when the brakes were applied, it stopped vibrating, but only
when the brakes were applied. I pulled over and checked the front wheel.
It was very, very loose. I immediately called Colleen and asked her to
look for the lugwrench and a screwdriver and flashlight because I didn't
bring anything with me except a philips screwdriver (for adjusting the
headlights) Or so I thought. I looked in the trunk and there was a lug
wrench (that came with the car when we bought it) and I had a flashlight
in the back seat. I took the wheelcover off with the philips screwdriver
and all of the lugnuts were loose. I could tighten three or four by hand
a few turns each - that's how loose. I called Colleen and 'cancelled the
order'. I tightened the lug nuts again and drove back home. Disaster averted!
Drove back home and asked Chris if he wanted to go for a ride. I drove
the both of us down some country roads and pointed out the quirks of this
old beast. It hesitates a little when you 'get on it' and it pulled slightly
to the right when you braked. Then I let him drive it. After driving into
town it started to make a weird wobbling noise and it shook just a little.
Then after a little while more it got worse. I took the reins and thought
it was really bad. I drove it a little and thought the wheel bearings were
shot, but when the brakes were applied, it stopped vibrating, but only
when the brakes were applied. I pulled over and checked the front wheel.
It was very, very loose. I immediately called Colleen and asked her to
look for the lugwrench and a screwdriver and flashlight because I didn't
bring anything with me except a philips screwdriver (for adjusting the
headlights) Or so I thought. I looked in the trunk and there was a lug
wrench (that came with the car when we bought it) and I had a flashlight
in the back seat. I took the wheelcover off with the philips screwdriver
and all of the lugnuts were loose. I could tighten three or four by hand
a few turns each - that's how loose. I called Colleen and 'cancelled the
order'. I tightened the lug nuts again and drove back home. Disaster averted!
January 9: Installed the headlight covers after
adjusting the headlights. Took the rest of the night off.
January 10: Saturday. Started working on the right
window and vent window. First thing to do was to replace the vent window
seals. I had already started by replacing the division bar weatherstriping,
so the next thing was the vent window weatherstriping, and putting the
window back together and installed into the door. The rivets that hold
the division bar onto the frame were a real bear, especially when I don't
have any riveting tools other than the normal assortment of punches and
hammers. I custom ground a punch to work with the rivets I bought from
Mc-Master Carr. I had to order 100 rivets, so if anyone knows anybody that
needs these kind of rivets, let me know. I have 96 to spare. 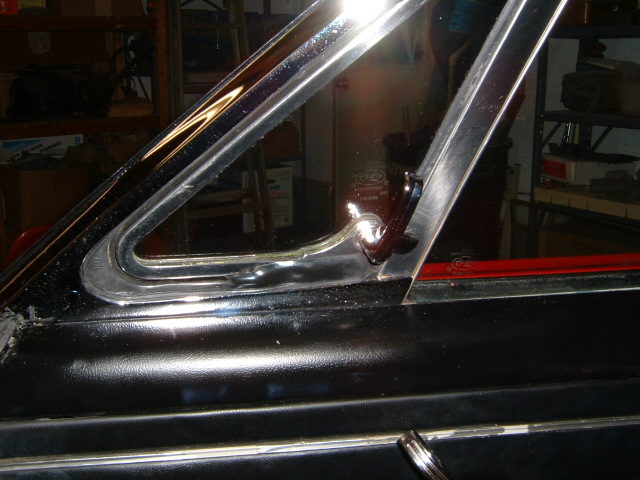
 Installing
the vent window frame into the door chipped even more paint off. Dang!@#%$
Then comes the window. Except the part that stops the window from cranking
up to much, it went pretty well. The adjusting stop wouldn't let the window
up far enough, so I took it out a few times for some tweaking. Then I tested
the fit by closing the door. The window slammed into the quarter window
with a loud bang. I thought it was going to break! Well, adjusting the
'big' window didn't give me any good results, so I had to think about adjusting
the 'small' window. Hmmm. Take the rear quarter panel out to get to it.
Take the back seat out to get to the screws in the quarter panel. Take
the package tray out to get the top screw out. Take the speakers out to
take the package tray out. Stand on my head in the trunk to get the speakers
out. Oh, what fun. Needless to say, I was not a happy camper. My back was
killing me.
Installing
the vent window frame into the door chipped even more paint off. Dang!@#%$
Then comes the window. Except the part that stops the window from cranking
up to much, it went pretty well. The adjusting stop wouldn't let the window
up far enough, so I took it out a few times for some tweaking. Then I tested
the fit by closing the door. The window slammed into the quarter window
with a loud bang. I thought it was going to break! Well, adjusting the
'big' window didn't give me any good results, so I had to think about adjusting
the 'small' window. Hmmm. Take the rear quarter panel out to get to it.
Take the back seat out to get to the screws in the quarter panel. Take
the package tray out to get the top screw out. Take the speakers out to
take the package tray out. Stand on my head in the trunk to get the speakers
out. Oh, what fun. Needless to say, I was not a happy camper. My back was
killing me.
 Finally,
with the speakers out, I could take the package tray out, then the last
screw for the quarter panel. After loosening every bolt that holds the
window in, and fiddling with the window to where it seemed to 'fit' the
best, I tighten up the bolts, re-attached the quarter panel. Leaving everything
else apart so I can adjust the other side when the time comes, I tested
the window fit once again. It still doesn't fit very well. In fact, it
was exactly the same as when I started. Boy, what a waste of time. I am
not going to do that again.
Finally,
with the speakers out, I could take the package tray out, then the last
screw for the quarter panel. After loosening every bolt that holds the
window in, and fiddling with the window to where it seemed to 'fit' the
best, I tighten up the bolts, re-attached the quarter panel. Leaving everything
else apart so I can adjust the other side when the time comes, I tested
the window fit once again. It still doesn't fit very well. In fact, it
was exactly the same as when I started. Boy, what a waste of time. I am
not going to do that again.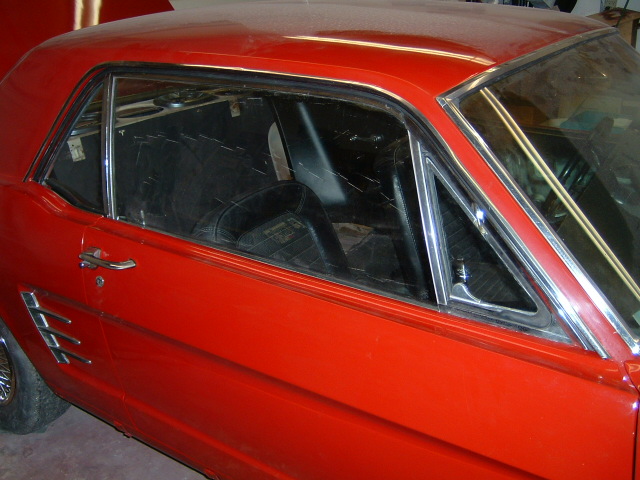
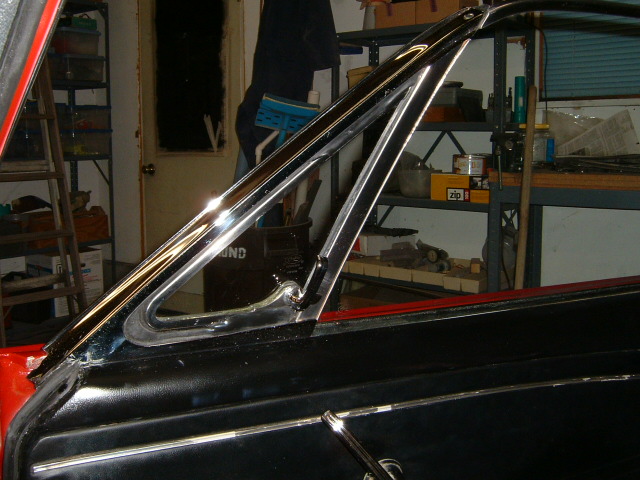
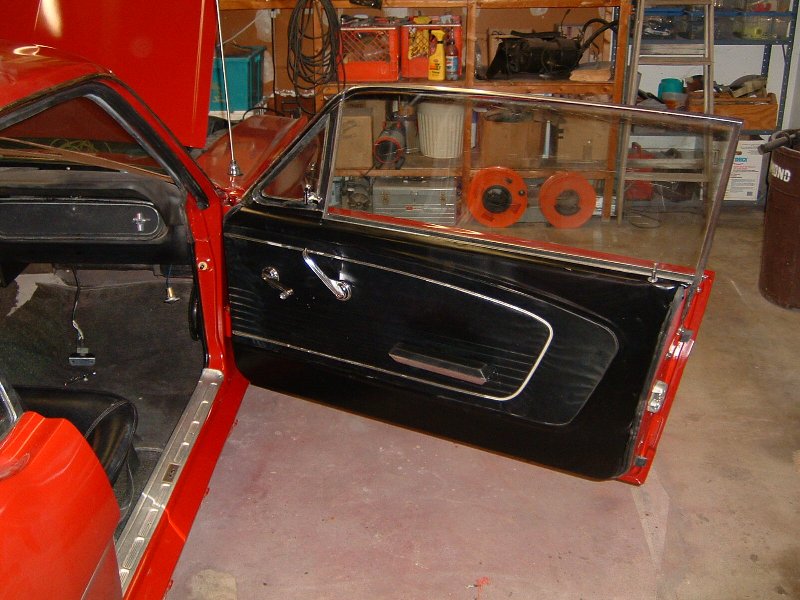 That's
just going to have to be one of those quirks about an old car that you
live with. Well, on with the rest of it. I tightened up all the nuts and
bolts for the window and vent frame, and put the end seal on as shown to
the right. I installed the rainshield (like the rear quarter) and put the
door panel back on. It was really dusty, so I 'Son-of-a-Gun"ed it. (Armour-All
for those who are name brand illiterate). Next came the window crank and
door handle, along with the arm rest (if you can call it that - It's more
like a door pull). Seems like the right side is done.
That's
just going to have to be one of those quirks about an old car that you
live with. Well, on with the rest of it. I tightened up all the nuts and
bolts for the window and vent frame, and put the end seal on as shown to
the right. I installed the rainshield (like the rear quarter) and put the
door panel back on. It was really dusty, so I 'Son-of-a-Gun"ed it. (Armour-All
for those who are name brand illiterate). Next came the window crank and
door handle, along with the arm rest (if you can call it that - It's more
like a door pull). Seems like the right side is done.
Next, I installed the new glovebox. The old one was a
wreck and falling apart. It had a metal clip for an instruction booklet
or registration papers or such on the top surface of the inside. The new
one doesn't. The old one had a hole for the emergency flasher switch, the
new one doesn't. It doesn't install from the front like you'd hope. Too
big to fit in the opening. 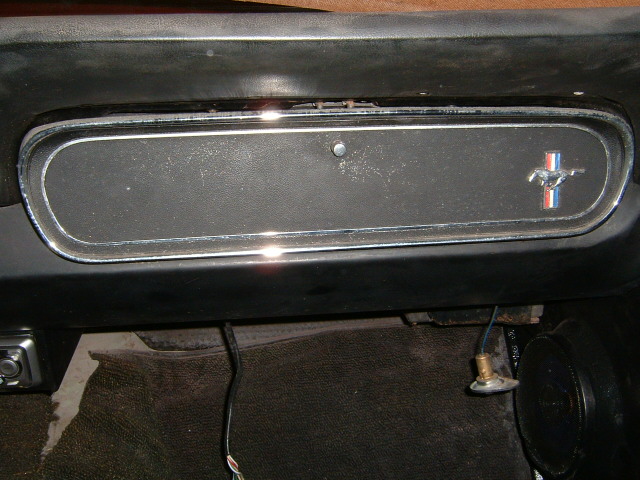
 Even with the door and hinge removed. Have to install it from behind. How
do you get it back there? Of course, remove the stereo you so proudly installed
just a few days ago. Luckly, all I had to do was remove the front mounting
screws and swing it away. Still, it wasn't easy to get it in from the rear.
The heater core and wires were in the way. I had to take drastic measures
and kind of warped the box out of shape to make it thinner. Now it's not
as pristine as it was before, but still nicer than the old one! Of course,
the screws didn't line up with the screw holes in the new box, so even
more frustration, muscle, and tweaking finally forced it in. Still not
bad. Now, back goes the door. Finally installed!
Even with the door and hinge removed. Have to install it from behind. How
do you get it back there? Of course, remove the stereo you so proudly installed
just a few days ago. Luckly, all I had to do was remove the front mounting
screws and swing it away. Still, it wasn't easy to get it in from the rear.
The heater core and wires were in the way. I had to take drastic measures
and kind of warped the box out of shape to make it thinner. Now it's not
as pristine as it was before, but still nicer than the old one! Of course,
the screws didn't line up with the screw holes in the new box, so even
more frustration, muscle, and tweaking finally forced it in. Still not
bad. Now, back goes the door. Finally installed!
Time for a break.............
Still waiting for the vent window bracket to fix the left side vent
window:
PREVIOUS:
NEXT: HOME: