GOT WEEDS?Without them, growing irises is an even greater joy. Besides looking attractive, a weed-free garden saves soil nutrients for the irises and allows good air circulation. Here are a few methods that many growers have used to control unwanted companion plants. |
BlockingDon't let them in! |  | |
| A wall around a raised bed, or even a solid edging material will prevent encroachments from grass and surrounding weeds. | 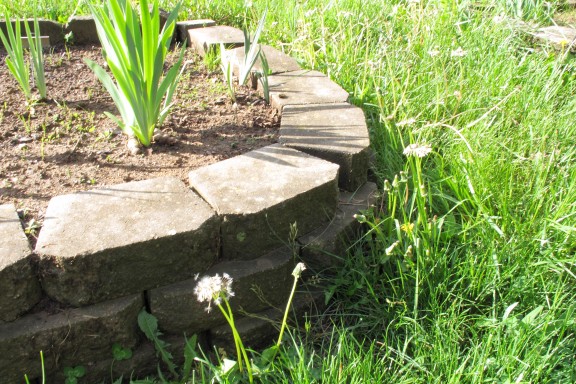 |
|
 |
Careful selection of soil amendments will avoid inadvertently adding weed seeds to your garden. A bag of sedge peat moss full of weed seeds, for example, can cause years of problems eradicating its results. | |
BurningYou're fired! |  |  |
| Some growers find it helpful to burn off weeds once in the spring, when hard freezes are no longer typical, but before strong new iris growth. Not universally endorsed as a method, it has the advantages of not bringing new weed seeds to the surface and of removing dead foliage from the previous year that has been contaminated with eggs from iris borers. Burn on a windless day when the debris is dry enough to burn quickly, so the rhizomes will not be damaged. A small propane torch works well, but it is important to consider it a two-person job, both to do the burning and to monitor that no safety issues arise. |  | |
PullingYou're out! |  | |
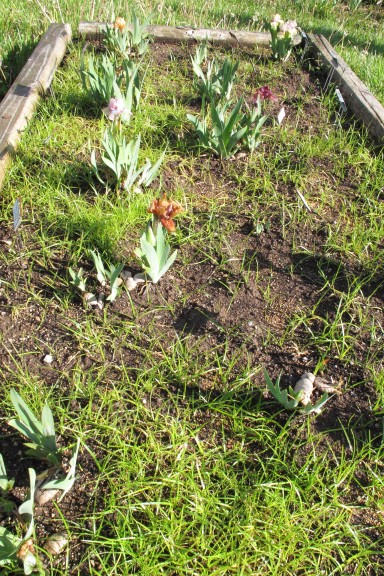
| Mechanical means of removal take time, but are the tried and true approach. Many methods here can work with weeds embedded in a clump of irises, but seriously challenged clumps can provide a good motivator for division. In the dividing process, all the weeds go away and the clump gets a fresh weedless start. | ||
| Otherwise, every gardener has a favorite tool for the purpose; an asparagus knife is a great one, used in one hand for digging underneath the weed to loosen the soil so that it can be pulled out, roots and all, with another hand. | 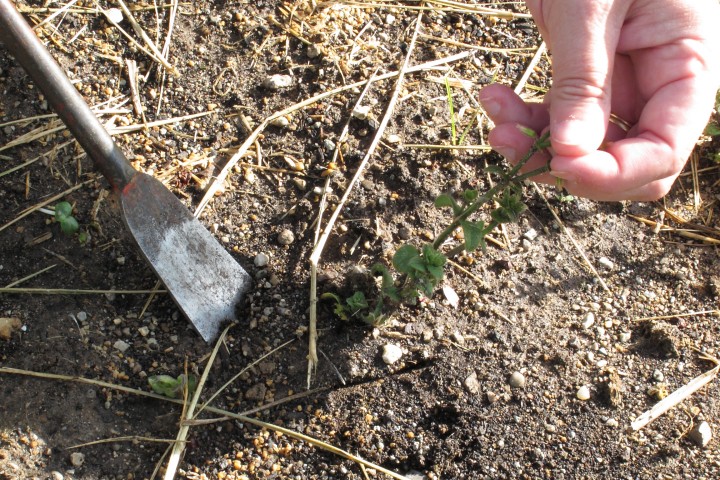 | |
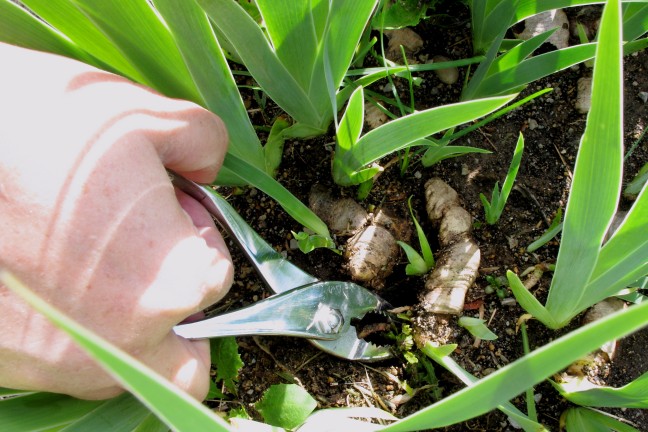 |
A pliers can provide a handle for pulling out pesky taproots. | |
| On a good weeding session, it is worthwhile to build in some comfort. A seat with wheels is a good way to maintain some mobility and keep tools (and water, music, phones, etc.) at hand. |  | |
| If bugs are a problem (and they have been for me), my favorite solution is clothing with nanotechnologically embedded pyrethrins. | ||
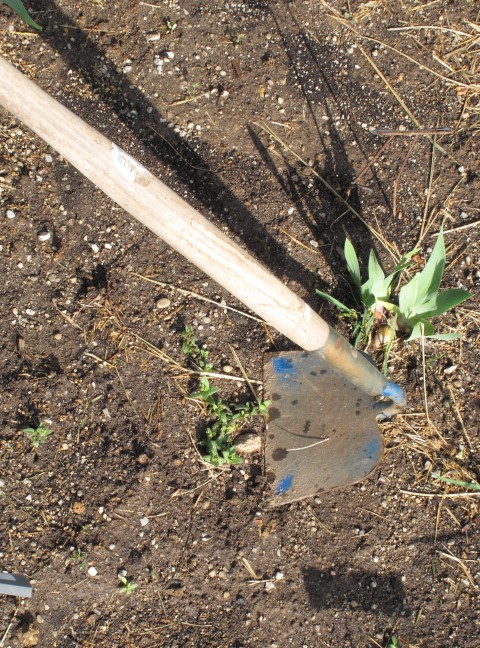 |
A hoe can be used to chop off weeds just below the surface, and allow working without bending over. | |
PoisoningRead and follow the labels! |  | |
| In a new bed, or one that you have freshly weeded, you may want to try a pre-emergent herbicide, such as Preen™ (Treflan™), Snapshot™, or Simazine™. Even corn gluten can work if your timing is right.
These products treat different subsets of weeds with different efficiencies, but all work by forming a barrier at the top layer of soil, which is best not disrupted after established by spreading the product and watering it in.
Once weeds have begun growing, you have choices of using post-emergent products. Some of these are selective, targeting only certain types of weeds. A few types have been found generally successful around irises.
| ||
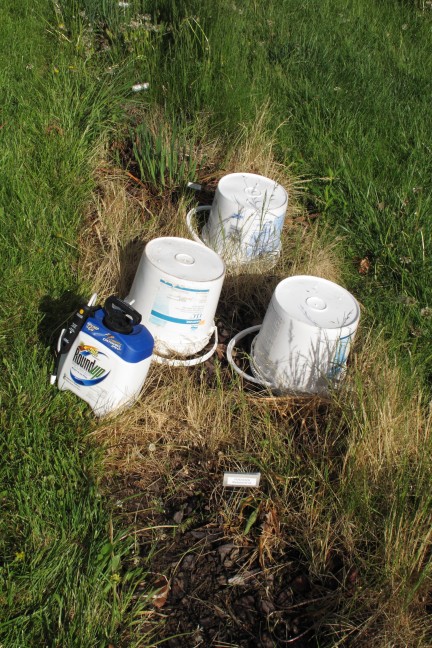
|
One person could hold a blocking
sheet while another sprays. Alternatively, cover irises with buckets and spray around them. |
 | |
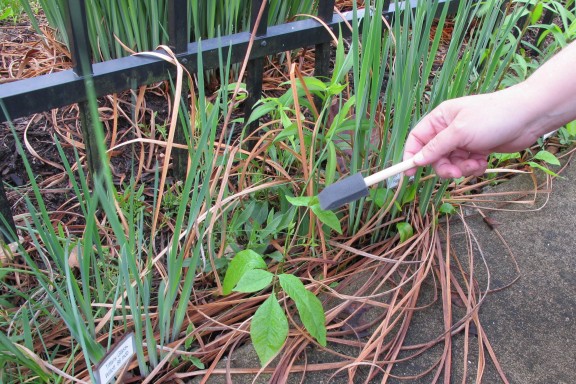 |
Another approach is to apply the herbicide carefully on the target weeds. It can be painted on with a brush, | |
| it can be applied with a cotton glove dipped in herbicide, worn over a protective rubber or latex inner glove, | 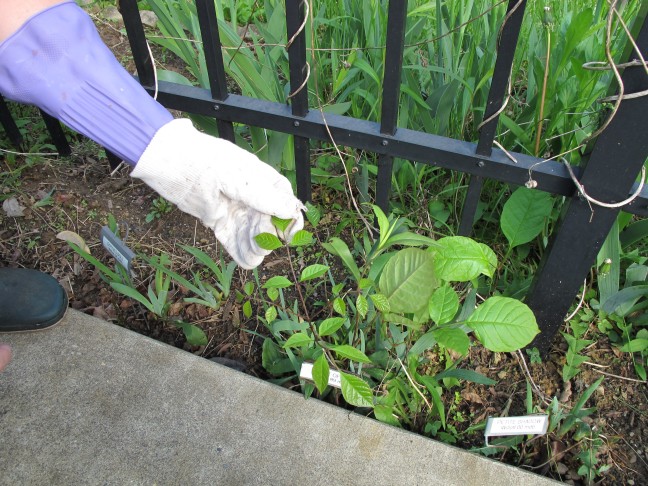 | |
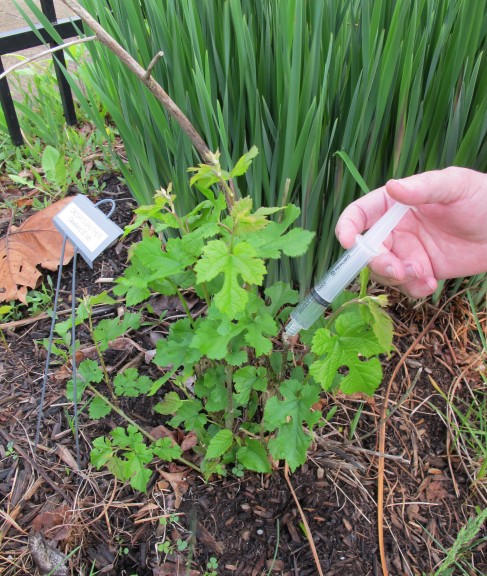 |
or it can be injected directly into large troublesome weeds. | |
SmotheringGot you covered! |  | |
| To grow, weeds need moisture, air, and light. Eliminate one of these and the weed problem disappears. | ||
| The no-till approach called "lasagna gardening" begins with smothering the existing plant growth. (One of many possible recipes is shown here.) |  | |
 |
The most generally applied gardener's friend is mulch. It can be used successfully on beardless irises and certainly should be, alone or in combination with other approaches. Be certain, though, that soil nutrients are maintained while the mulch decays. | |
| The mulching approach is more of a challenge with bearded irises, since their rhizomes spread and need to be at the surface of the soil. Still, though, some gardeners have managed careful mulching and some have even used landscape fabric, cutting out a spot when planting an iris rhizome, and then regularly revisiting the clump and enlarging the hole as the iris clump increases. | 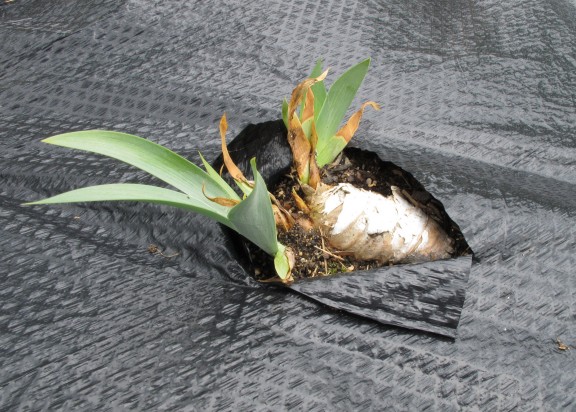 | |
SolarizingBest idea under the sun! |  | |
|
This one takes some planning, but the results are worth it.
Besides most weeds and their seeds, it is also effective against southern blight and root knot nematodes.
It works best to be in place in June and July, but the season can be extended in warm and sunny climates.
Prepare your soil with amendments, till it up well, and rake it level and free of debris. | ||
| Pictured is a full-scale work in progress by the guys at Superstition Iris Gardens, experts in this technique. | 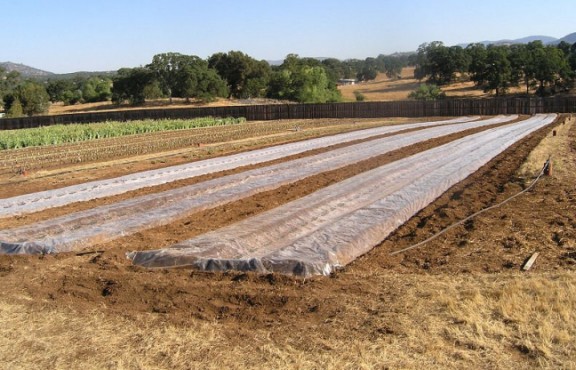 | |
| Irises | Weeds index |