
Leatherique Seat restoration
Disclaimer: I am not affiliated with Leatherique in any way. I paid full price for the products I used (less BMWCCA discount). The purpose of this page is to help others who would like to improve the appearance of their interiors. If I sound like I am endorsing these products, it is because I feel they worked wonderfully. The pictures should speak for themselves.
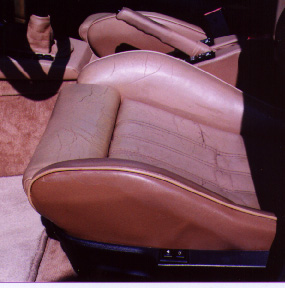
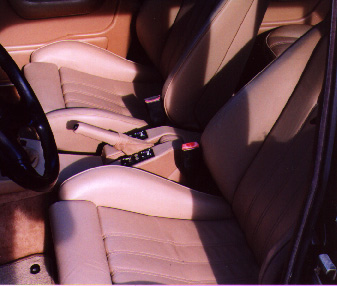
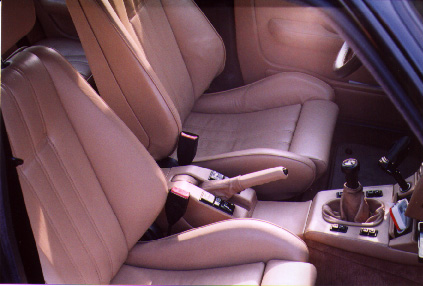
Here is what my seats looked liked. My back seats are in good shape, but the driver's seat was very cracked (surface cracks only, not through the leather), and the side bolsters had been reupholstered by the previous owner. You can see in some of these pictures that the dye on these sections didn't match that well.
I had heard others on the varios discussion groups report good results with Leathrique products, and I had been using their Rejuvenator oil and Prestine Clean products for a few months with excellent results. I can say that they far outpeform any other leather care products I have tried, especially Lexol. This is the only stuff I've used that actually seems to bring the leather back to life. I already had these two products, so for the restoration I sent them a small swatch from beneath my back seat and they sent a custom matched quart of dye, a quart of prepping agent, and 4 oz of crack filler.
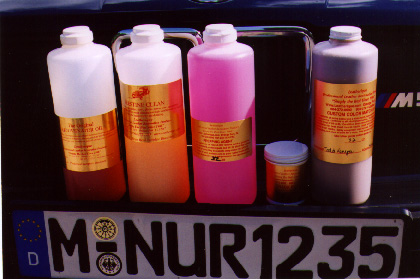
(Oil, Prestine, Prep, Filler, Dye)
The first thing to do was to really soak the seats in Rejuvenator oil. I used a spray bottle and massaged a good bit of oil into the seats, and then let it bake in the 90 degree heat/sun all day. I reapplied more oil periodically to areas that absorbed it quickly. At the end of the day I used the Prestine clean to remove excess oil, dirt, etc. I then needed to wait 48 hours before starting the restoration.
During this time I bought some extra stuff for the project. 2 nice brushes for the dye (1.5" and 2.5"), wet/dry sandpaper in 220 and 320 grit, some plastic drop cloths, 2 identical tupperware containers to pour dye into for mixing, and also made sure I had lots of rags/towels.
I would recommend that before you undertake this project, make sure you have a roomy area uninhabited by kids, dogs, cats, spouses, etc. Mine were all out of town when I did it, so I had use of the wife's car and no interruptions. I did all the prep work in the garge/driveway, and then moved the seats to the airconditioned basement for dyeing/drying. My car was undriveable for about five days, so you need to plan.
After the 48 hour wait, it was time to remove the seats. You need a 17mm socket for the 4 floor bolts and the seatbelt bolt (wherre it attaches to the seat frame). You need to slide the seat forward and then back to access all bolts. BEFORE you start disconnecting wires, try to position the seat in the middle of the rails so it will stand up when removed from the car, and also if you have sport seats, extend the thigh support. Then carefully unplug the 4 or 5 connectors beneath the seat. There was a plastic "guard" underneath the front of the seats, held on by 2 screws, that when removed made it easier to unplug the wires. Then carefully lift the seats out, making sure you don't gouge anything with the rails. They are heavy, I would say 50 pounds or so each. I sat mine on a dropcloth in the driveway.
I then set about removeing the trim pieces. This is basically common sense stuff, just be careful so you don't break any plastic prongs. On the M seats there is a plastic M bar pinned to the seat backs which I also removed. You need to first remove the backs themselves, which you do by removing two small screws beneath the seatbacks and then pushing upward on the back section - you will see it is held on at the top by two clips. You can then remove the M bars, if you have them, by carefully straightening the bent nails (really) that hold them to the seat. The whole removal process and trim removal for both seats took about 90 mins.
Now it's time to get a bit nervous. Have a bucket of water with a little dish soap in it for sanding lube. Take the 220 grit and lightly sand all leather surfaces. Unless you have major leather damage, a light touch seems to be enough. Keep it wet. I tried to avoid sanding the stitching. You just basically want to beak down the surface layer, and remove any large burrs. Follow this with the prepping agent, which will remove a good bit of dye. Then sand some more with the 320 grit, and finally one more wipe down with prepping agent. This process didn't really take too much elbow grease, you don't want to turn the leather into suede. If you have cracks, you will notice that many of them are probably gone, and all of them are shallower than they used to be. Much of the cracking is in the actual dye. I applied the filler with a credit card, trying to confine it as much as possible to the remaining cracks. If you let a thick layer dry on the seat surface, I expect you will notice it after the seat is dyed as it will hide the leather's grain. So I used the credit card much as you do a spatula or trowel when filling holes in walls. The filler drys quickly, so move fast. BTW, I prepped one seat at a time. The deeper cracks required a few coats of the filler to build it up. Here is what the driver's seat looked like after prepping was complete.
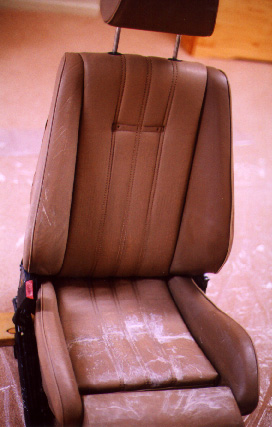
Pretty ugly looking, but they felt very smooth. Prep for both seats took a total of about 90 mins. There were almost no cracks in the passenger seat so it went faster. At this point the seats need to dry for at least 6 hours, mine dried for a day in airconditioning.
Now it's time to dye. I poured the quart of dye into 2 tupperware containers, stirred them up and poured back and forth. Mix well and get ALL of the sludge out of the bottom of the bottle, as the dulling agent is dense and sinks to the bottom. Your seats will be real shiny without it. I sealed one container and put it aside. I poured some of the other into a plastic paint tray, and thinned it a bit with the water. It looks thin to begin with, but I found that if works better if thinned even more. I started on the backs, painting the edges first and working inward, keeping a wet edge. The stuff starts to dry immediately, and darkens as it dries. This can make it look streaky but resist the temptation to keep going over it to even it out. The dye self levels amazingly well. But if you gob it on, you will notice it when it dries. Once the backs were coated, I used the small brush on the seams and piping on the first seat. I tried to make sure I jammed it down into all the cracks etc. Then I used the big brush to coat the rest of the seat. I let em dry overnight and put on a second coat (optional). I can say I was amazed at how good they looked when the dye dried. See for yourself:
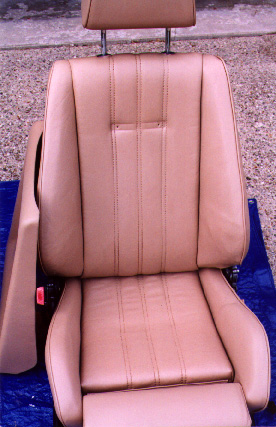
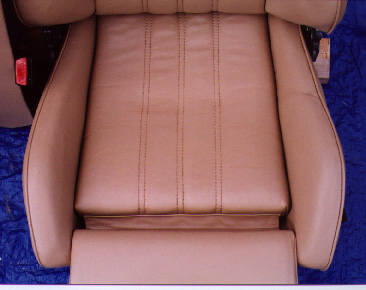
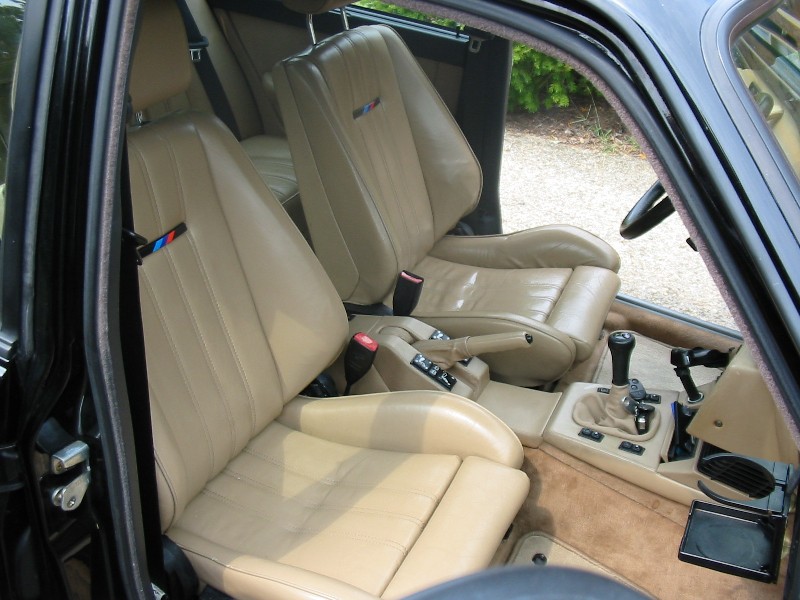
They have to be left untouched for 48 hours at this point so the dye can cure. Here's some shots after putting them back in the car. Also notice that I did the emergency brake handle and the leather square beneath the handle. The color match is quite amazing. I didn't do the back seats (although I will eventually) and they match perfectly. You can see in the one photo that the door panels are darker than the seats, they always were and are darker than the other leather in the car for some reason. I didn't put the "M bars" back on because one was cracked so I have new ones on order.
All in all this was a very worthwhile project, and not too tough. Huge improvement to the appearance of my interior. And it cost maybe $200 total, and I have enough for the back seats. You could do this project in about 3 days if you plan well (remember dye has to cure for 48 hours). Next, a new dashboard, coming to these pages soon....
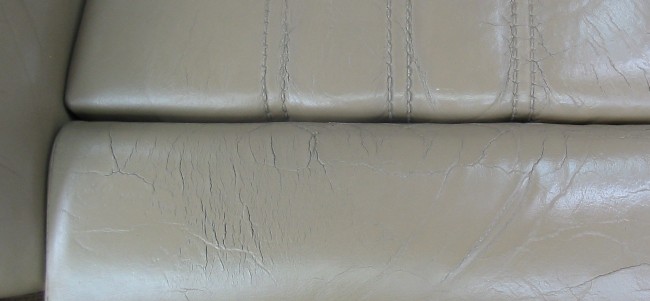
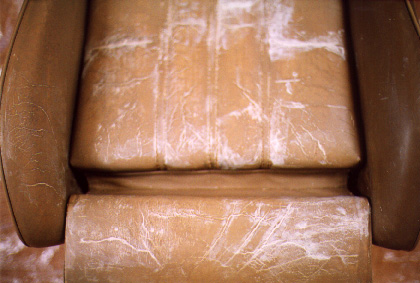
Here (below) are the seats one year later. Overall I am very happy with the durability of the dye. I have seen no deredation of the dye coat or color. But you can see in the close up that some of the old cracks are visible again. I figure this will be an ongoing issue, but as of now they are more creases than cracks. At some point I may refill them and redye the section in question.