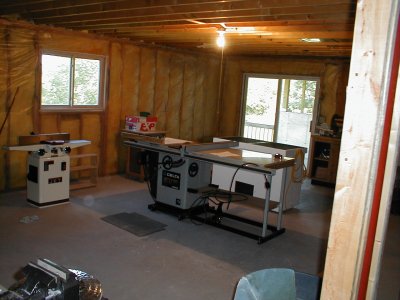
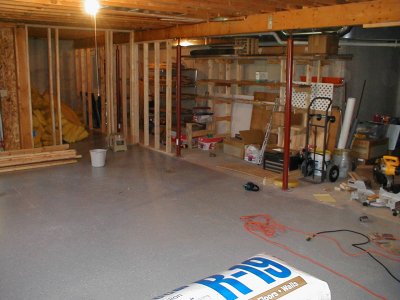
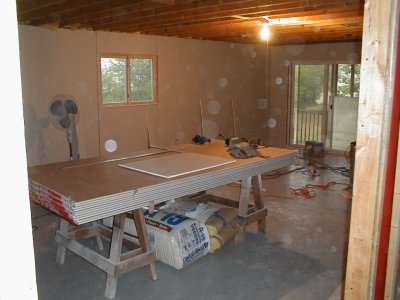
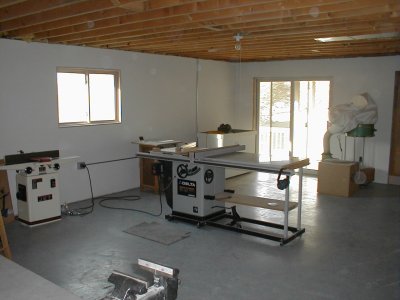
The main shop area is 16' x 26'. Not quite as much space as I had at the other house, but a much nicer space. Initially I put all of the tools into the shop and arranged them to get a general feel for how things should be. I wasn't quite ready to purchase a new saw yet, but I acquired the Delta Unisaw and Jet 6" jointer in the last week or two from one of the guys on the Woodnet forums. I feel that I got a really good deal on it and just couldn't pass it up.
The ceiling is a few inches short of being 8 feet tall. I don't understand why builders don't make basements 9 or 10 feet tall as the extra concrete just isn't that expensive and it adds so much to a basement living area. To the right of the sliding door is a 8' x 10' room with a rough opening at the end of the hallway by the electrical box. Not sure what they were thinking there, but that will have to be addressed. If you could see it, the electrical box is located against the far concrete wall.

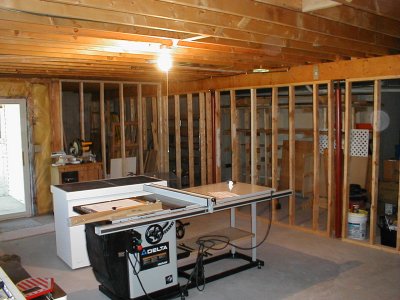
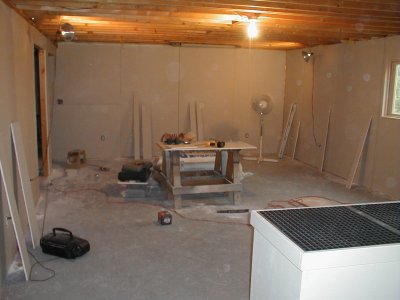
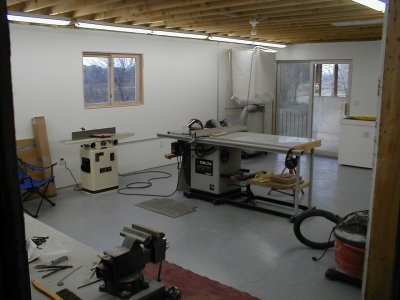
Another view of the shop. You can see into the other room that is currently used as an exercise room. It's not really finished except for some drywall that I intend to remove. Here you can get a pretty good view of the downdraft table that I built just before I moved. Haven't really had a chance to use it much, but it seems to work well as a general air filter.
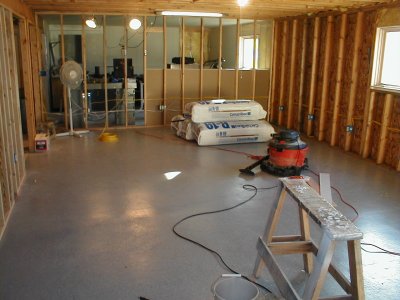
Initially I thought I was just going to run some power and get the shop functional, but as usual, one thing led to another and I decided that I should paint the floor first. Once everything got set in place and the shop became operational I figured the chances of getting the floor painted were not very good.
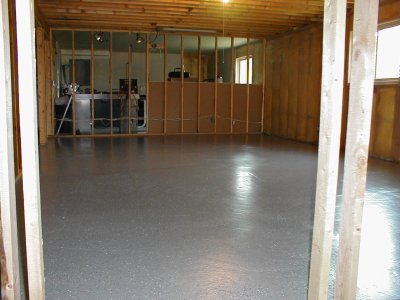
I used Rustoleum 2-part basement epoxy on the floor. I used two kits (gallons) to cover about 450 sq feet. I just followed the directions and it went down pretty good. I just cleaned the floor with TSP and rinsed. Let it dry for a few days with fans blowing on it and painted. I was a bit more worried with the "flecks" that you throw down because I wasn't sure of the coverage and worried about running out of flecks before running out of paint. As it turned out I had just enough flecks.
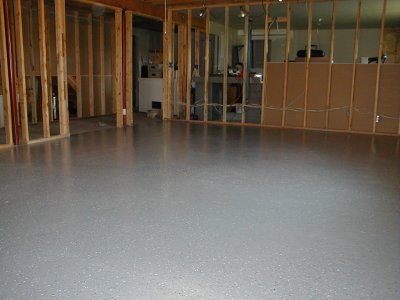
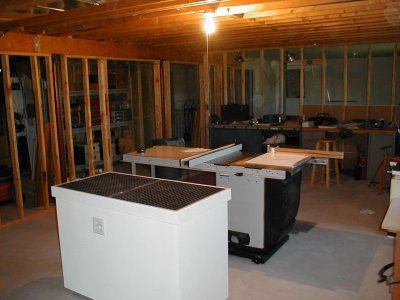
Another view of the floor. The flecks are not very prominent in these pictures, but IMO they do add to the look of the floor and I'm sure they add some traction. One thing that I did notice is that the painted surface now shows how poorly the floor was finished. I knew that the floor is very uneven, but there are a lot of swirl marks and other irregularities that are very noticeable when the light hits the floor right. Not sure what I could have done about that though, short of grinding down the floor and it just wasn't that much of an issue for me.
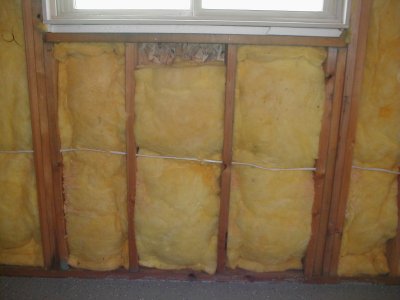
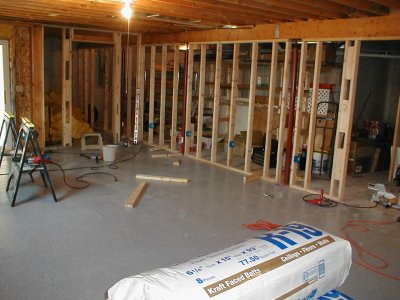
I was pretty disappointed in the insulation that was in the walls. Check out the gap below the window where they put a short piece of insulation. I decided to pull the insulation and put in new kraft faced insulation on all exterior walls. I'll reuse this insulation elsewhere as sound deadening material. One good thing that I discovered is that I have 6" exterior walls. I wonder if that holds true upstairs..
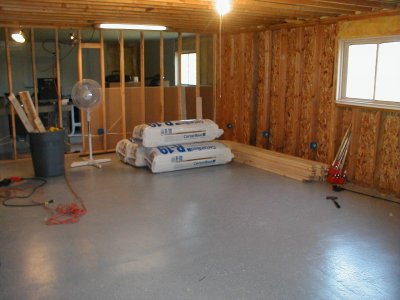
Just another view of the finished floor and walls without insulation. I put up electrical boxes along the walls and purchased new insulation and some 2x4s. Why the 2x4s? I discovered that the wall opposite the exterior wall was in no way plumb, flush, straight, aligned... etc.. so I opted to simply replace it. Not what I wanted to do, but easier to deal with now than while I'm trying to drywall.
I scaled back on some of my initial plans. I had some pretty extreme electrical plans for the shop, but after some consulting with the Woodnet forum guys and others, I decided that I didn't need what I was proposing and that it was smarter to have this space be more easily converted to real living space in the event I have to move. (I have no plans to move if I can hold on to my job in this horrible aerospace environment)
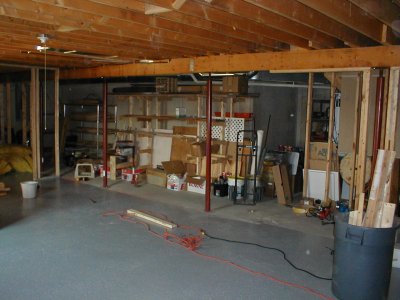
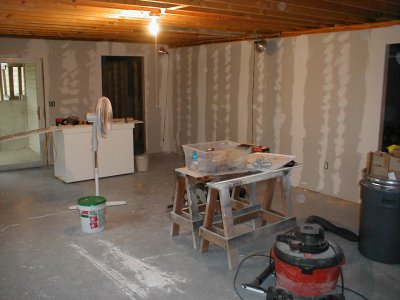
A view with the wall removed. I toyed with the idea of expanding this space, but the ceiling area on the other side of the posts have a lot of utilities I'd like to keep access to and odd shaped pipes and ductwork. It is also a beneficial space because it's really our only good storage space. Mostly it will be used to store shop stuff.
Here you can see the rough opening I made for the back room and the first new wall partition installed. All of the insulation that I removed is now stored in that back room. I'll need to add some blocking and some sort of header. The bucket is there because I've got a leak in my dishwasher that sits right above it. I know.. I know.. I've been meaning to get to it.
I think the framing is all done now. I spent more time on this than I really anticipated. (what's new) Guess I'll have to wait till next weekend to work on the electrical as I've got a Visual Basic class starting on Monday. I did get things cleaned up before I stopped today, so it should be pretty easy to jump into the electrical if I have time some night this week. Fortunately next weekend is labor day weekend and I'll have an extra day to work in the shop if LOML doesn't plan something for me.
It's hard to see the progress, but I got a lot of wiring done this weekend. I was somewhat sidetracked by a bathroom project on Saturday, so once again I didn't get as much done as I had hoped. I am well into my second 250' roll of wire now and expect that to last through this phase of putting the shop together. Wiring just seems to take more time than it should. I still went a bit overboard on the number of circuits and outlets here, but I think I'll be happy with it. There is a double box in the middle of the far end on it's own 20A circuit. (Proposed as a home theater outlet should the space be converted) and the two outlets on either side of it are on their own 20A circuit to support the work benches. The two walls on the right and left are also on their own 20A circuit. Lights are also on their own 20A circuit.
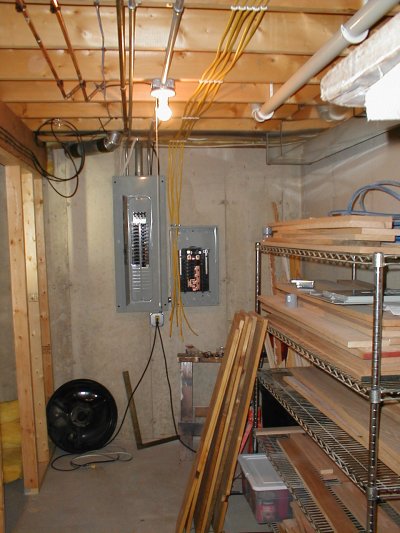
Well, for better or worse I got the sub-panel in. I've still got some questions, so I didn't really make any connections. I probably had enough open spaces in my main panel, but by the time I get done with the planned circuits for the basement I'd be close to having a full box. Also I like the idea of having the shop on it's own panel with lots of room for expansion. All circuits but lights are ready to be connected at the panel - I just need to get down there and finish it up. I really fear that I may need to run the NM through the joists or in conduit instead of across the bottom. It only runs that way for a joist more than you can see in the picture. I'm also confused as to the connections I am making in the box. Not so much what connections to make, but what I need to make them. Maybe I'll hit BillH up for some answers this week.
Next up some insulation and vapor barrier. We are heading up to Minnesota next weekend so I want to try to be ready for drywall when I get back later next week. I'll see if I can't get my brother to help me get some drywall next Saturday.

09-06-03
Thanks to my good friend Norm who set me back on the path, I got my electrical
up and running this weekend. I've still got a few circuits to run, but
all of the outlets in the room are now functional. The outlet checker
revealed one mis-wired outlet with crossed hot & neutral - quickly
remedied and it reinforces the need to check your work.
I plan to put up some running boards for the NM runs in question above,
but that will have to wait until I get the shop together and table saw
up and running.
Picked up 20 sheets of drywall today after helping my brother put a new
steel door in his garage. I'm off to Minnesota for a few days and should
be able to start insulating and dry walling at the end of next week. I
almost feel like the shop is coming together. The end of next weekend
should show some good progress.

I didn't get as far as I wanted to today. I started fairly early in the morning and had the insulation and vapor barrier installed by noon, but only managed to get three sheets of drywall up in the afternoon. I must be getting old because I just ran out of gas. I'll attribute my lack of progress to the 6 hours I had to spend in the car the day before
I've mentioned it before, but I really hate my camera. It continues to plague me with spots when it's not happy with the lighting conditions. If I can stay gainfully employed into the new year a G3 is going to be near the top of my "toy" list.
Today brings about the completion of the two visible walls. Well.. when I say completion, I mean that the drywall is tacked up. I still have to go through and screw the walls properly. All of the outlets and switches have been trimmed with my Dewalt "roto-zip" tool. It takes some getting used to, but I think I have the hang of it now. (near the end) The biggest problem with it is when bits break and I go zooming across the front of the drywall.
Finally a little progress. I got the remaining two walls up today. It just seemed to go a bit faster today and I didn't quite run out of gas as quickly. Again, all of the sheets are just tacked up and need to be properly secured. I had hoped to get further by the end of my vacation, but it appears I won't get to mudding and taping until later this week or next weekend.

It sure looks different having walls up on all sides. Somehow the space seems smaller. The back room will be finished at some later date. It would help to have a defined use for it before I start putting outlets in. I'm toying with the idea of it being a finish room, but for now will probably just be storage.
You can see that I broke out the downdraft table to help clear the air. The Dewalt cutting tool kicks up a lot of dust and it was getting hard to breath. I figure that I will need it for the coming sanding portion anyway. I don't really mind hanging drywall, but it sure is a lot of damn work when the studs aren't spaced properly. I'm just glad that I don't do this for a living! Hopefully I will get the shop picked up tomorrow and drive some screws in between homework and lunch at Moms.
Well, things have moved slower than I had really hoped this week. I did get three layers of mud on and am ready to start screening/sanding. I had hoped to be priming this weekend, but may have to put that off until later this week or even next weekend. I still have not picked out a paint color for the shop yet, but expect it will be some form of white as that will provide the best light reflection. I may go as dark as a barrister or bone though just for some color.
I really want to move into the shop next weekend, so I'll have to make some progress this week to make that happen. The immediate need after painting will be to run 220 for the Unisaw. I've had it for a few months now and haven't heard it run yet, so I'm kind of anxious to see that happen. I suppose that triming the window and finishing the back room will occur sometime later - possibly over Christmas break.

I did manage to get the walls primed and painted this week. The walls got painted a "pure white" satin color because it was easy and because white seemed to be what my woodwoking brethern on the WoodNet forums perfer for best color representation. I used a non-textured roller to keep the dust from clinging to the wall as much as possible. It also leaves the possibility of texturing at a later date if this space should be used for something else.
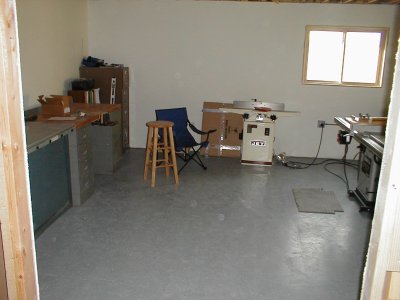
As empty as it gets. The outlet covers are on and the floor was mopped to pick up all the fine drywall dust that was everywhere. The space is now ready to start receiving tools and benches. I decided not to run 220 until I placed the Unisaw for better outlet placement. You can see the conduit and boxes in both pictures.
10-04-03
After a reasonably full Saturday I have all of the major pieces in the
shop now. This afternoon I ran two 220V outlets on one circuit for the
Unisaw and "future tool to be named later". Actually I just
thought it made sense to have two outlets on the same wall and since I
don't believe I'll ever use two 220V floor tools in the shop at the same
time..
I really need to think about getting some air piped into the shop. I plan
to leave the compressor out in the garage just run 1/2" or 3/4"
copper down to the basement. There were several occasions today that I
wanted air and had to run up to the garage. The blue bench is just incredibly
heavy, but I was able to move it myself without scratching up the floor
after building up two furniture dollies out of 2x4s. I may have to keep
those around. Need some rubber mats from SAMS for this area.
10-03-03
As you can see, I got Unisaw powered today and she hums like a beast!
It screams power and I can't believe how quiet it is or how quickly it
gets up to speed. I didn't actually cut any wood on it, but I'm really
looking forward to using it. Eliza bought me a Bisemeyer spliter for my
birthday (tomorrow) and I need to get that installed. I'm lucky to have
such a good wife who supports my interests. (with cash even)
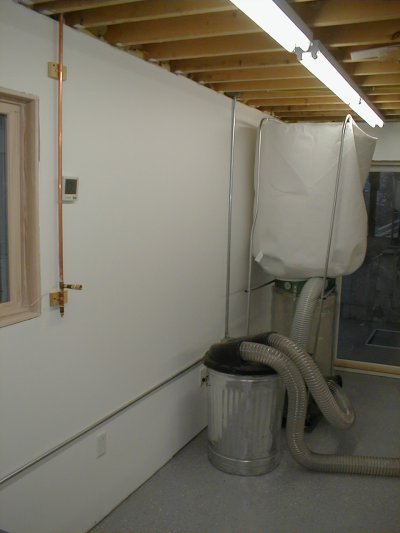
Next up is the dust collector. I pulled the custom AFF bag out of the
box and it's just freak'n huge! I need to fabricate some type of hanger
for it out of 1/2" EMT conduit. I also have 25' of 4" Oneida
hose to run to the tools. While I really wanted to do 6", 4"
gets me up and running quicker and I believe that I will be able to move
to 6" and re-use the 4" on other tools. (Blade guard, router
fence..)
Lights should also be coming in the next few weeks.
10-18-03
Well, as you can see, the lights are now up and I have the dust collector
set up. The seven lights are 8', 4 bulb T8s that I got from the Orange
Borg. I picked up the lights from a local electrical shop and they were
significantly cheaper than any of the boxes. It's kind of different to
look at now, but the light is good and does not offend. These lights do
not buzz and they come on instantly. Initially they seemed a little dim
and you could see rings moving down the tubes, but they are solid white
now so I suspect they just needed breaking in.
The HF DC just needed a couple of 1/2" EMT conduit fashioned to suspend
the oversize AFF bag. It's a monster to be sure as yet does not fully
inflate. Can't say that I've used it to much yet, but I'm looking forward
to running the planer with the DC - should be a nice change from the shop-vac.
10-18-03
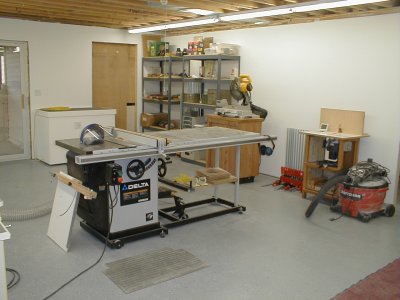
I bought some shelves from Menards ($25) to store some tools that were
in boxes out in the hallway. I still have not done anything with the back
room yet and it is still full of insulation. You can start to see some
of the clamps that I received over a few of the orgies we had this summer.
Many more clamps sit between the shelves. A new router table is one of
my next projects.
10-18-03
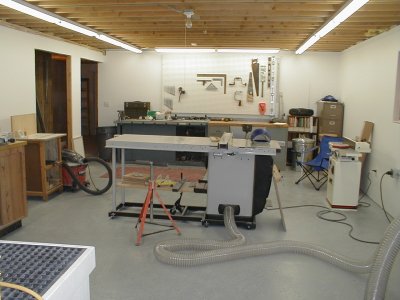
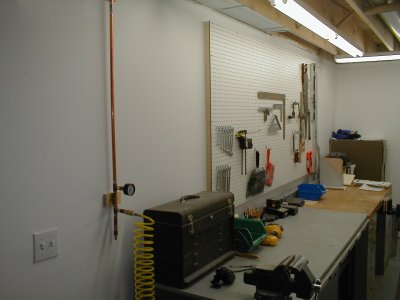
I put up the pegboard and started getting some tools on it. I've had a
hell of a time finding pegs that I like though. Everyone seems to bundle
groups of different pegs and I'd prefer just one or two kinds. I know
there's some pegboard haters out there, but I like some things within
easy grasp of the workbench. Still, I think further down the line I will
reduce the amount of pegboard and install a cabinet in the middle to hold
items that don't fit on the pegboard so well.. like planes!
You can see that I am still in need of both a drill press and a bandsaw.
(among other things) I'm pretending that I'll pick up a drill press in
the coming months and that I'll get enough of a tax return to start me
on my way to a MM16. Do I need it? No, but it's a lifetime tool and at
35 I figure I've still got a few good years of woodworking left in me.
Not to sure where to go from here. I think some wood storage. My current
solution is just to big for this basement.
11-15-03
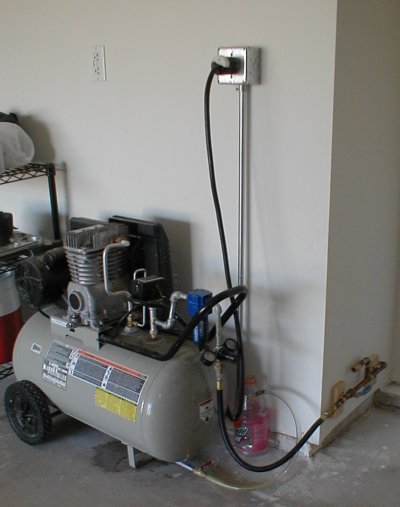
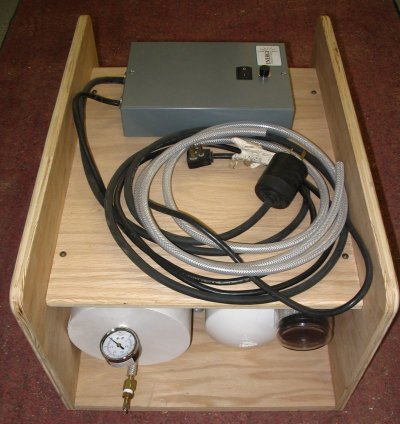
I made some changes to the compressor to prep it for supplying the shop.
You can see that I ran the drain out to the bottom front with a 1/4 turn
ball valve, that should make it much easier to blow any moisture out of
the tank. (I never really used to do it with that horrible inaccessible
T-valve) I re-piped the supply to put an in-line filter/water seperator
ahead of the gauges and regulator, I had problems previously with nasty
gunk making my gauges not work.
The manifold at the bottom right was fabricated out of 1/2" copper.
It is simply a shutoff with a connector (for garage use) that disappears
into the basement on the right side. The system is currently pressured
at 100 lbs (Tank@130) - I'll check the pressure tomorrow to see if I have
any leaks.
05-15-04
Update: A few months back I re-wired and ran 220V so the compressor could
be on it's own circuit because it was on the same 110V circuit as the
garage door opener and was blowing circuits occasionally. This meant that
sometimes you would come home and not be able to open the garage door.
That doesn't make LOML happy. Last weekend I finally added the drain line
hose and container. The hose is leftover from my furnace humidifer drain
and the bottle is a Gatorade bottle with a fitting attached. Works out
pretty well - I may have to add a hose clamp to the compressor end as
it will blow off the hose if the valve is fully opened.
11-15-03
I installed air at three locations in the shop. At the shop entrance and
bench location I installed a gauge to read supply pressure regulated at
the compressor. Each drop has a thumb screw at the bottom to drain any
moisture that might collect. I'm thinking that eventually I will run a
line along the front of the big gray bench and just connect to that.
This project took about 3 weekends part time. I spent the first weekend
getting the parts together and making changes to the compressor itself.
Didn't get much accomplished the second weekend beyond the manifold and
started to piece the drops together. It took 4-5 hours today to get everything
connected and installed. Outside of shopping here is probably 10 hours
overall in this project.
11-15-03
I am killing two birds with one stone in this shot. First is the air drop
and In/Out digital thermometer and the second is a closer view of the
dust collector setup. The size of the AFF bag still amazes me. I'd like
to run some 6" PVC sometime to minimize the amount of 4" hose.
I have a few projects and purchases to make before that happens though,
so maybe sometime next summer or fall.
I can't express how lucky I feel to be in a shop of this quality. The
more time I spend down there, the more I appreciate the space. The guys
at the WoodNet forums have been my inspiration for putting things together
and hopefully some of them visit here occasionally. If anybody wants to
see anything specifically - please e-mail me and I'll get some more pictures
up.
At this point I feel that more progress on getting the shop together is
simply a money issue. I still need a drill press and band saw - I would
like to get a dado set and a few other toys before I get serious about
making sawdust. I will start working on a new router table shortly as
I have nearly all the pieces I need already in the shop. (Heck, my CMT
Industro top has only been in the box for almost two years now)
03-06-04
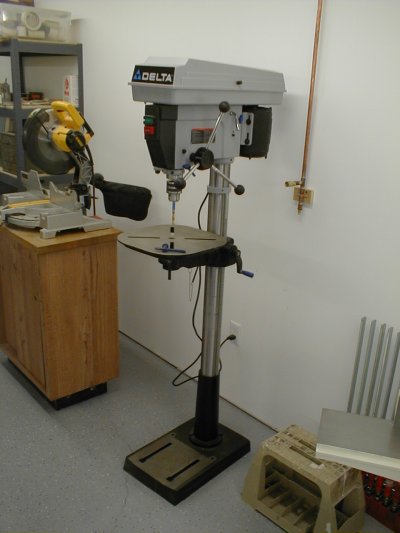
A new Delta 17-965 drill press found its way into the shop recently. I've
been wanting to add a drill press for some time now as they really aren't
that expensive, but like most tool decisions I had had a hard time making
a decision. Of course what I really wanted was a variable speed DP akin
to the Delta 925, but that runs nearly $800. The recently available? Delta
968 was also of interest at $499, but there was little history on it that
I could find. In the end, the 965 showed up during an Amazon Friday sale
and using a $25 off coupon I was able to get it delivered for only $356.
That made the price difference with even the 968 enough to make the decision
for me.
This is a pretty solid drill press and I'm sure that I will be a lifetime
of enjoyment out of it. The only thing that I have found not to my liking
is the plastic quill lock knob and the plastic knobs for setting the belt
tension. They work, but they just feel cheap and for the minimal additional
cost I would have liked them to be made of something more durable. I haven't
used it enough to comment on the switch problems that many people have
commented on, but I don't feel that the plastic top cover is a negative
in any way. Only time will tell.
04-12-04
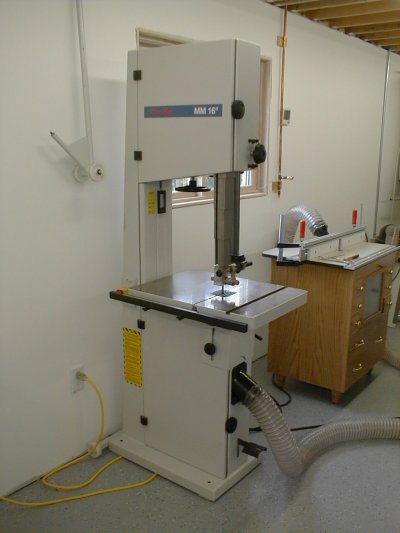
Well I finally got the the Mini-Max MM16 that I had so long desired. It
was a long time coming and there's a long story behind its finally getting
into the shop. This is the new model MM16 with increased resaw. (149 inch
blade) I plan to write up a nice review after I've had it 6-12 months
and spent some time with it. My only real experience with a bandsaw is
the Craftaman 12 inch that I inherited from my father, so it's hard to
make any rational comparrison.
I will say that this thing is a beast and one hell of a machine. It took
four people using a refrigerator dolly to bring it down the stairs. Well..
maybe it didn't take four, but we had four people and it went down the
stairs intact easier than I thought. I hope I never have to take it back
up the stairs.
I will say that the little bit I have played with it has given me an appreciation
for how complex bandsaws really are. It's going to take me some time before
I'm comfortable setting this beast up. I still have not figured out how
to fold that damn 1 inch blade that came with it. (got a few scratches
trying)
05-22-04
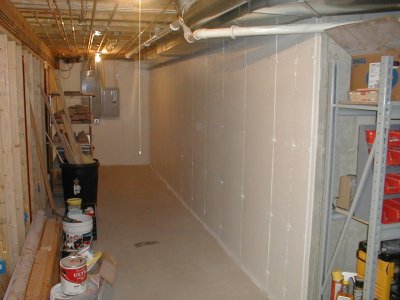
I cleared out my storage area so I could paint the walls using Drylock.
In large part I just wanted to Drylock the back room of my shop because
I had some moisture on that back wall and wanted to seal it before I put
up studs and finished that room. That particular wall is exposed on the
oustide and I expect it was mostly just condensation frost.
I also have been desperate for a more permanent wood storage solution
and wanted to get these walls painted before I put up any kind of wood
storage. It certainly brightens and dresses up this space a bit. I'm much
less concerned about moisture here, but still felt Drylock was the way
to go for basement walls. I'll paint the rest of the basement walls at
a later date.
06-01-04
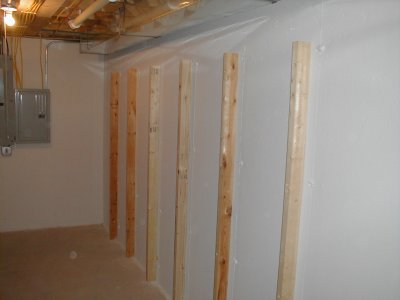
My buddy Steve loaned me his hammer drill and I put up six studs that
I had fabricated yesterday. Each stud is secured to the wall with recessed
four inch Tapcon screws. I wasn't excited about my first experience with
Tapcons, but I have to say that they worked out really well for this application.
The six studs area spaced two feet on center. That should allow me to
support 11-12 foot boards without to much grief.
I have not fabricated the arms yet. I've cut some 2x4s, but I'm planning
to sandwich them between some 3/4 inch plywood and don't have enough yet.
I stopped at the Orange Borg the other day and see plywood is running
about $35/sheet. I sure hope that comes down in the future, but I guess
I'll have to borrow my brothers truck soon and just bite the bullet. I've
got vacation next week so this should definately be done by then.
06-10-04
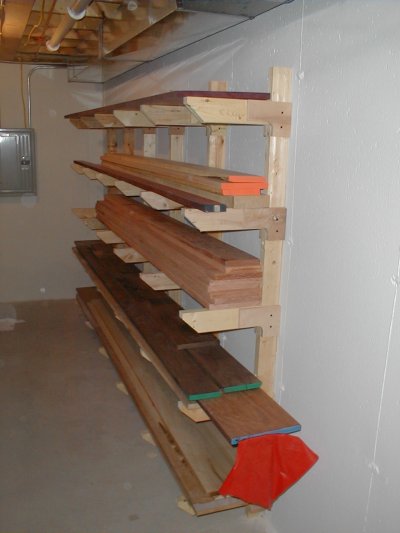
Well I finally got the arms built and installed. They took a lot longer
than I expected. They are 13 inches wide and I almost wish that I had
made them 14-15 inches wide. Originally I had thought that I wouldn't
buy boards wider than 13 inches, but as I started stacking the boards
it occured to me how nice it would be to stack smaller boards side by
side in excess of 13 inches. Oh well.. this is about half of the storage
that I had with my previous storage solution - I simply didn't have room
in this area for that.
As you can see we made a little trip to The Hardwood Connection to stock
the shelves. The only project wood we picked up was the Lyptus on the
third shelf. I am planning to build Eliza a tack trunk to keep her horse
stuff in out to the barn. The rest of the wood was purchased as stock
on hand. We picked up some black walnut, jatoba, poplar, white maple,
purple heart, ash, lyptus and my favorite - bloodwood. Yea, that little
board on the second shelf from the top is bloodwood - about $15 per board
foot. I thought that it might compliment the lyptus nicely. All in all
we spent about $600.
I'll consider adding addition storage down the road once I actually start
making projects. Right now it looks a little to much like I just collect
tools and wood.
12-27-04
It's now Aug of 2005 and I'm just getting around to updating some things. I can't believe it's been so long since I've updated this page. I built this vacuum press over Christmas break (2004) using the Joe Woodworker plans. I got the vacuum pump from Surplus Center. I built this primarily because of the struggle I had veneering the Lyptus top for the blanket chest project. (Formerly Eliza's tack trunk) To date I have not used it yet.
01-05-05
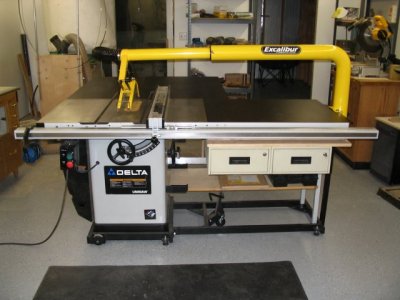
I've made some changes to my table saw this year. First of all you can see that Excalibur blade guard that I picked up over Christmas during one of those crazy Amazon sales for $299. I just couldn't pass it up. I have yet to hook it up though as I've been meaning to run six inch PVC all over the shop. I've replaced the extension table with a black laminated MDF top attached to an oak frame. Attached to that oak frame are two drawers that I've had laying around. I haven't decided yet how much I care for the drawer arrangement. I may stack them later instead of having them side by side. One more change I have in store for the saw is to get a shut-off switch for it to facilitate blade changing. I'm absolutely to lazy to unplug the saw, but I might throw the switch if it were conveniently located.
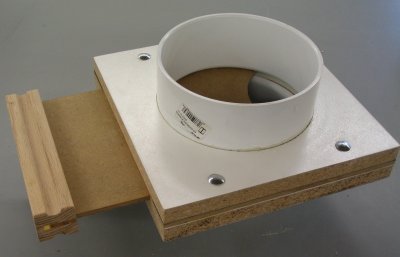
07-23-05
I finally got five, six-inch blast gates built and have 20' of 6" hose from Oneida. I've got a few more odds and ends to do around the shop before I purchase and install the PVC ducting, but at least I'm getting closer.