
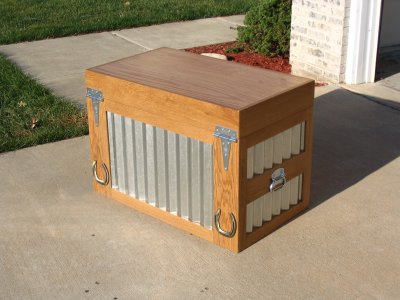
This is my second attempt at a tack
trunk for my wife Eliza. After the first attempt was deemed to nice to go out
to the barn I wanted to make sure that my next attempt would be my last and
that this tack trunk would have more of a utilitarian barn look to it. All of
the hardware is Stanley hardware from Home Depot and is quite rugged. I picked
up the corrugated roofing material from a local roofing supply house as I had
a problem finding it at any of the local borg stores. The horse shoes are the
first set of shoes that Eliza had put on her horse.
 |
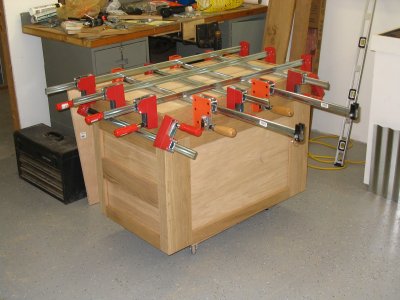
09-20-04 The construction for this box is fairly simple. I built the box out of 3/4" oak plywood with mitered corners reinforced with biscuits. The bottom of the box sits in a dado. The lid for the box was cut on the table saw from the box after the glue up was complete. The plywood top was then joined to the lid frame with biscuits and everything was trimmed in solid oak. The trim pieces were attached with glue and brads. |
 |
09-25-04 Once the bottom was trimmed out, the top was trimmed out and clamped over the plywood lip in the hope that it would fit like a glove. For the most part it fit well, but it still required some sanding to make all of the outside edges flush. |
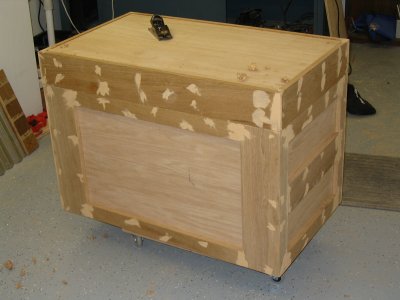 |
09-26-04 Oak filler was applied to all of the brad nail holes and other gaps. I had started to use the block plane to trim the lid sides flush with the top, but then broke down and used the router with a flush trim bit. |
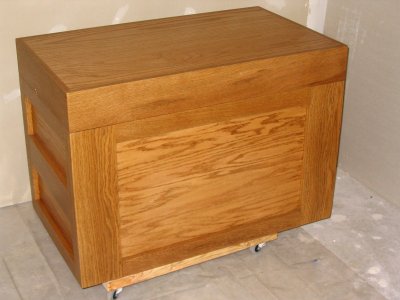 |
10-08-04 Golden oak stain and several coats of water based satin polyurethane were applied. I used the water based poly because I had it around. I've about decided that I'm done using the water based finishes for a while. |
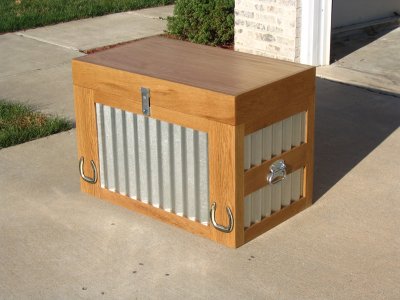 |
10-17-04 The tack trunk is finally done and ready to take out to the barn. The horse shoes on the front and the back are the first set of shoes Eliza had to put on her horse and are affixed with 5 minute epoxy. I started cutting the galvanized roofing using a circular saw and metal cutting blade, but it was difficult to obtain precise cuts the exact width I needed. For better or worse, I ended up putting that 7 1/4" blade on the table saw and made the cuts there. It worked out a lot better for making the cuts and trimming pieces to size, but it did make a good mess on the saw - nothing the shop vac and some MEK couldn't deal with though. |
 |
10-17-04 08-27-05 |
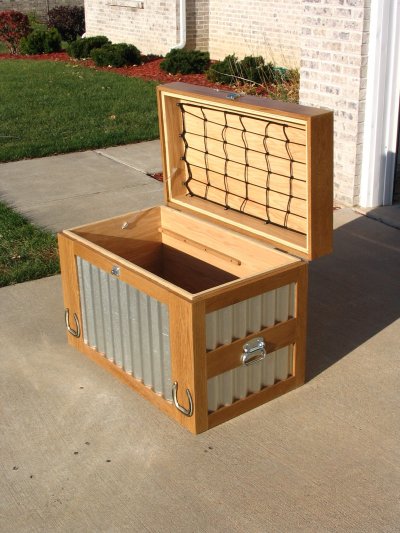 |
10-17-04 The lid stop is simply vinyl coated, stranded 1/8" wire looped at each end. The netting in the lid came from a local motorcycle shop and will be used to store Eliza's body protector (vest). There are rails on the front and back of the inside of the box for a tray that hasn't been built yet. I wasn't going to hold up deployment of the tack trunk for lack of a tray. |
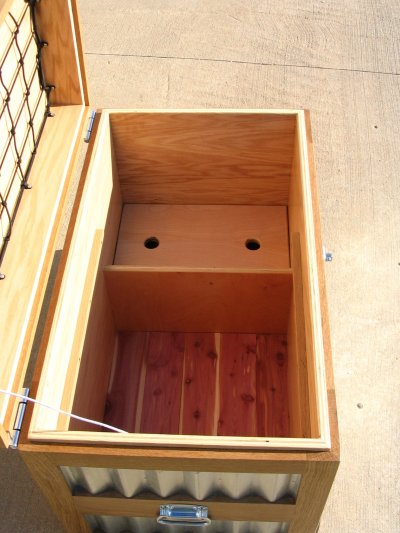 |
10-17-04 The inside is divided. The upper part is where her grooming box will sit. It is raised about seven inches off the bottom of the chest to provide additional storage below the tote. (see next photo) The bottom is lined with the same aromatic cedar that I used in the blanket chest (tack trunk I) project. |
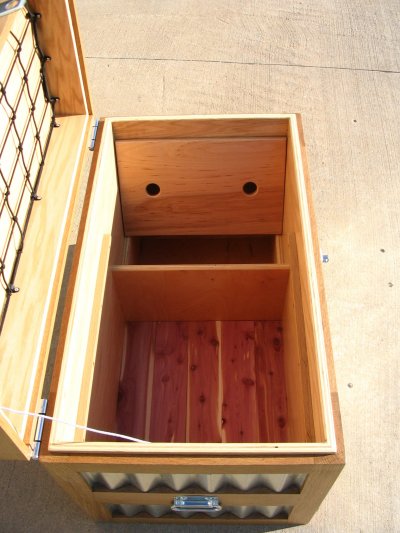 |
10-17-04 The storage area below the grooming box will be utilized for seldom used items such as a medical kit. The construction of the partitioned area is very simple, but quite functional. This project went quite a bit faster than the last. In part because this project was much less complicated and didn't require the level of finishing that the blanket chest did. Also, having done the blanket chest, I had a level of confidence going into this project and that helped it to move right along. We took this out to the barn this morning and got a lot of nice comments from the folks that were out there. I'm sure Eliza will get a lot of good use out of this box and I had a lot of fun building it for her. Thanks for looking and if you have any questions or comments, feel free to contact me. |
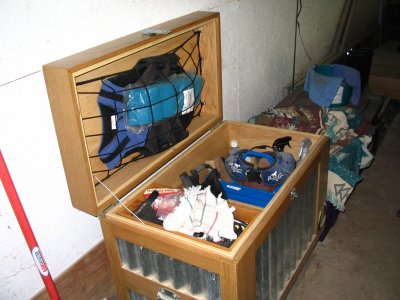 |
08-27-05 I finally took a picture of the trunk in use. I suppose that I should have made Eliza straighten up before the picture, but it's not really as bad as it looks. The trunk has held up well out to the barn with the only problem being a dropped rear shoe. Some day I'll think about taking some epoxy out to the barn, but it's a rear shoe and nobody can tell that it's missing. |