I purchased a Freud Super Dado set for use with this and future projects. I've never used a dado before and haven't really done any woodworking for over a year. The dado set is really very easy to use, but I made some mental setup mistakes and had some incorrect cuts.
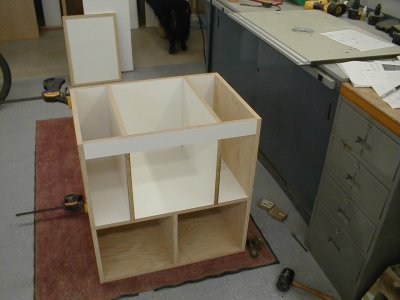
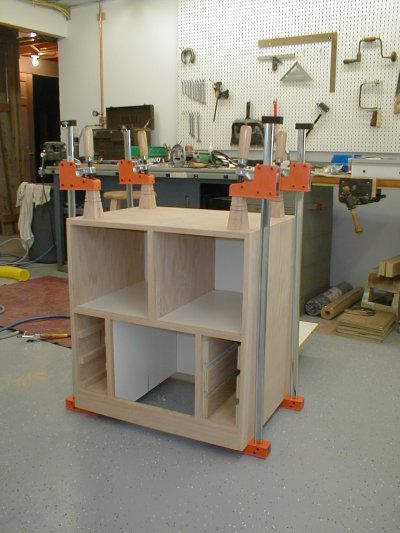
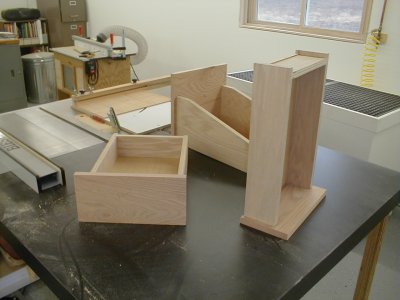
Everything in this picture is dry fit and sits in a dado. I don't have a biscuit jointer so the back is also dado'd. (The source of most of my miscalculations) As you can see the sides are 3/4" plywood and the area the router sits in is 3/4" melamine. I wanted a slick surface for better dust collection and the nice reflective white surface to make it easier to see what's going on in there.
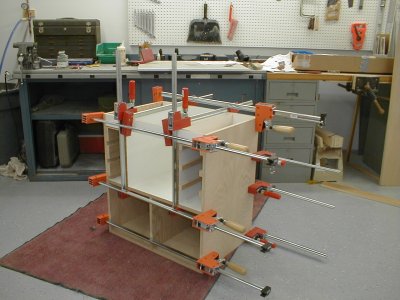
I was finally able to use many of those "orgy" clamps during the glue-up.
I don't know why, but I had an issue with the two center melamine pieces not fitting correctly after the glue-up. They looked really good in the dry fit, but I think the clamping pressure must have twisted things a bit. I ended up using the belt sander to bring the top back level so it wasn't that big a deal, but it still left me confused.
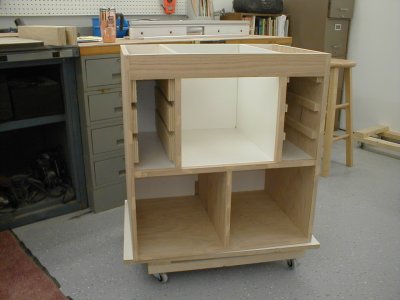
I placed the carcass on top of a piece of melamine. and dolly that I made to make it easier to move around. The face frame is installed now and you can see the drawer arrangement. The left side is the typical "Norm" router bit storage. I don't have that many router bits and felt that drawer storage on the right side would serve me better for wrenches, router and fence accessories, etc.. The bottom left will have two drawers and the right bottom a single deep drawer.
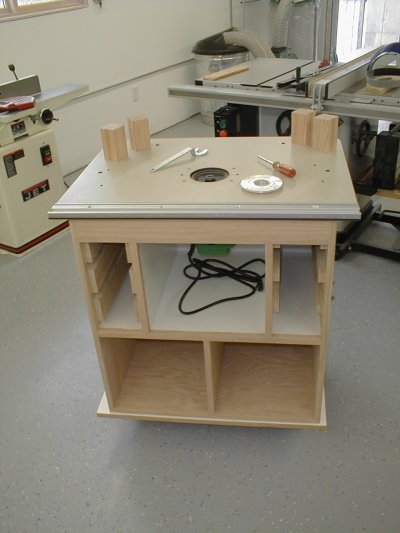
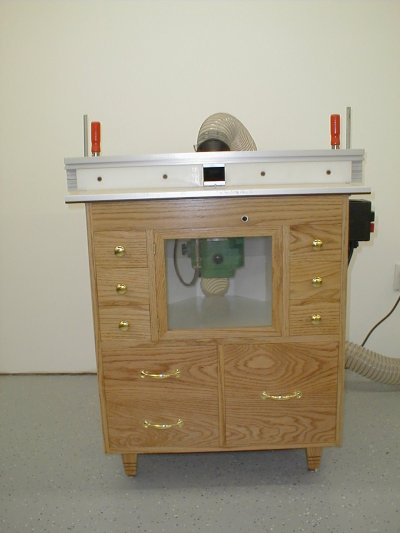
The scariest part of this for me is now over. I drilled the phenolic top to accept the Hitachi M12V and it appears to be pretty good. The four blocks are leg stock that I glued up from 3/4 stock. Originally I had thought to put wheels on the table, but the concrete floor is so uneven I felt that it would forever be tippy. To that end I will use threaded inserts and adjustable nylon feet.
I still have not come to a conclusion regarding dust collection. I will use a 4 inch port in the cabinet, but I am still confused about what DC connections play nicely together. I'm sure I'll go with 4 inch S&D, but need to research it a bit more.
Though it didn't make the picture, the Router Raiser is installed now (12-20-03) as well as a connection to lock the collet from the right side of the table (using 3/16" threaded rod). I still have not found a knob to use, but that shouldn't be very difficult.
The feet have been installed as of this morning. You can see that I tapered the legs and added 3 decorative lines at the bottom. I cut the lines on the table saw when the blocks were still square. All three are the same depth and it might have been nicer to make them incrementally deeper toward the tapered end. The legs are secured to the cabinet with a 1/2" dowel and yellow glue. Threaded inserts will go into the legs followed by adjustable nylon feet.
I cut the tapers on the table saw and don't think I will ever do that again. Perhaps it was simply the small size of these 4 inch legs, but I felt it was incredibly dangerous and stupid to cut these on the table saw. The blade had to be around two inches above the table top to make the cut and even with the not so clever jig I used my right hand was WAY to close to the blade for comfort. I would have cut these on the band saw if I had one. This is a situation that will soon be rectified though as I put down a deposit on a MM16 last week. Now if I can get my tax return to play nice I should have one in my shop by the end of February.
You can see the slot for the threaded rod in the melamine at the bottom left. The slot should allow the rod to travel unimpeded as the router moves up and down.
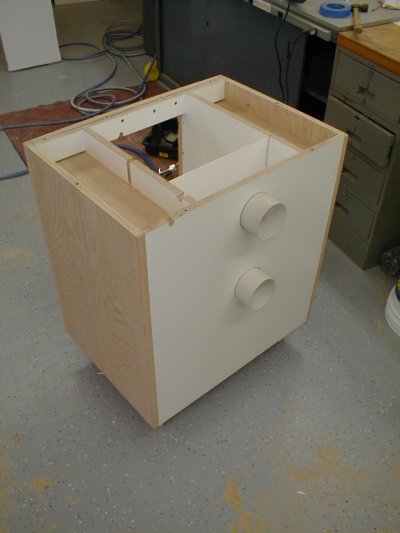
I installed two four inch dust collection ports. The top one will go to the fence and has a "blast shield" in front of it to help prevent the router from being pelted with debris. I had issues with using this four inch S&D pipe as it was the same OD diameter as the four inch Oneida Air flex hose I was using. After many unsuccessful attempts at heating and forming the pipe, I attempted to simply cut out a section and glue it together - thus reducing it's diameter.
In the end I ran a length of pipe across the router table using a 3/4" bit, cut to length using the chop saw and used PVC cement and clamps to put it back together. The resulting diameter fits into the hose nicely. This may not be the preferred technique, and it wouldn't work well for long sections as the joint is reasonably weak, but for hose connections of this size (i.e. blast gates) it is easy and works well.
12-31-03
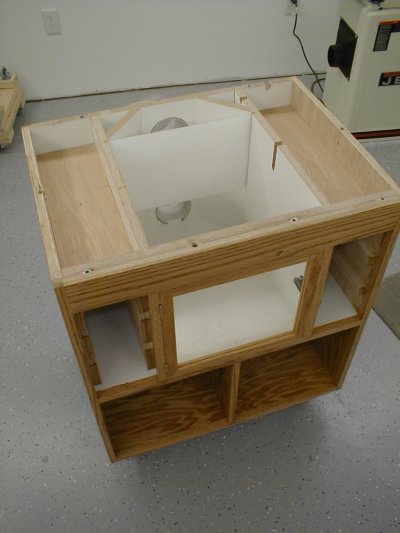
The router table is now stained and has two coats of satin poly. Corner
blocks were installed to help direct debris into the lower duct. At the
point I install S&D throughout the shop, I would like to replace the
four inch lower with a six inch pipe. (I've been playing with the DC and
appreciate the extra flow generated when I remove both of the four inch
caps on the Y - or simply remove it)
The "blast shield" is simply a piece of sheet plastic I had laying around
installed in slots cut into the sides. The slot on the right side is for
the 3/16" threaded rod that is used to lock the collar for bit changes.
I also decided that I still don't install hinges very well. While it really
isn't that bad, the door rubs against the top of the opening when you
close or open it. I did install a magnetic release latch so that I could
forgo a door handle. The Lexan window is almost a 1/4" thick - and
was the bargain find for this project - 50 cents on the scrap cutoff table
at the hardware store.
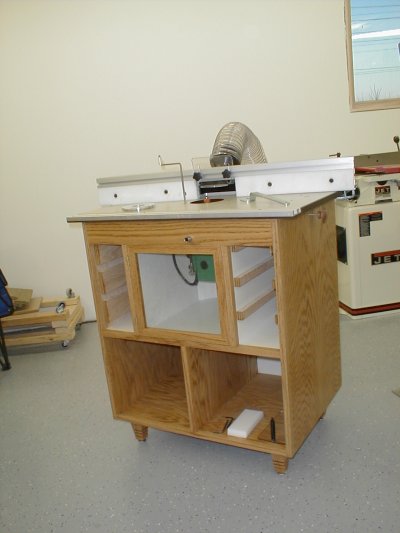
The table is installed now and the router table is mostly functional. The Router Raizer works well and a few test cuts seem to indicate that there is sufficient air flow to keep the cabinet free of chips. I epoxied a 4" to 2 1/2" reducer on the fence inlet - I'll try to get a picture of it up in the next set.
The fence is quite a bit more complicated that I am used to and will take some time to figure out. There are a lot of pieces to it and instructions that came with it just aren't much help. Still, it's a hell of a system.
You may note that I still do not have a power switch on the side as that piece was backordered from Rockler. Guess that I will have to get started on some drawers soon. I don't currently have a drill press, so the router trays on the left may have to wait a bit. This has been a pretty fun project, but like most projects as they come to a close I am ready to be done with it.
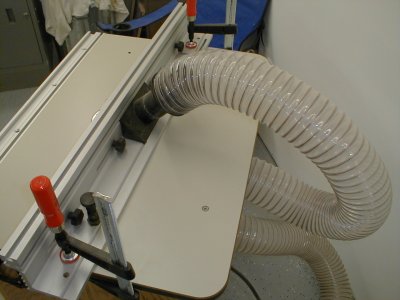
Here you can get a better idea of the dust collection for the fence. In time I would like to make it four inches up to the fence, but that would require some fabrication that I just haven't taken the time to do. You will note that I am now using clamps to hold the fence in place instead of the original clamps that came with the fence. The OEM clamping system had 3/8" soft rubber pads that contacted the underside of the table. I found that with those clamps in place I was able to deflect the fence a noticeable amount. It turns out that the rubber pads were flexing with the pressure and causing the fence to deflect. Of course that wasn't acceptable, so I removed them and have been using the Bessey Tradesman clamps since.
03-20-04
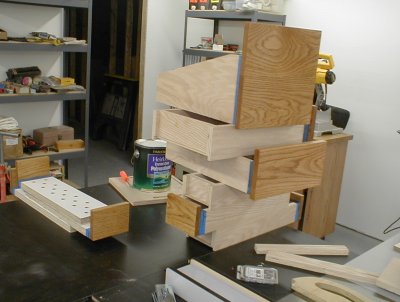
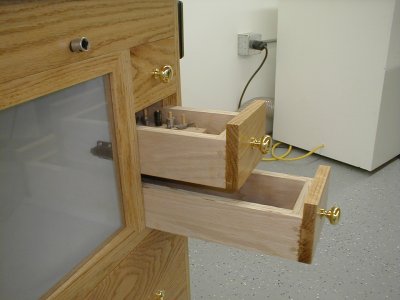
You can see there is a time gap where I didn't work on the router table much. I decided that the router table was mostly functional and that I really needed an outfeed table for the Unisaw more than I needed drawers for the router table. But recently I finally got off of my ass and started making drawers for the table. Here you can see the large drawers on the outfeed table and if you look closely you can see the unfinished smaller drawers already installed in the router table. (Note to self: Don't install all three drawers on one side if you don't have a good way to pull them back out.)
The drawer construction does not exactly follow Norms plan since my table isn't from his plan either. I had to make some design adjustments to make them work. For the large drawers the side are attached to dados in the front. Since they are just glued, I was a little concerned about the forces on these joints while pulling the drawers out. I added some corner blocks to provide some extra long grain to long grain glue surfaces to reinforce the drawer fronts.
The drawer fronts have been stained and have their first coat of satin poly. The blue tape was used to help insure that only the drawer fronts got stain and poly. For the most part the blue tape did its job, but there were some area that stain got through. No big deal on this project though.
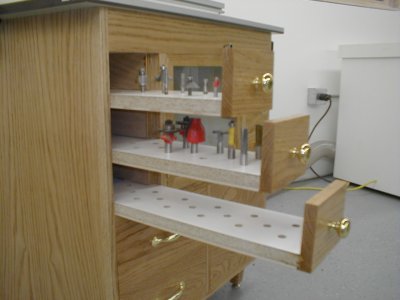
A bit fuzzy, but you can see that the solid brass knobs are installed and the bit drawers are somewhat populated. I've got more bits than this, but they are CMT bits and come in a nice case that provide good protection for them, so I simply put those bits in their own drawer.
I know what you're thinking, solid brass knobs are overkill for a shop cabinet. That's true enough, but I had them laying around from the bathroom project at the last house and they fit the bill. I only had six of them though, so I went to the orange borg and picked up three handles for the drawers for less than $2 each.
These drawers seem a bit on the small side, but they're big enough to hold some wrenches and misc parts. The construction on these is a little different in that the front plywood part of the box sits in a rabbit and is pinned by two dowels. The oak fronts are just glued and screwed on to the plywood drawer.
04-02-04
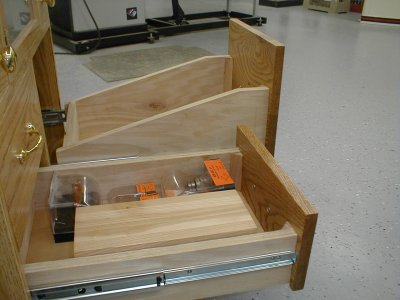
You can see the corner blocks that I added to reinforce the drawers. The
slides are full extension, 100 # Dynaslides. They didn't come with any
installation directions, but were not to difficult to install. They certainly
are very solid, but I'm not sure how much I really care for them yet.
I had originally planned to store my Bosch 1615 router in the larger drawer,
but it's really big and doesn't really fit in there to well. Guess that
I'll just have to buy myself a smaller router to store in there.
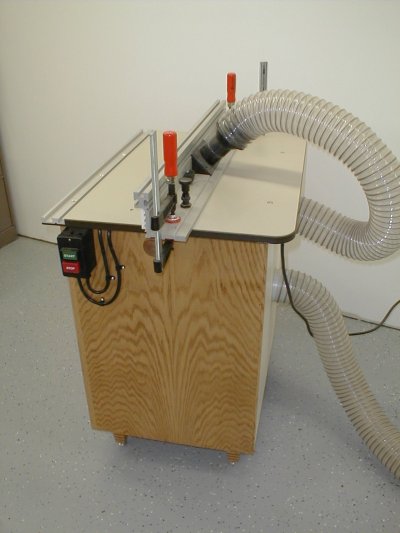
This is how things look from the side. I've covered most of what's here already, so I don't have much to say about it. This is the first good look at the switch however. I do really like this switch and feel it was worth the $20 I paid for it.
Ahhh.. seems like a lot of storage now, but I know it won't be enough down the road. (If I have anything to say about it) Of course the table isn't totally complete yet as I need to refine the router height lock. You can see that I don't currently have a permanent lever for that yet. Close enough to call the project finished though.
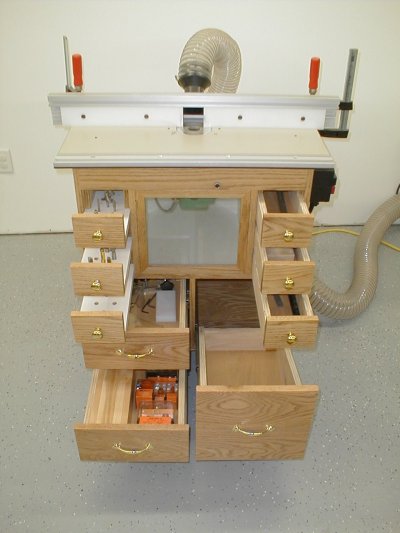
The completed table with drawers and hardware. This project took much longer than I anticipated, but seems to have turned out really well. I may need to plane the top of the bottom left drawer front sometime as the left side of the top seems to rub against the drawer above. It's not really that bad or noticeable, but I'll keep an eye on it and adjust if necessary.
Now I guess it's time to start making some chips!