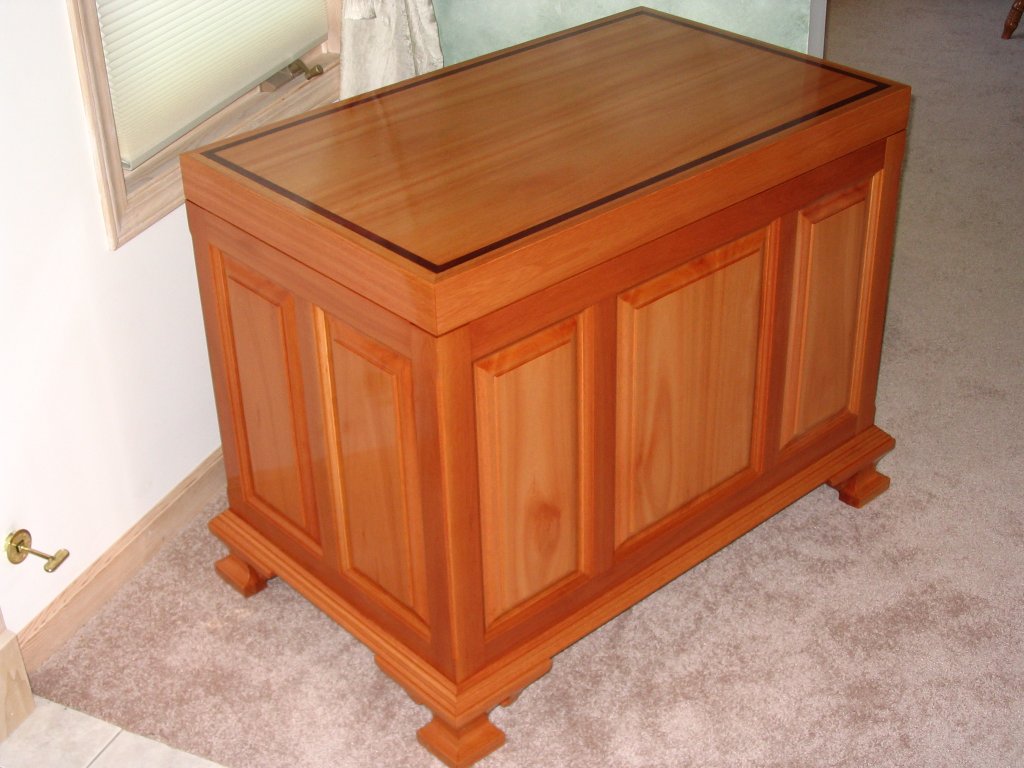

As with most projects, I'm long overdue
to have started on this one. I promised my wife Eliza that I would build her
a tack trunk for her horse gear. There aren't very many people out to the barn
with real tack trunks. Most of the boarders use some form of rubbermaid bin
or chest to store their gear. Eliza has been using such a container, but it
is really just to small to contain all of the gear she uses regularly. There
are a few trunks out to the barn. One looks like an old steamer trunk and perhaps
there are two older tack trunks.As usual, I wanted something that would stand
out from the crowd and be noticed.
I took the same approach to this project as I do with most of the larger items
I build for the shop. Even though I know that this trunk will be kept out to
the barn and exposed to the elements and probably abused more than I'd like
to think, it's a great project to try out some new techniques and further my
woodworking education. Because hey.. it's just going out to the barn anyway..
Update: This project has been a complete
failure. I was commissioned to build a tack trunk for the barn and it turns
out that this will now be a blanket chest for the house. Despite the many new
challenges that faced me in this project, it really has turned out extremely
well so far and was deemed to nice for the barn. Oh well, I guess I know what
my next project is going to be.. a barn quality tack trunk.
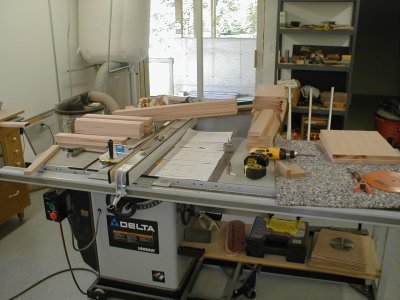 |
06-22-04 If you check the shop page you'll see that we recently picked up a bunch of wood from The Hardwood Connection in Sycamore. Eliza decided that she wanted her trunk made out of Lyptus and we purchased enough to make this trunk. (or so I thought) Here you can see that all the panel pieces have been dimensioned and are ready for the router. The only glue up was for the larger middle panel on the front and back. |
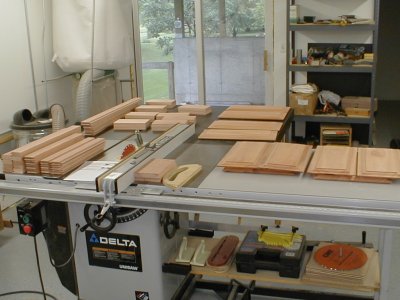 |
06-24-04 All of the pieces have now been routed and are ready for a dry fit to see how bad my calculations were off. I have to admit that I totally screwed this operation and had to cut several new boards. I routed the ends for all of the rails and made a practice cut for the stiles - when I went to test fit the pieces something just didn't look right. That's when it hit me.. I used the wrong freak'n bit to cut the rail ends. I was a bit pissed off to say the least. I gave it a few hours and then came back to the shop and cut new rail stock. Sometimes I wonder if I have any business in this hobby.. |
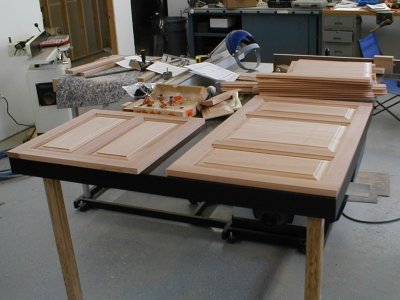 |
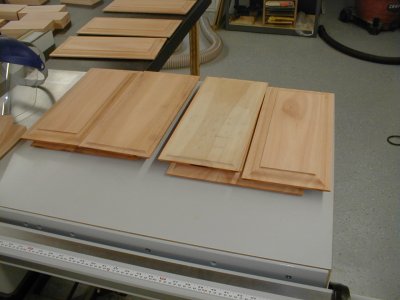
06-24-04 I dry fit these panels to make sure that I didn't totally screw up the calculations. What's missing here is the foam spacers (like space balls) that will keep the panels snug and still allow them to expand as needed. |
 |
07-04-04 There were some dark spots on the back side of two of the panel boards. I checked around to see what I could do about these and saw that people recommended using Oxalic or wood bleach to lift the stains. I went down the the orange borg and picked up some wood bleach and applied it to the stained areas. After it had been down for a few hours I was shocked to come down and find that it really hadn't done much to lift the stain, but it had turned the Lyptus from red to white. (But only where it was spot treated) I decided to treat the entire side of the board just to make the color more uniform. Needless to say it never did entirely lift the dark stains and it did turn the wood mostly white. |
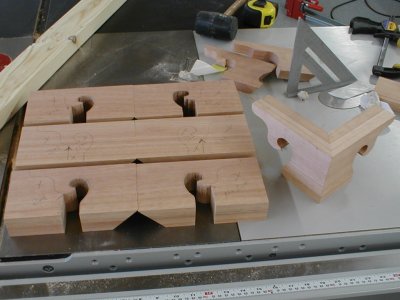 |
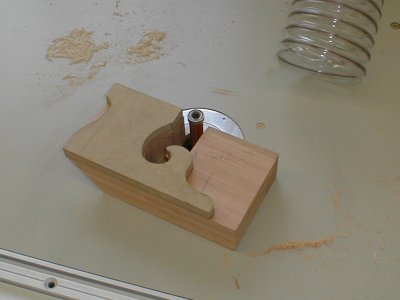
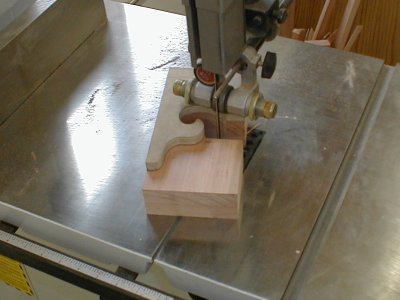
07-05-04 I decided that I wanted some form of Ogee feet for this project. Mostly I just wanted to gain the experience necessary to use these on other projects and thought this was a good opportunity to experiment. I could only purchase 4/4 Lypus, so I had to glue up two pieces to make the feet thick enough. I made a template out of 1/2" MDF and used that with a pattern bit on the router table to get a smooth and consistent cut for the pattern. I had a problem with some test cuts blowing out the little curl that hangs down, but managed to solve that by making the rough cuts on the band saw in two operations. |
 |
07-05-04 By leaving a good amount of material on the other side of the curl I was able to safely rout the inside of the curl without tearing it off. |
 |
07-05-04 Back to the band saw to rough cut the rest of the foot and then back to the router table to finish it up. This approach seemed to work very well. I assembled the feet using splines and then cut a cove on them using the table saw. I forgot to take pictures of that operation, but it was a lot of fun and something that I've been waiting to try for a long time. |
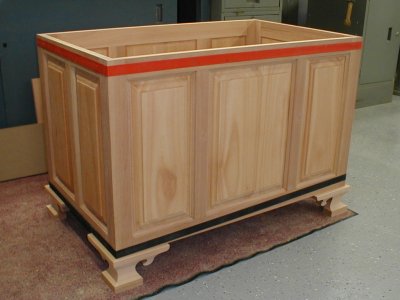 |
07-10-04 Everything here is dry fit. I finally got around to dimensioning the panels (making them square again), mitering the corners and cutting a half inch dado for the bottom. I was pleasantly surprised at how well everything seemed to go together. But then again, it's not glued up yet.. You can also see how the ogee feet are coming along. I haven't decided if I am done with them yet. |
 |
07-10-04 The inside of the box. The bottom is standard 3/4" birch plywood from the orange borg. I cut a rabbet around the bottom of the plywood so that it would fit the 1/2" dado in the panels. I'm still undecided how I will treat the bottom. I had thought I would lay down some 1/4" aromatic cedar, but now I'm considering lining the bottom with a rubber mat instead. I really need to stop slacking and get this thing glued up. |
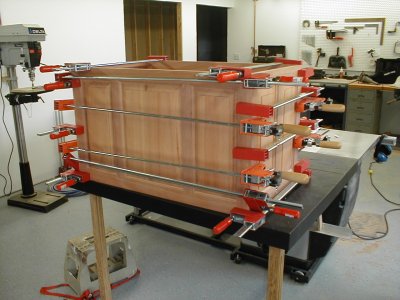 |
07-15-04 I finally got around to gluing up the box. I recently acquired a PC biscuit cutter and used #20 biscuits to align the miter joints. It worked out really slick and while I didn't need the additional strength for this long grain to long grain glue-up, the biscuits did help with alignment. I would have preferred using a glue with more open time as the yellow glue (Titebond II) doesn't give you a lot of time to get things aligned. It always takes more time to do a glue up than you think and this was no exception. Still, in the end it turned out pretty well. Guess I should start thinking about the lid to this trunk. |
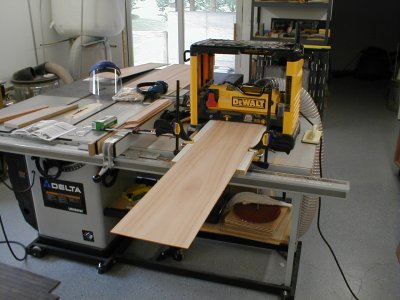 |
07-17-04 Because this trunk will be out to the barn I decided that the top of the lid should be made from plywood. I couldn't get Lyptus plywood (without special ordering) and decided to veneer some birch plywood with Lyptus - heck, what good is it to have a MM16 if you don't resaw veneers. So that's what I did - using the less than spectacular 1/2" blade that came with the saw I resawed the Lyptus to obtain 5 sheets, 9 inches wide. Ripping one of those would give me enough veneer to do the top and bottom of the lid. The resawing left a fairly rough surface so I planed between passes to insure that I always had one smooth/flat side against the fence. In this shot you can see how I took the resulting pieces and made them all mostly smooth on both sides, parallel and a uniform thickness. Hmm.. I really need to get a wide belt sander.. |
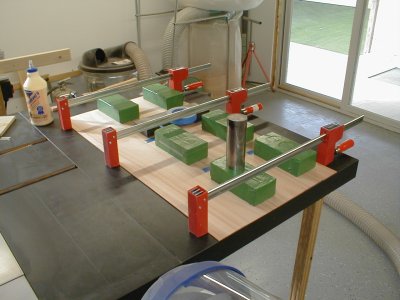 |
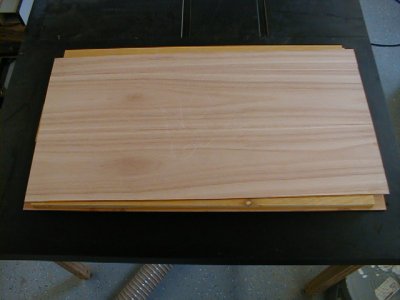
07-17-04 Here's the glue-up for the bottom of the lid. I borrowed the "duct taped bricks" from David Marks show. Does it look like I need an assembly table? I glued the first one and let it dry for two hours before removing the clamps to do the second glue-up. It's time to go down-stairs now and see how that one turned out - hopefully it's not completely glued to the table. |
 |
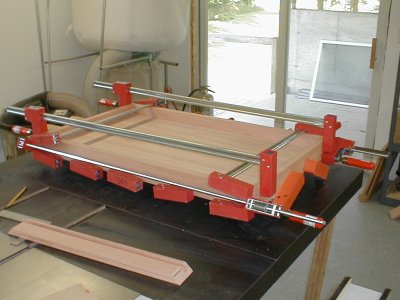
07-18-04 The resulting glue-up to 3/4" birch plywood turned out fairly well, but as you can see here, the veneer for the top got turned somewhat during the glue-up. When I squared this piece and cut it to final size, I was able to get the gap down to a reasonable size and in the end it won't matter when the inlay is done. The veneer isn't exactly flat and I'm not entirely sure what to attribute that to. It wouldn't be a big deal if I had a drum sander to run it across, but I don't. Rest assured though, that a 22-44 or equiv will be one of my next major tool purchases. In the meantime, I'll deal with this when the lid is put together. |
 |
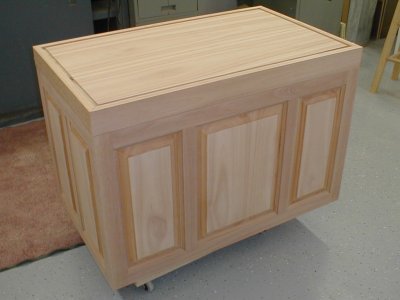
07-25-04 The top is all glued up and clamped. I never have regretted purchasing all of these great clamps. In the foreground, you can see the test piece I cut. The edges of the top have a 5/8" dado cut to receive the plywood top. The veneered plywood was then run through the dado to create a rabbet such that there was 5/8" on the underside to fit into the dado. The wrap is also joined with #10 biscuits for added strength for this end grain joint. |
 |
07-25-04 After setting in the clamps for about four hours I got back from lunch at moms and removed the clamps and set the top on the chest. Surprisingly it came out fairly well. On the top you can see what's left of the dado I plowed before the glue-up. I am planning to route an inlay of bloodwood around the top and thought that removing the extra material early would be beneficial. I'm not entirely sure where to go from here - one of the downsides to not having written plans. I know what needs to be done, but not sure how best to go about it. I know it will all work out in the end. |
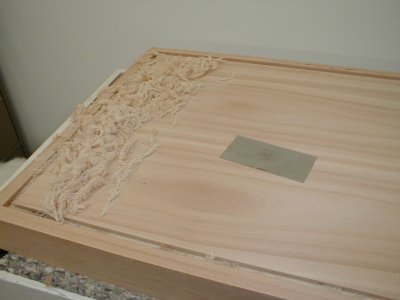 |
07-27-04 There's just something satisfying about using a scraper to make piles of nice shavings. I used the card scraper to clean up and flatten the inside (veneered) portion of the lid. It worked out rather nicely with the exception of having the lid on top of the wheeled downdraft table. Even though it looks like I've already cut a slot for the inlay, that isn't the case. The gap is simply the result of the extended rabbet I cut with the dado before putting the top together. The outside edges are a fair bit higher than the veneered portion - I'll have to figure out some way to even things up before i cut the slot for the inlay. |
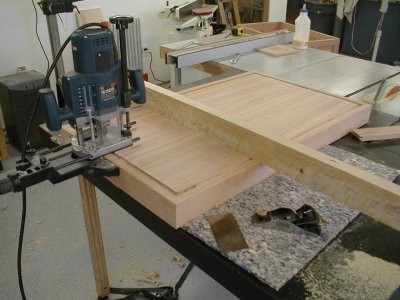 |
07-31-04 Well, I spent the better part of the morning reconditioning the Stanley 9 1/2 block plane that I've never really used before. It belonged to an uncle of mine and I've had it for years, but I've never really used it before. Because it seemed like my best option and I've been meaning to recondition it, I went ahead and cleaned and tuned it up. It works like a champ now and cut some very nice shavings. This picture also shows you how I cut the slots for the inlay. I had to make two passes to accommodate the width of the existing gap. The 2x4 is clamped on either side to insure that the top doesn't move while I'm routing. |
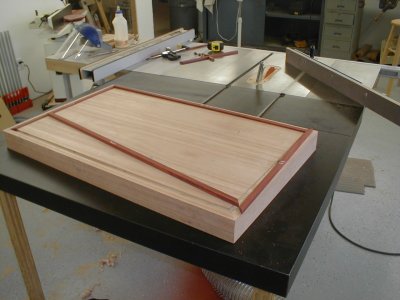 |
07-31-04 I resawed some bloodwood on the MM16 and mitered to fit. Mmmm... I can't believe how good the bloodwood smelled while resawing and mitering. I think the smell reminds me a bit of tobacco. You know that rich yummy smell when you walk into the tobacco store... mmmm... BTW - smokers suck! Anyway, I left the resawed face up and made the straight cuts on the table saw with the blade at 3 degrees on one side. I felt that would insure that I got a fairly tight fit at the top of the gap and still have get plenty of glue surface underneath. |
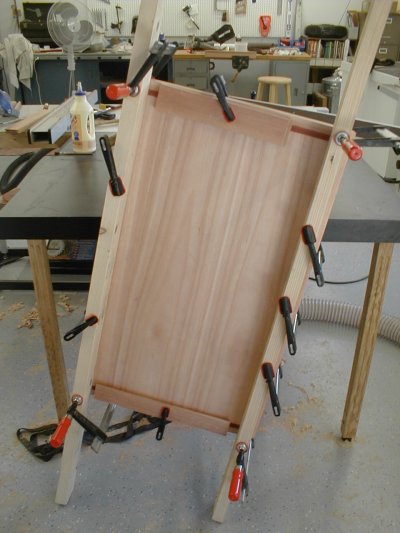 |
07-31-04 All clamped up. I promise that next time I'll make sure the cauls are move even, but it didn't occur to me until I was half way through the clamp up and trying to figure out how to clamp the remaining sides. While everything looked good in the initial glue-up, we'll have to wait and see how nicely the mitered corners come out when the clamps come off. I have to say that I'm looking forward to another opportunity to use my newly reconditioned block plane and scraper again to bring the inlay flush with the lyptus. There's been some talk of not taking this trunk out to the barn and keeping it at the house. I have to admit that it's turning out better than I had expected and it probably would be a shame to take it out to the barn. Besides which, I've got a good idea of something that would make a more appropriate tack trunk for the barn environment. We'll see how things go, but this may turn into a blanket chest instead of a tack trunk. There's continues to be plenty of opportunity to screw it up though, so it may still end up being a tack trunk. |
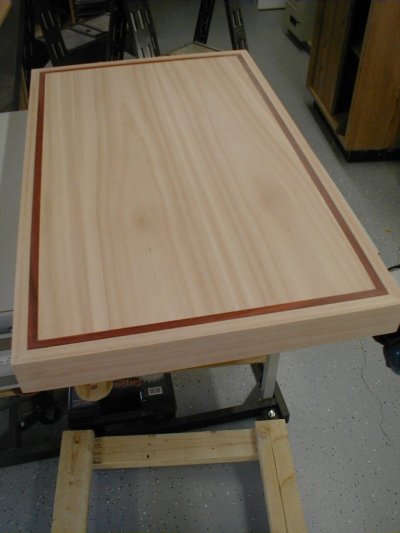 |
08-09-04 The lid has turned out pretty well so far. The inlay is not perfect, but I'm very happy with it for a first attempt. The bloodwood contrasts nicely with the Lyptus. |
 |
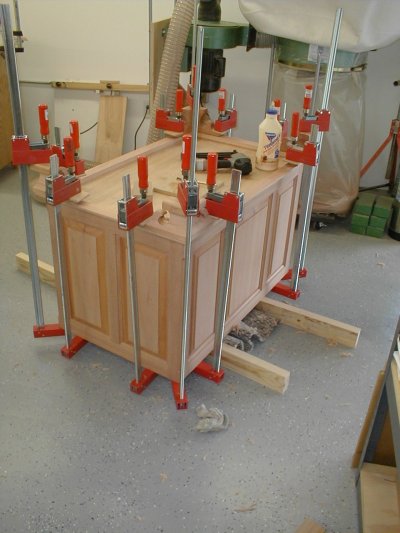
08-09-04 I built a frame with a decorative edge and then glued and clamped it to the bottom of the chest. A small cove molding will be placed at the glue line. In retrospect, I think I should have glued the feet to the frame first and then the frame to the box. I had a hard time getting a flush fit with the feet. Any gap between the frame and box would be covered by the cove molding. Oh well, live and learn, it turned out ok anyway. |
 |
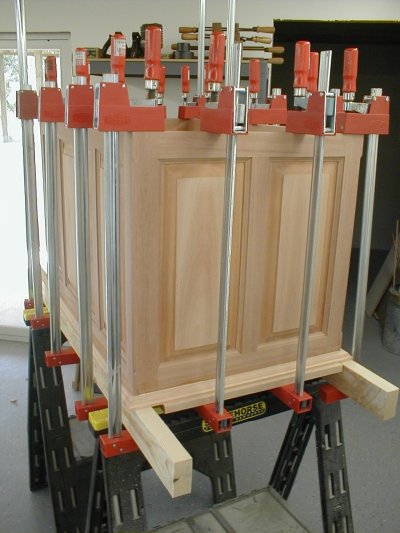
08-14-04 The feet were positioned and tacked with the brad nailer. I ended up dry fitting and making pencil marks and then lining the glued up feet with those pencil marks. The feet had a tendency to slide around and that's where the brad nailer came in. Once the feet were tacked, it was just a matter of clamping them in place. All in all a fairly easy glue-up. Next up is the task I've been dreading the most - fitting a hinge and making the lid fit square with the box. One the hinge is in place and the lid is fitted it will be time to start preparing for finishing. I do hate sanding.. |
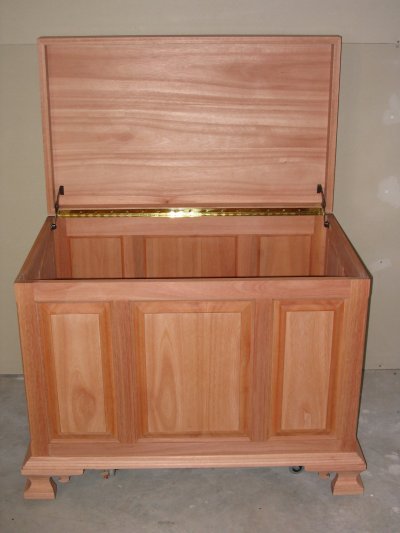 |
08-22-04 This and subsequent photos were taken with my new Canon A75. Hopefully we can say goodbye to those horrible spotty pictures. It's been a long time coming! Notice a color difference? The Canon is certainly closer to the true color than the Olympus was. The piano hinge went on fairly well and the lid actually lined up fairly well with the box. The big problem was that neither the box nor the lid were really square and they just didn't quite line up. It certainly took some work with the scrapers to make it flush, but it does now fit. . The lid stops were also a big PIA as I had to change their position a few times to get them "right". These are supposed to be friction stops in that they aren't supposed to let the lid slam shut. They don't really work that well as the lid essentially slams shut. Oh well, just keep you fingers clear. The first go at sanding on the outside of the box is complete here. I need to sand the inside and then hit everything with 220 before I start applying finish. I'm planning to set the box out in the sun for a while to color the wood a bit. I tried a test piece and it came out pretty nice - though it did sit out for a whole day. |
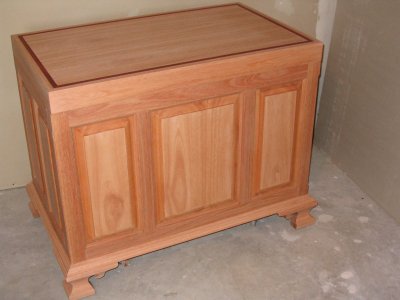 |
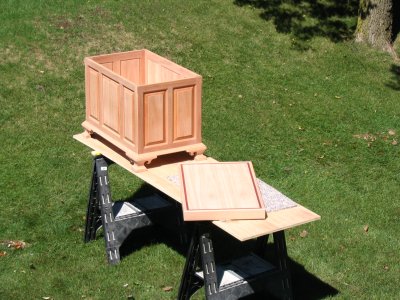
08-22-04 The sanded box with the lid down. I expect that I won't start applying finish until after labor day. One other issue that I have with the lid is that it still has a tendency to move side to side. It really needs something to keep the front aligned - maybe a lock or pins or some other piece of hardware. It will also need some sort of handle for lifting the lid. |
 |
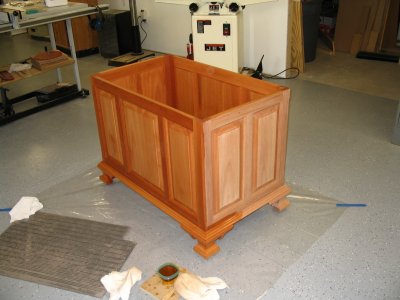
08-29-04 I set the box and lid outside to soak up some sun for a full day. I had done a test piece and liked how it darkened and enriched the color. The box didn't seem to get as much sun as my test piece, but it did pick up a little color. |
 |
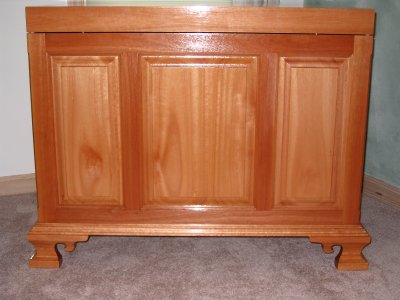
08-30-04 Almost done with the first coat of Generals Seal-A-Cell. I used the clear color and put on four coats before applying 3 coats of Armor Seal in gloss finish. I hadn't intended to use the gloss finish, but it's all they had at the only shop I know in the area to carry the General products. |
 |
09-10-04 |
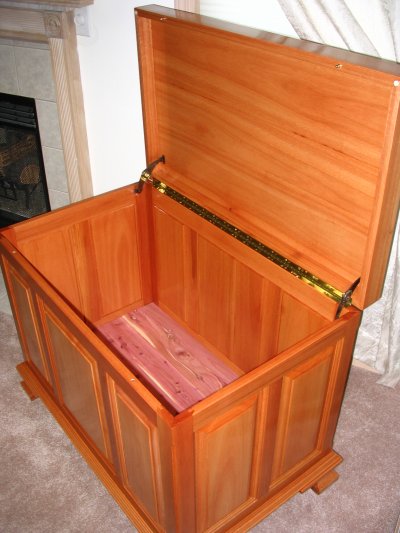 |
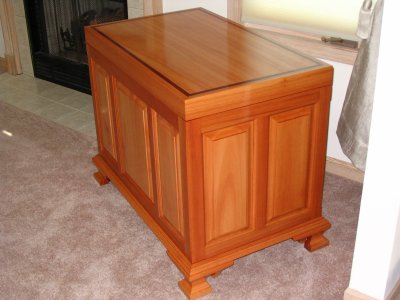
09-10-04 The lid is still rather heavy to lift and I'm still debating on a handle. If you look carefully you can see two pins on the lid front and two holes in the chest front. This is hardware normally used for table leaves. The lid has a tendency to not line up correctly in the front - in fact it has some play side to side. I used the pins to correctly align the lid and box and to prevent any side to side motion of the lid while closed. The bottom of the chest was lined with cedar - simply a package of 1/4" cedar closet lining from Menards cut to fit and brad nailed in. Three nails per board - should come up easily should the need arise. The two lid stays are friction stays, but do almost nothing to slow the closing of this 27 pound lid. Oh well.. I can't say that I found working with Lyptus to good or bad. I do like the finished color and would recommend it if you can live with the limitations of using Lyptus. My local source of Lypus only carries it in 4/4. They can certainly order it in different dimensions, but I like sorting through to find the piece I like. The other limitation that I didn't care for is the not being able to get highly figured Lyptus. It wasn't a big deal for this project, but I'd like to start using some figured woods and Lyptus doesn't seem to offer much figure. Still, it's reasonably priced and does finish nicely. I may yet use it again. |
 |
09-10-04 |