Harley Tour Pack Restoration:
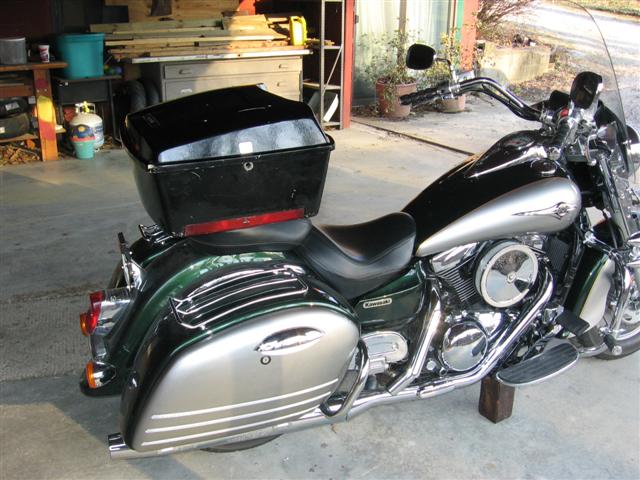
Ever since I got the Nomad I wanted a Tour Pack. My plan was to install it as a solo setup since I never carry a passenger and have the convenience of a back rest and the storage capacity. I spent several months on Ebay and finally found one at a price I wanted to pay and which turned out to be in great shape. It came of a late 70's, early 80's bike and therefore did not have the holes predrilled for the wrap-around back rest and speakers like the newer tour packs and which I did not want anyway. My plan was to put the smaller back rest pad on that HD uses for the chopped tour packs.
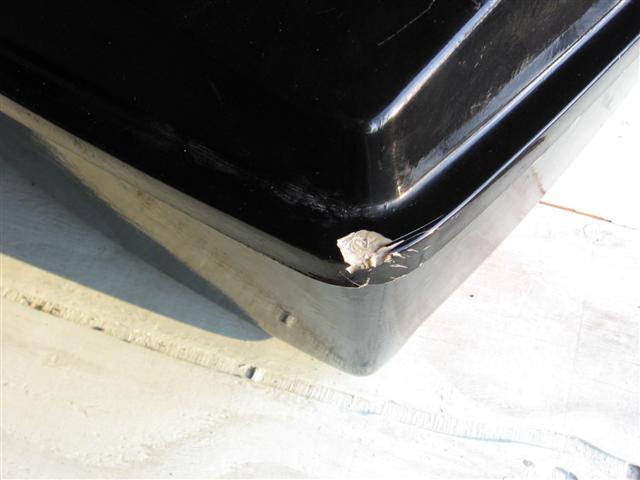
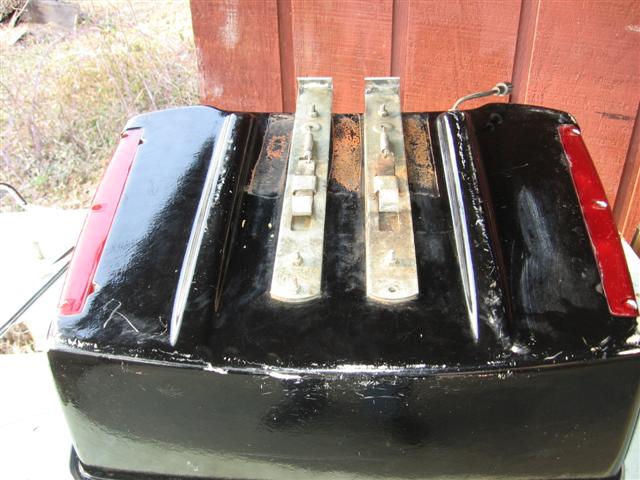
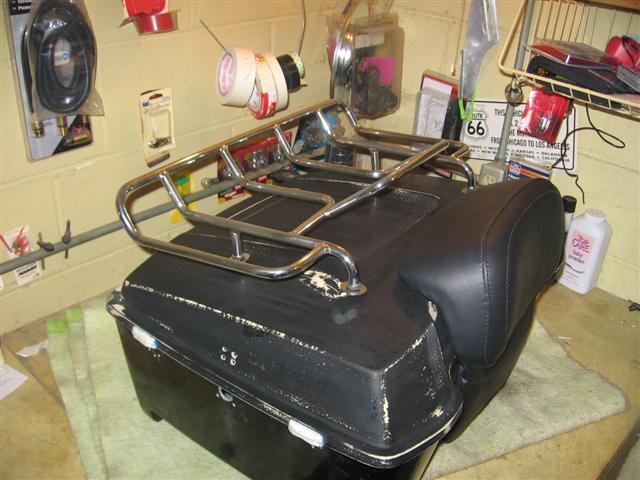
Having finally got the right box, it was time to go to work. I spent about six weeks off and on restoring it. One corner on the lid needed some fiberglass repair but otherwise the top and bottom were in great shape. I had to install a new lock and gasket and also replaced the rivets on the lock and hinges with stainless steel screws and lock nuts. I also added latches as the newer packs now have. The older ones were not fitted with them and only used the lock to hold down the lid. Below are some pictures of what I did.
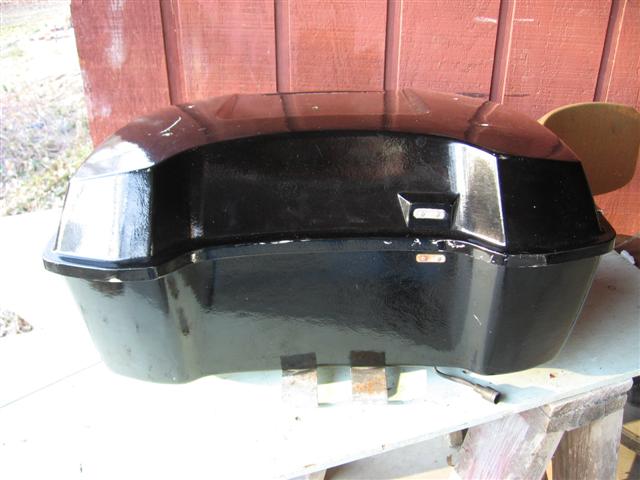
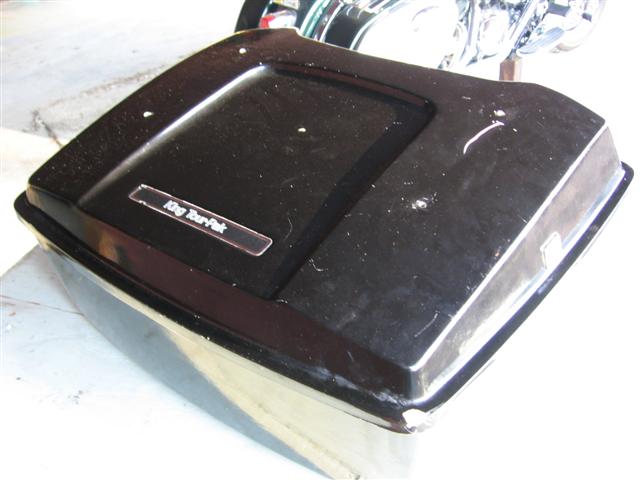
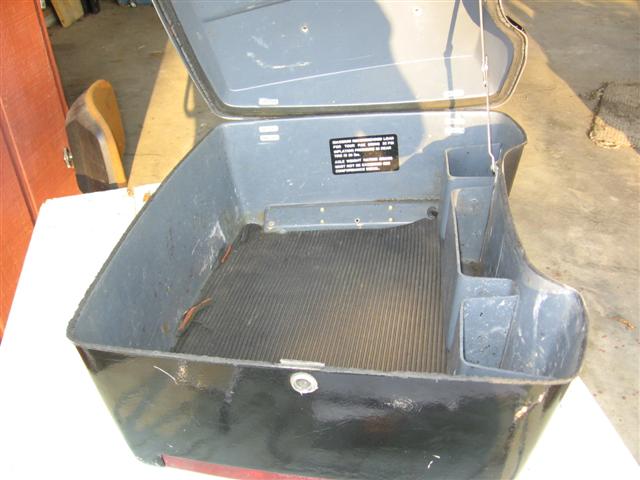
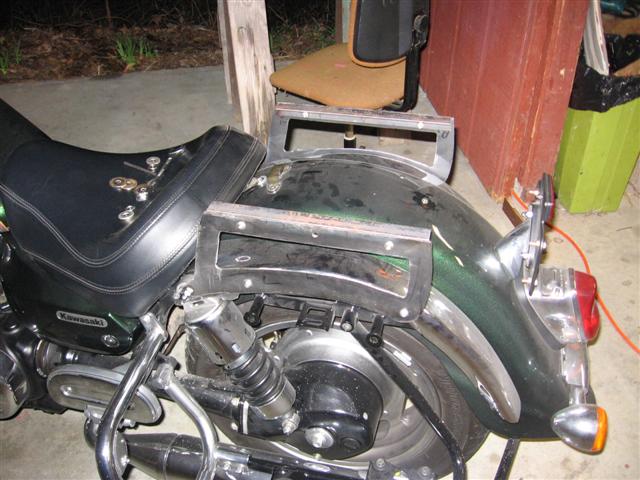
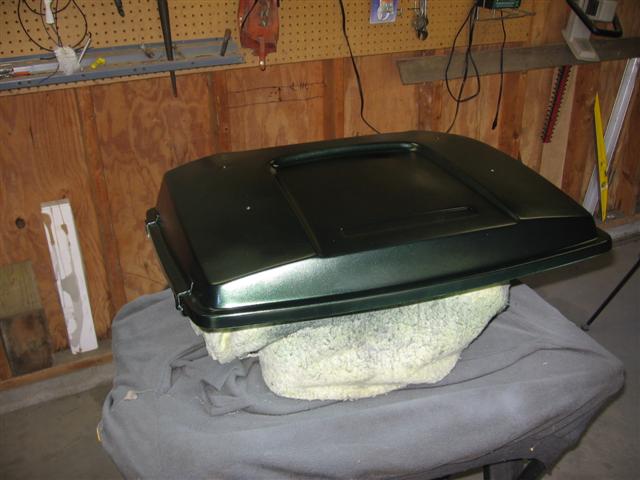
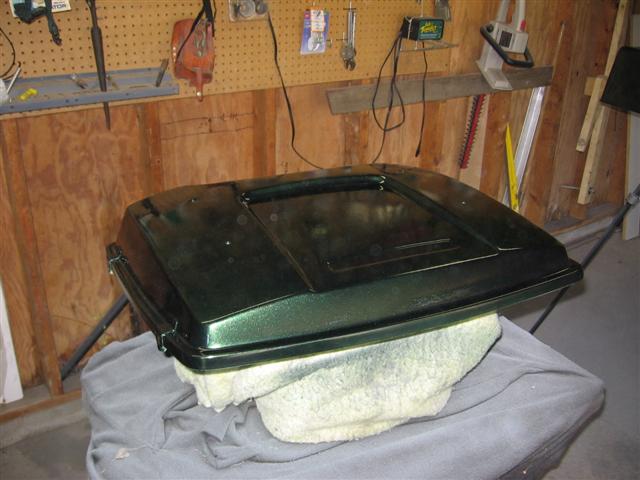
The Tour Pack as I received it:

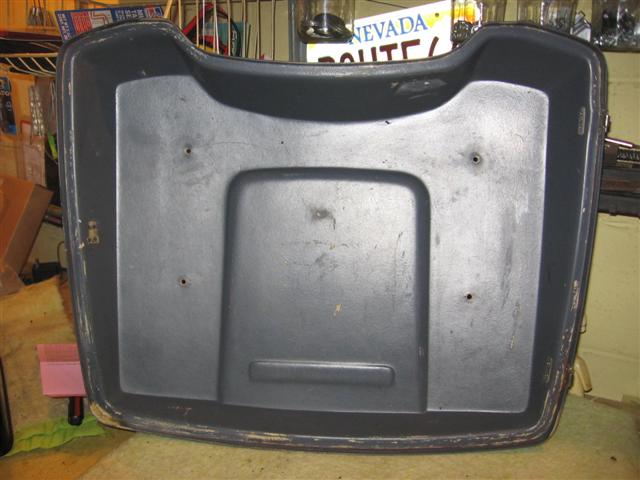
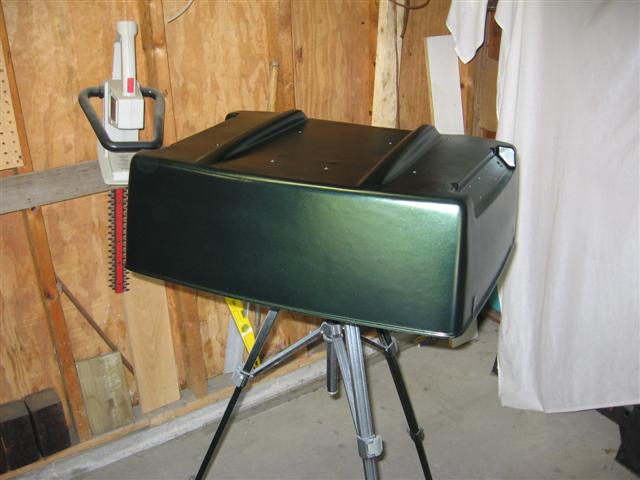
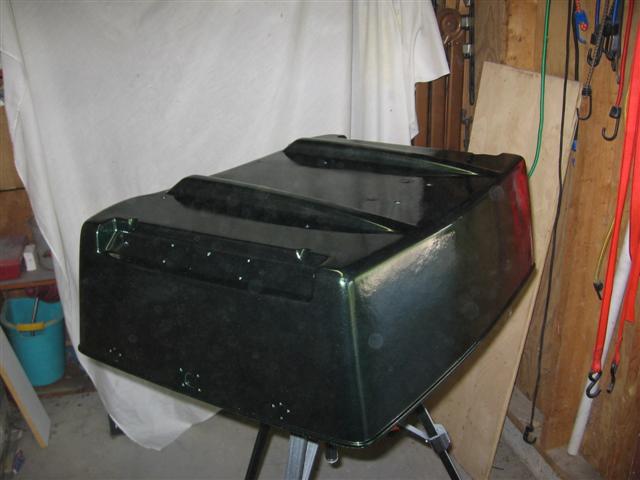
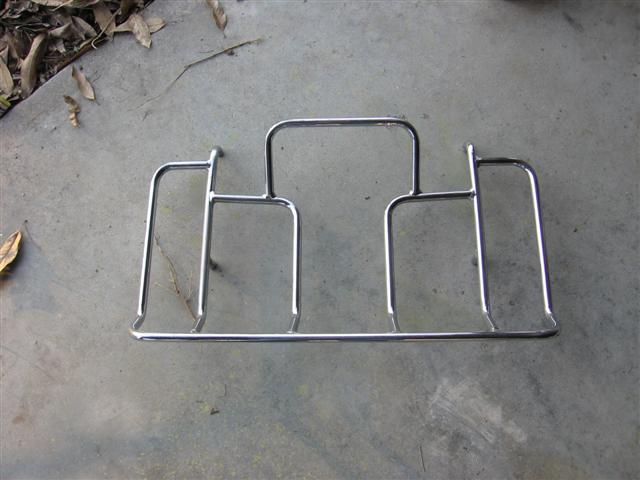 The luggage rack was also included!
Restoration.
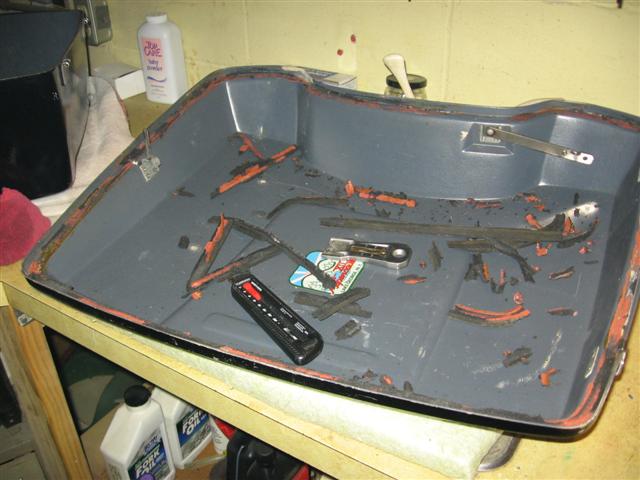
First I removed the old gasket which was totally shot. I scraped off as much as I could of the old gasket with a knife and then gasket remover did a good job of removing the remaining rubber and old adhesive.
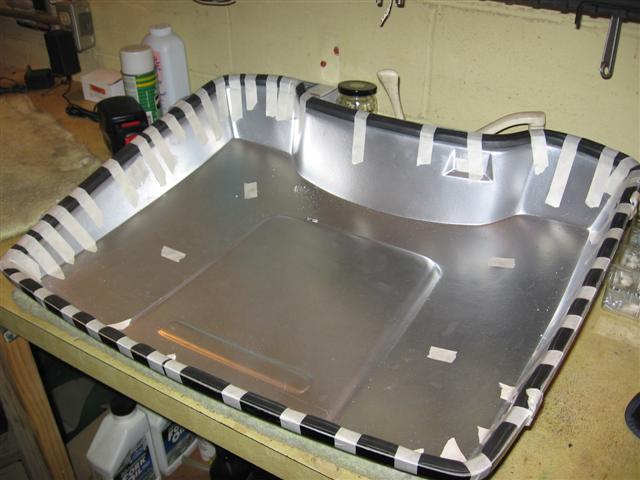
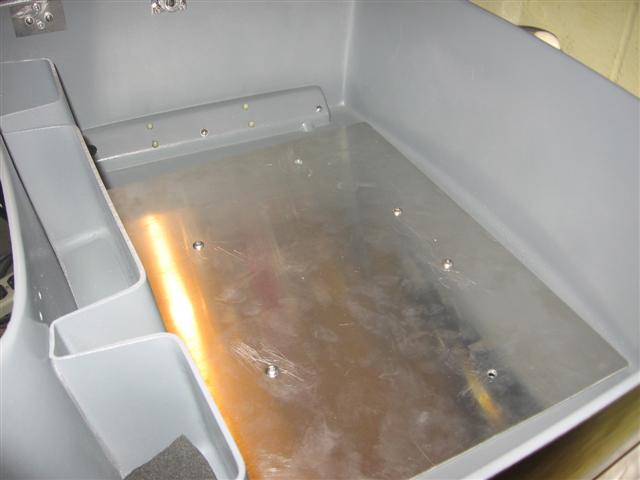
I bought a new gasket from the HD dealer. It comes with an adhesive backing strip which is worthless. I used a good contact glue to attach it. The corners are a problem as the gasket wants to pull away but using this method and leaving the glue to cure overnight solved the problem. To install the gasket, start at the front middle with the center of the gasket strip and work your way around to the back where the two ends join. You'll have to stretch the gasket a bit in the straight sections to make sure you have enough length. Practice once with the adhesive backing and you'll get a feel for how much to stretch it. You can then just strip it off again and install it permanently with the glue. BTW, the silver paint on the inside was a big mistake. I thought it would look cool but it took ages to dry (Rustoleum) and every time you touched it, you got silver on your fingers. I ended up painting over it with a good grey color close to the original color.
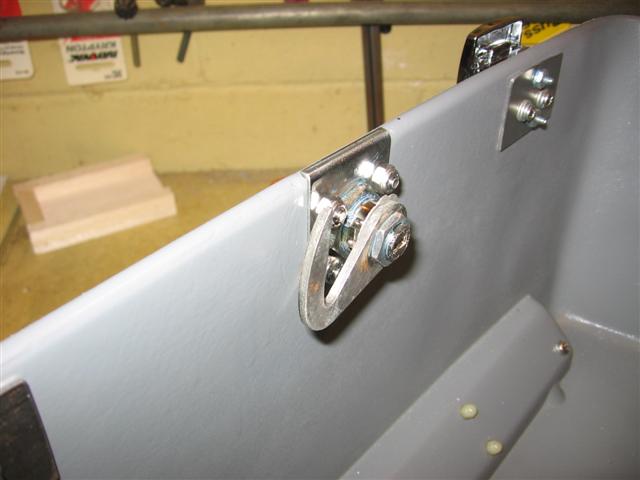

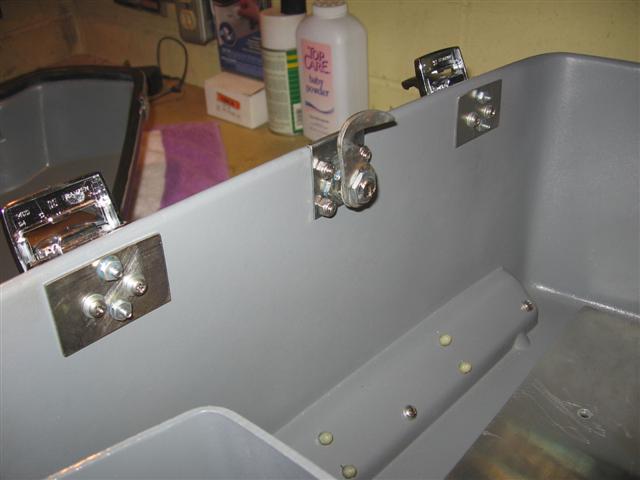
Luckily all the pieces for the locks and hinges were included and all I had to do was buy a new lock and clean up the plates and latch and hinge components. I made a face plate for the lock to better secure it as the hole had been wallowed out by the old lock. I replaced all the rivets with small stainless steel bolts and lock nuts (Ace Hardware has a good selection of all you'll need) and added the two latches which I bought at the HD dealer. I also made larger backing plates for the latches and hinges to help distribute any stresses in the fiberglass. The HD backing plates were fairly small and it seemed a simple thing to do to at least reduce any possible cracking.
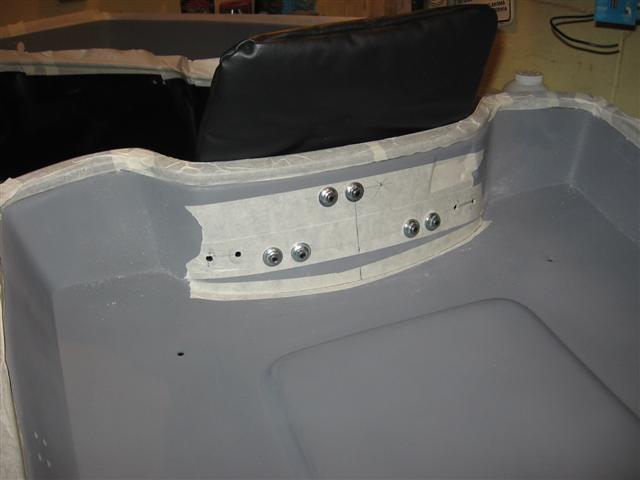
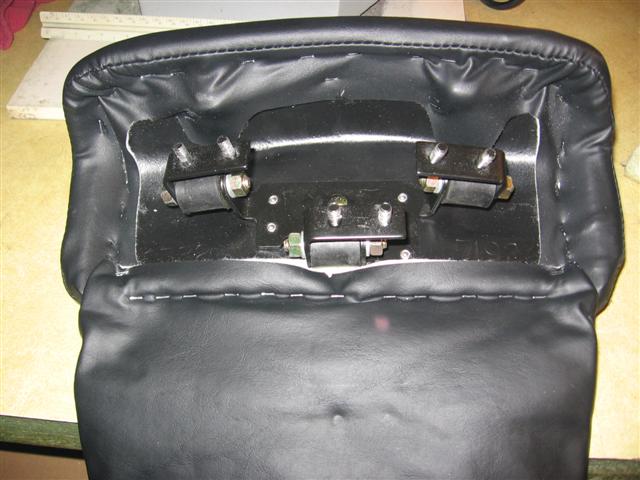
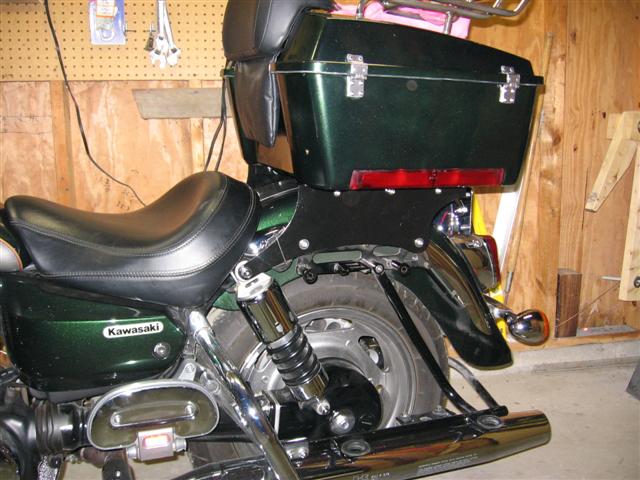
The next item was the chopped tour pack back rest installation. I bought one off Ebay which was almost new and in excellent condition. The HD dealer, however, did not have a hole template I could borrow as all the chopped tour pack lids are predrilled. I took some measurements on one of his bikes and was able to get it installed correctly. I first made the mistake of drilling the upper two sets of holes with the brackets turned to the outside. I turned the brackets around as shown in the lower picture and this did not put as much stress on the curved fiberglass lid section. I just filled the wrong holes with epoxy.
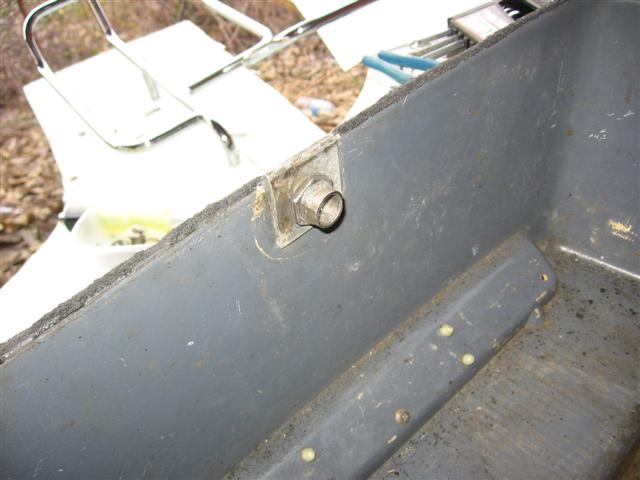
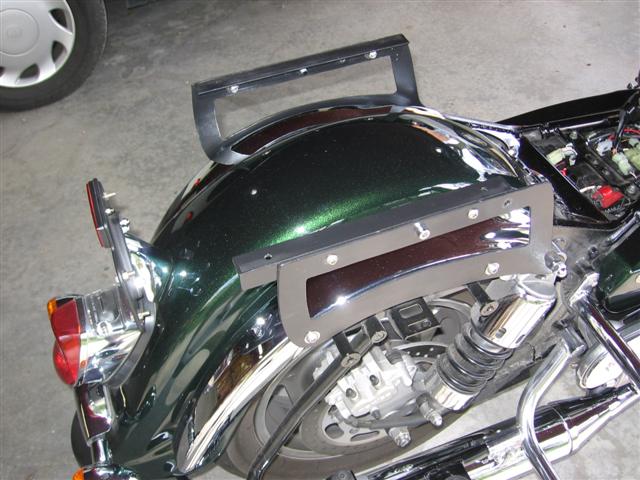
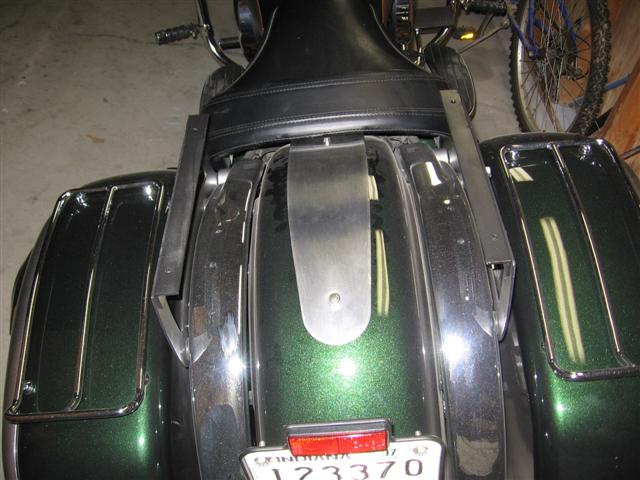
I bought a piece of 1/8" aluminum plate 17" x 15" for the inside. The bottom of the tour pack is not flat but has two ridges as shown above in one of the pictures (the paint pictures below also show what I mean). I had planned to just bolt the bottom of the tour pack to a flat plate connecting the brackets on either side of the fender (see below) thinking the bottom was flat. However, the ridges would not allow this. As it turned out, I lucked out since the ridges on the bottom of the tour pack fit exactly between the brackets with a 1" angle piece bolted to them (see below). I bolted the plate to the brackets and thus all the weight will now be on the plate and brackets and not the fiberglass bottom of the tour pack. Had I tried to use the Wompus rack with the flat mounting plate, I would have had to come up with some other scheme since I would have run into the same problem.
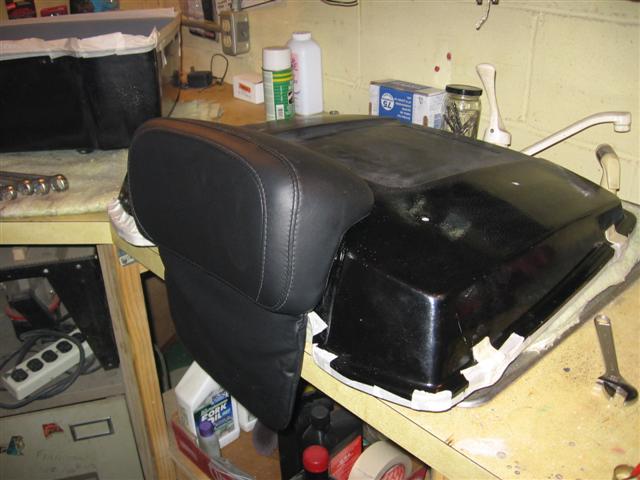
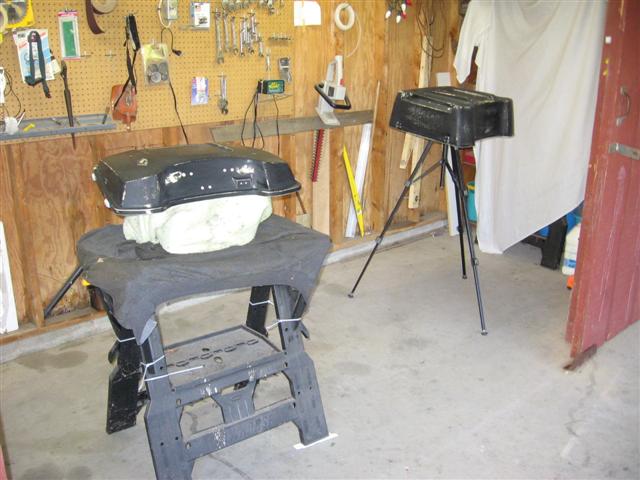
Trial fitting of the parts before preparing for painting.
Bracket Fabrication:

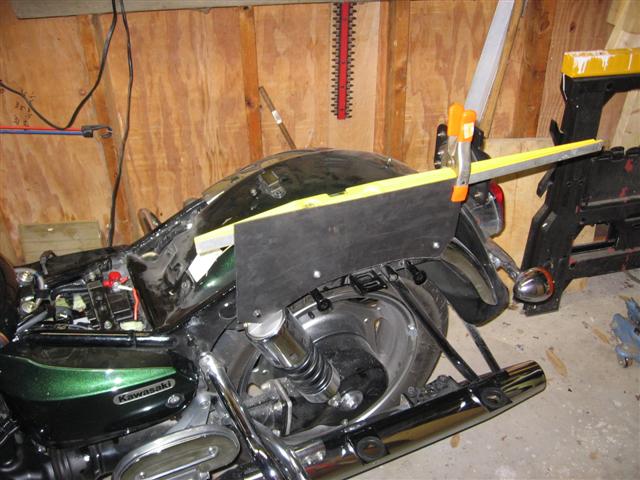
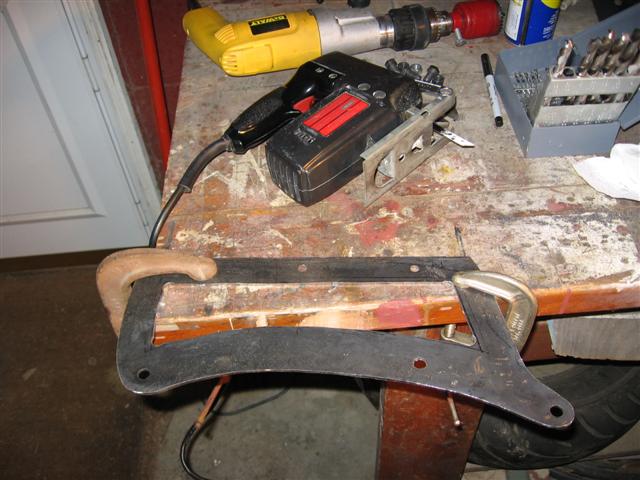

This series of picture shows how I prepared the bracket. I started with a cardboard template to get the hole spacing. I used the same bolts as the factory back rest. The brackets are made from 1/8" mild steel plate. I thought about stainless but it's too hard to work with and as it turned out it was the right decision anyway. I found that a jig saw with a metal blade will cut the mild steel plate quite easily. The bottom two pictures are the final brackets. I used two 12" pieces of 1/8" x 1" x 1" angle to set the tour pack on and as I said above, the two ridges in the base of the tour pack fit right between them so I got lucky. Unfortunately, the brackets are not useful in the end as the tour pack ended up about 2-1/2" too far forward. I thought I had it right from sitting on the bike and moving the pack to where I thought it should be but once I actually rode with it on, it was way off. I also did not allow enough for the thickness of the back rest which I only bought after I finished the brackets. I'd suggest making a plywood template which should be strong enough to fix the pack to and ride with to get the final position tuned in. I fixed it temporarily by moving the angles back but it now looks terrible.
I came up with a new design and will make them:
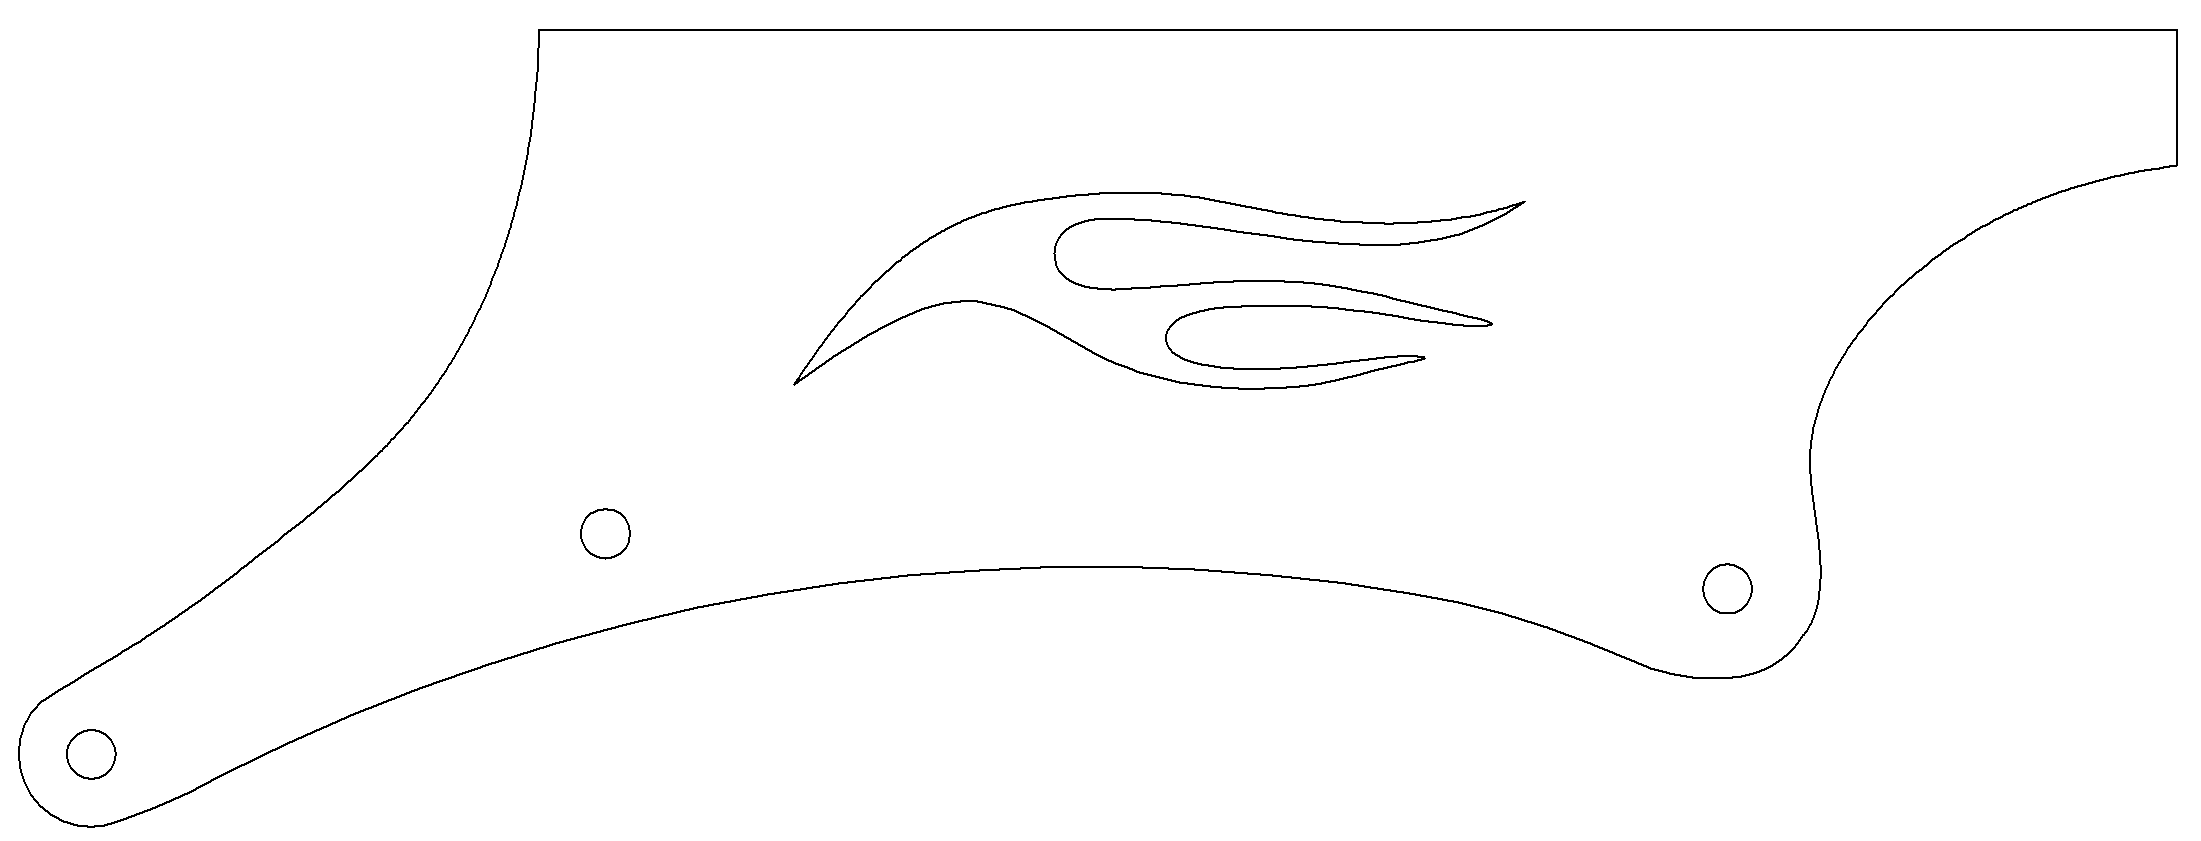
I made ones out of mild steel plate for now. Our fab shop at work is getting a new plasma cutting machine this summer and as part of the breaking in and training process will make me ones out of polished stainless steel (including the flame cut out!). I've posted links to drawings of the bracket at the bottom of this page.
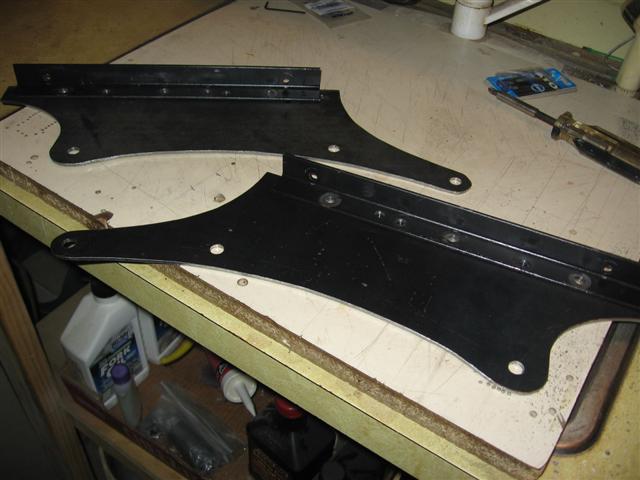
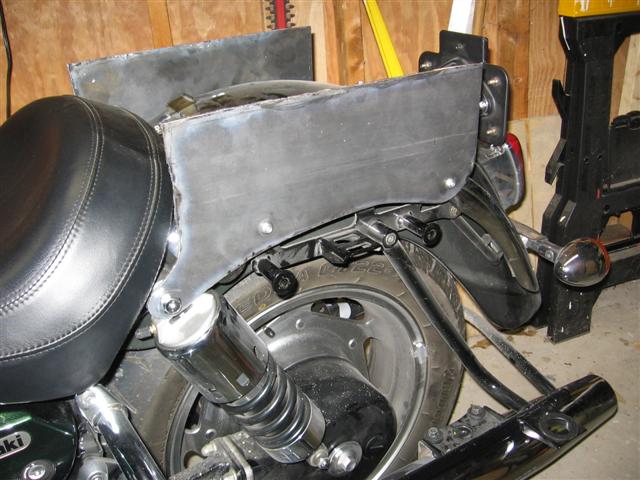
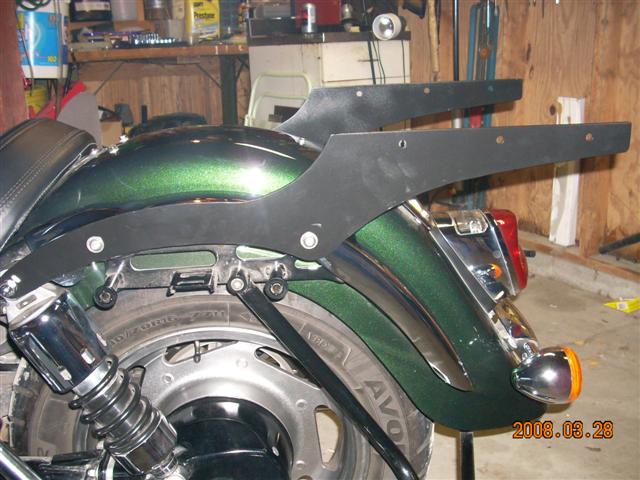
These are the new brackets. Much better look until I get the SST ones. I also reduced the height of these brackets by about 1/2" and with the saddle bags on it looks a lot better.
Painting:
Painting was the part I was most apprehensive about and is the operation that makes or breaks the look of the tour pack. I had never done this before and was worried about screwing it up and having to redo it. I couldn't afford a professional paint job and so was stuck with doing it myself. I ordered the paint from Colorite on the web. They sell it in rattle cans or in bulk. They provide good service and they are happy to answer any questions you have if you call them. I called them a few times and got good advice. I had to use the rattle cans since I'm not set up with a spray booth, etc. I ordered 1 can of primer, 3 cans of paint and 2 cans of clear coat (~$160). This was sufficient but if I did it again, I would get another can of primer. I used all the primer but wish I had a little more to get really full coverage. Three cans of paint is plenty, I still have about 1/2 a can left and two cans of clear is also more than enough. They provide good instructions with the order and, as I said before, are happy to help if you call them.
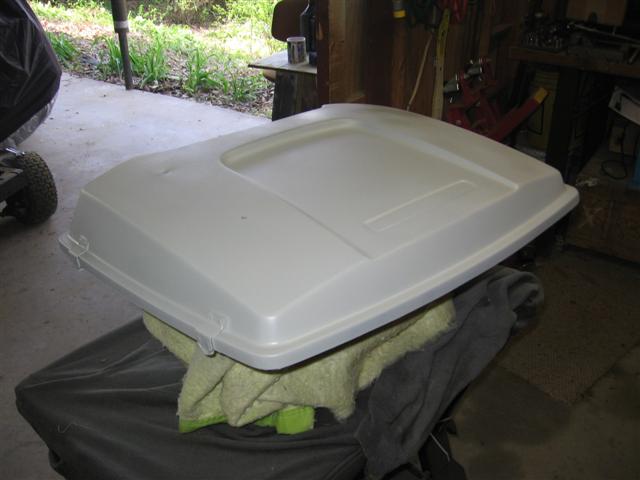
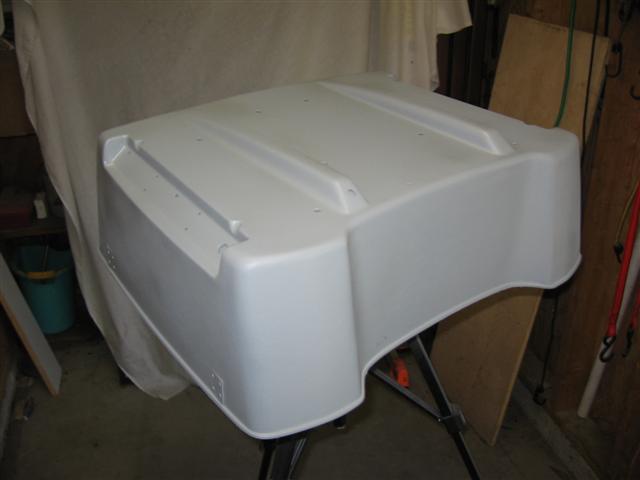
After filling a few scratches and fixing one damaged corner with a fiber glass repair kit, I sanded the pieces with 600 grit wet-dry paper to take the old clear coat off and smooth out any imperfections. Right before painting, I wiped all surfaces with a clean cloth wetted with alcohol. Painting was easier than I thought. I set everything up in my shed since I don't have a garage and luckily it was an almost windless day. I followed the instruction that came with the order and the primer and paint went on without problems. I waited the recommended time between coats. One thing I did notice is that keeping the nozzle about 10-12" away from the surfaces will not give good coverage with the cans. With the primer and paint I moved a little closer and I found that going back and forth over each surface 5-6 times WITHOUT STOPPING will cover pretty well. Just don't go overboard. Always keep moving and start spraying about 3" off the surface and then move over the surfaces. I put on about 2 coats of primer and 3 coats of paint.
If you can, get an extra can of primer, paint and clear coat for practice. Colorite recommends doing a spray-out panel to get a feel for how the paint covers and determine the color. I did a small panel but did not really get a feel for the coverage and how much to spray. I kinda picked that up as I went along. I started off fairly feebly with the primer and paint but you can be more aggressive than you think. The main thing is to keep moving. One thing I did was use a full can to spray the tops. You're spraying downwards and I figured I don't want a near-empty can could will such air and end up with splotches.
Applying the clear coat is a little different as I learned the hard way. I used the same technique as I did for the primer and paint and that was a mistake. The clear coat goes on a lot thinner and I ended up with a few runs on the corners. Nothing too visible but I know they are there. When applying the clear coat, use the same method but half the passes you used with the paint. It's a lot thinner and will run more easily. Also it will pick up a lot more dust and crap in the air and you'll end up with some crud on your work. Some of them will buff out but I still have a few dust particles which show up close but overall they're not that visible.
After letting things dry for a week, I called Colorite about what to do next. They said to sand it all (I used 2000 grit wet-dry paper with plenty of water) and then buff it with a polishing compound. I was a little dubious about this. I just spent ages restoring and painting and now I was supposed to sand it! Well, I did and it ended up looking all dull and like crap. I thought I had messed up a lot of good work. I did the underside first, however, just in case since you don't really see that. However, I got some Turtle Wax polishing compound (not the rubbing compound, it's a white paste and comes in a white can) at the auto parts store and with a lot of elbow grease, it came up shining and actually looks better than I thought it would. Colorite even said that after about 7 days you can sand down the runs in the clear coat. I did sand a little but figured I'd leave well enough alone. The runs are hardly noticeable now and, hey, it's a rattle can job and I can live with it.
Electrics:
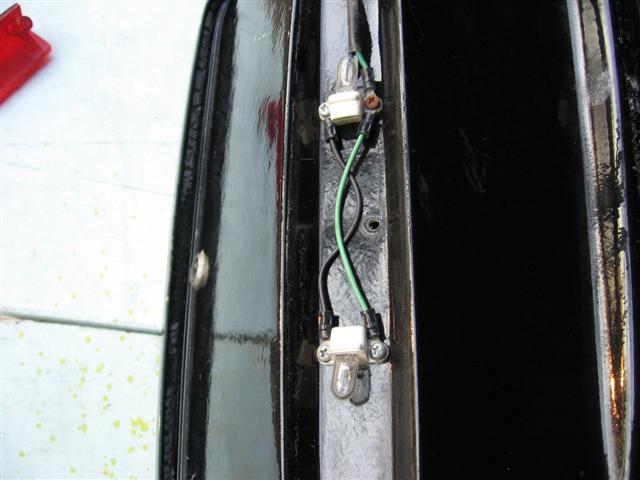
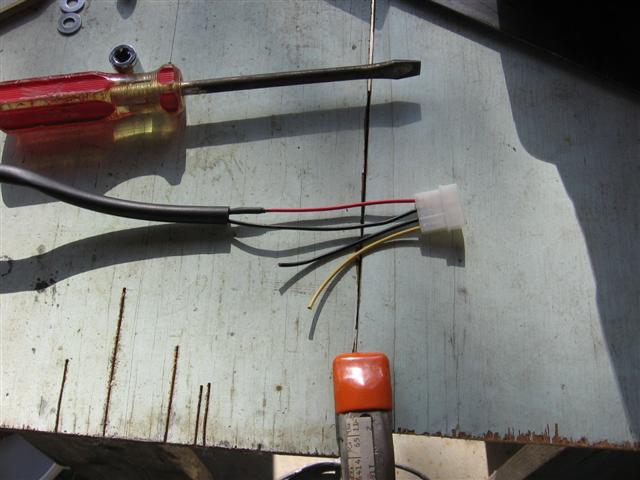
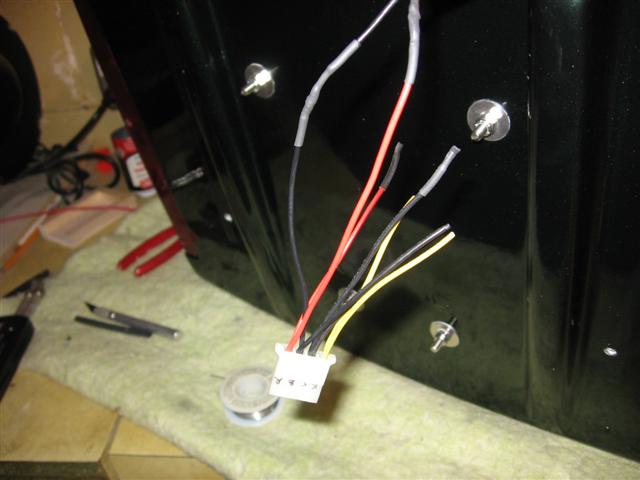
The pack came with side running lights. I wanted to have those working but also be able to disconnect them without having to cut wires every time I want to take the tour pack off. I used computer power connector male and female plugs to make the connections. One advantage of this is that if I ever want to hook up other lights such as brake lights, the wires are already there and can be connected via the same plugs. I connected the lights to the running lights under the seat and taped everything up to make it weatherproof.
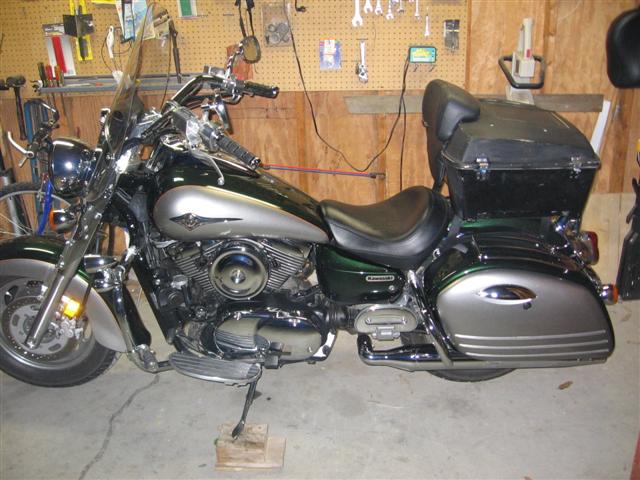
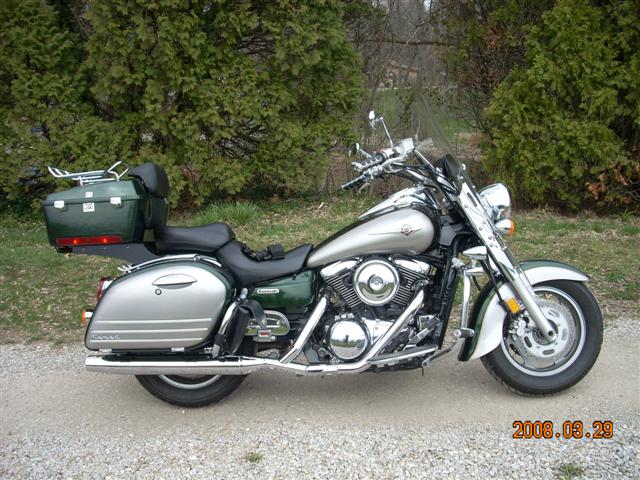
Finished:
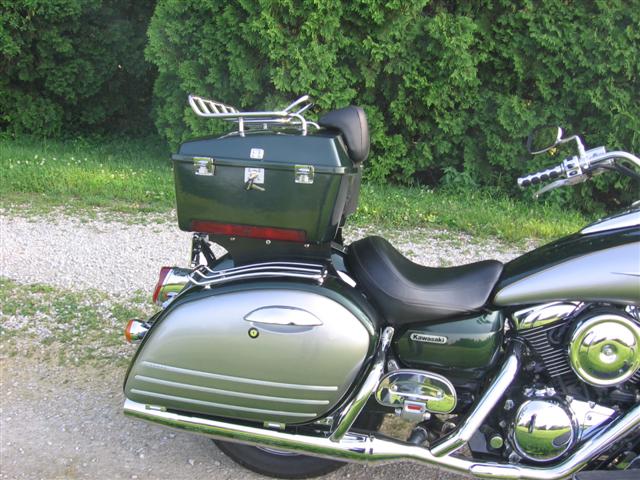
The tour pack finished and on the bike with the second generation brackets! The color matches very well and overall, I am really happy with how it turned out. Once I get the new SST brackets made, it will be perfect.
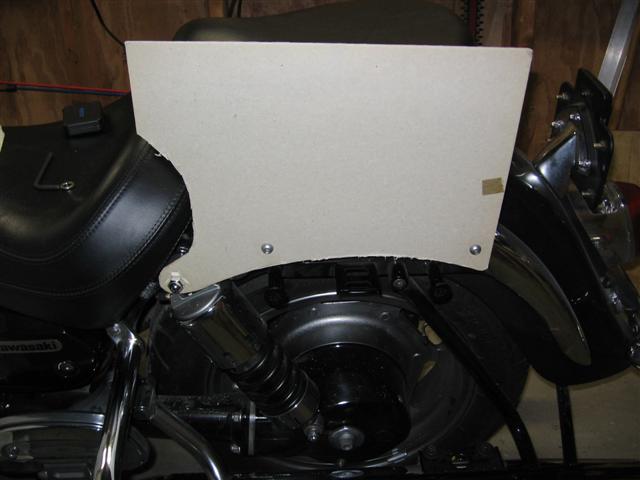
Fender Bib:
One other thing I experimented with while I was working on the tour pack was making my own fender bib. I saw some good designs on the net which are really not hard to make. I made this one out of 25 gage aluminum which I could cut with tin shears but the metal is really too weak and flimsy and I didn't spend a lot of time polishing it. I will have our shop make one from polished SST when they do my brackets with a flame cut out to match. I figure a 14-16 gage SST sheet should be strong enough and bendable enough to fit the curve of the fender. Right now I'll just keep this on there to cover up the bolt holes.
Bracket Files:
If you would like a drawing of the bracket, below are links to the files. If you have Autocad, the first link will get you that file. I also added two links to pdf files for those that don't have access to Autocad. I printed the bracket in two halves to the pdf files. Make sure in the Adobe Acrobat print menu you select "None" for the print scaling option and it should print out true to scale. You'll have to cut and paste the two pages together. I checked my printouts (HP 960c Inkjet printer) against a tracing of the bracket and everything lined up. I used 5/16" holes to mount the brackets to the fender rail but they are a little large I think. I suggest you print it out and check and adjust before making the bracket. You may be able to use a smaller hole, at least for the two rear bolt holes. The one that mounts to the shock bolt will have to be 5/16" as that bolt is larger.
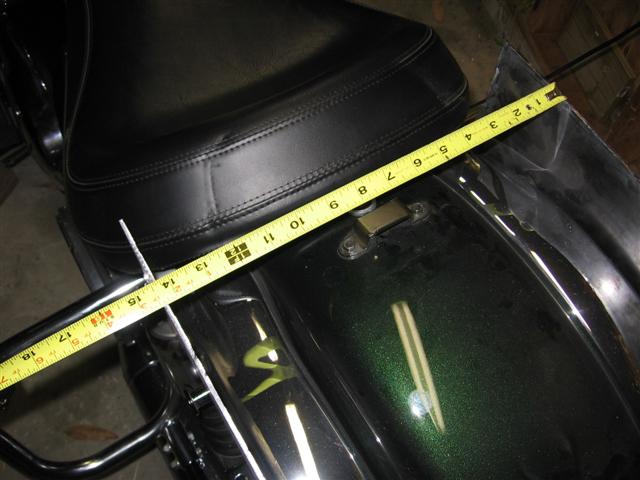
BTW, as a reference, now that I have the pack where I like it, I measured the distance from the center of the ignition switch on the dash to the center of the back rest and it's 37-1/2". This may give you a starting point at least for lining up the pack. I'm 6'-1" with a 32" inseam if that helps any!
Solo Bracket Autocad File PDF File Solo Bracket 1 PDF File Solo Bracket 2
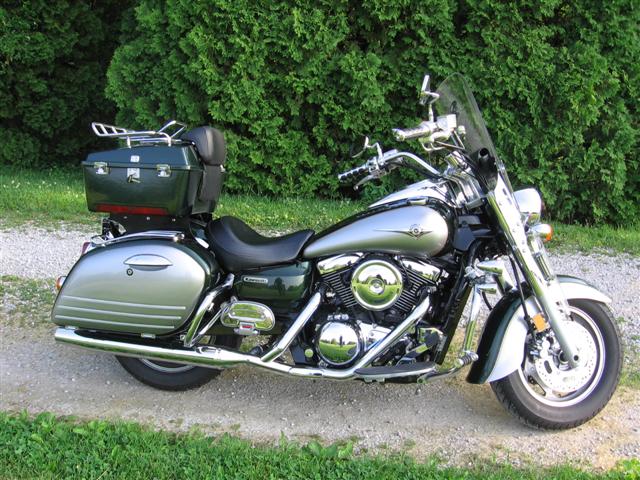
Brackets Update 03/2008:
Just as an experiment, I also made two brackets to move the tour pack back to allow installation of the passenger seat. I used the Scootworks bracket layout and my solo brackets to make a template for the two-up setup.
The final setup looks like this:
The drawing files
Long Bracket Autocad File Long Bracket pdf File