Clutch Rod Seal Installation:
After about 11,000 miles, I noticed oil dripping off the kick stand after riding one day. I cleaned it up and it stopped. After the next ride, however, it was back. I inquired about this on the VRF and several riders had the same thing happen to them. One possible problem seems to be the clutch rod seal is not installed properly or works loose. Rich posted excellent instructions on how to install a new seal or reinstall that seal on newer bikes. That turned out to be the problem on my bike. I took off the clutch slave cylinder behind the left alternator cover and the clutch rod seal was not seated properly or had worked loose and that's where the oil was leaking. I reinstalled the seal and it solved the problem.
I took the liberty of reproducing Rich's instructions and added some pictures of the process. It's not difficult to do and will take about an hour to complete:
If you'd rather do it yourself, it's not hard.
At about 3,000 miles, much to the amusement of my
Harley-riding friends, my Vulcan began marking it's territory. Wherever I put
the kickstand, there was a spot of oil. I could clean up the mess and leave the
bike for a week, come out to a clean garage floor, ride to the store for tacos,
and find oil in the parking lot.
In my case, the clutch pushrod oil seal had become displaced from the front
bevel gear housing. This has been a not-uncommon problem with recent 1600s, both
Classics and Nomads, so this is something to be aware of.
These instructions are for REPLACEMENT of the seal with a new PN #92049-1017 on
the Front Bevel Gear diagram in the shop manual, but if you have a new(er) bike
that is leaking, the original seal is probably good and just needs to be
reinstalled.
Don't be afraid... I didn't think to photo-document it because I really had no
idea what the problem was when I went in, but this is a 20-minute 2-beer job....
2 hours if you feel like burning a 6-pack
You can do this all on the sidestand, but a lift makes for a more comfortable
working position.
1 - Loosen the left front floorboard bolt.
2 - Remove the left rear floorboard bolt, and allow the floorboard to swing
down, or remove the front bolt and remove the floorboard (can be a PITA with
some highway bars).
3 - Remove the shifter levers. There should be dimples in the end of the shaft
to aid in realignment when reinstalling them... if not, use a black marker. When
you loosen the pinch bolts, be wary of any resistance after you feel that the
torque SHOULD have been broken... if the levers are not perfectly lined up, the
bolts will drag on the channel in the shaft and it will totally hose the
threads. GENTLY tap the lever back and forth on the shaft until the bolt turns
freely. The bolts must be completely removed to free the levers. My bike now has
two new bolts and fresh threads in the shift levers. 3 guesses why... first two
don't count.
4 - Loosen the 4 allen screws and remove the left side engine cover. Get some
Simple Green and clean the oil mess out of the cover.
5 - Pull the clutch lever in and hold it with a zip-tie. This prevents the
piston from being pushed out of the slave cylinder bore if you have to leave the
cylinder off of the bike for more than an hour or so.
6 - Remove the 3 bolts that hold the clutch slave cylinder to the case. The
slave cylinder is immediately behind the flywheel/stator cover, just above and
behind the kickstand mount.
Remove the cylinder and tie it off to avoid putting strain on the hose, just as
you would with a brake caliper. There is a plastic spacer between the cylinder
and the case. Make sure it doesn't get flipped over or omitted on reinstall.
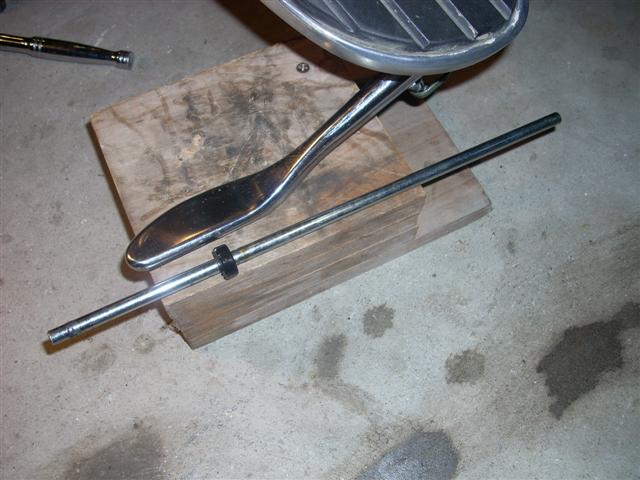
7 - Remove the pushrod. Note that the pushrod is round on one end and cupped
on the other... it must be reinstalled the same way.
8 - Pry the old seal from the cavity in the case.
9 - Place the new seal against the opening in the case and gently seat it, then
using a fender washer or other flat surface like the bottom of a socket, seat it
flush and square in the case. There is no lip inside the case, if you push
too far, it will fall in and ruin your weekend!!!
10 - Grease the ends of the pushrod and reinstall it through the seal.
11 - Reverse steps 1 to 7 to put everything back together. I also put some
grease on the pushrod where it contacts the seal and on the ends.
It literally doesn't take much longer to do it than it did to read this post.
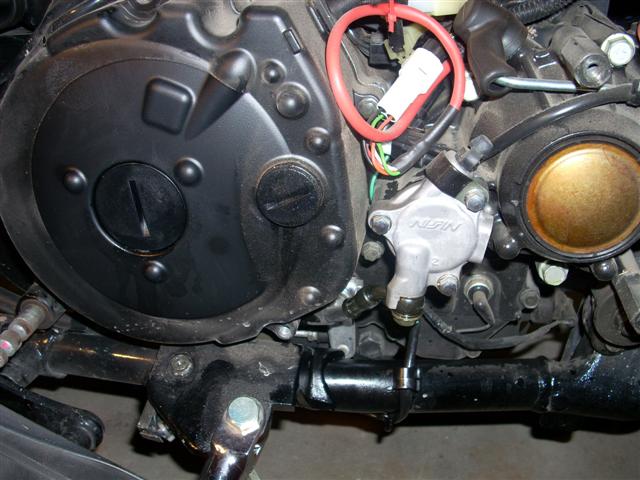
Left Alternator Outer Cover off. The red wires are the Speedo Healer wires.
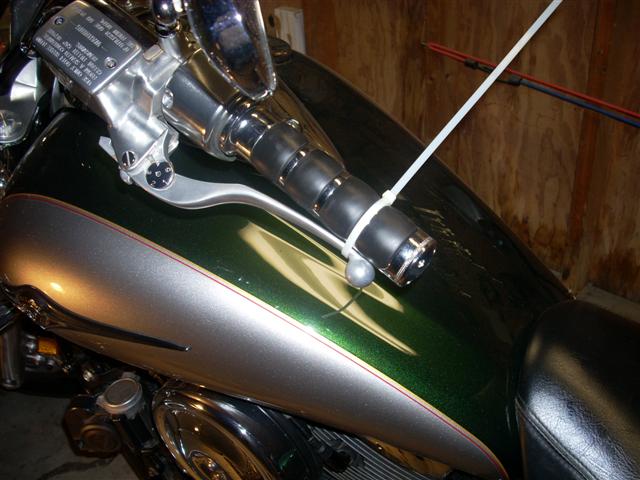
Zip-tie the clutch lever to stop the piston from extending.
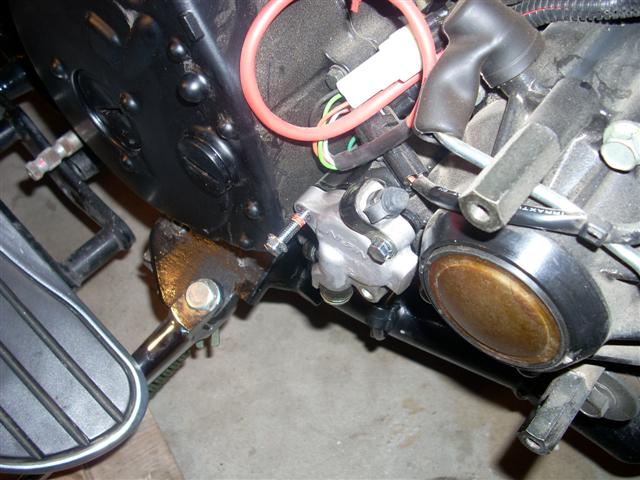
The three bolts for the clutch slave cylinder were loc-tited. I added blue loc-tite when I reinstalled them.
The push rod and seal. Note that the seal is not seated and loose which was why I had the leak..
When I pulled the rod out, the seal came with it. It had worked loose or was not installed properly.
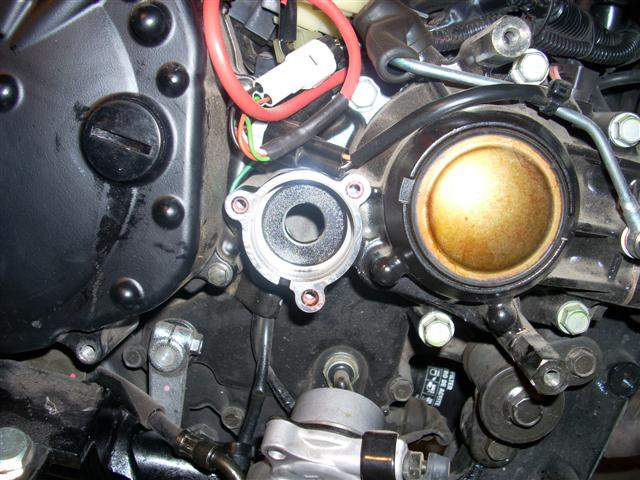
This is where the seal is supposed to sit.
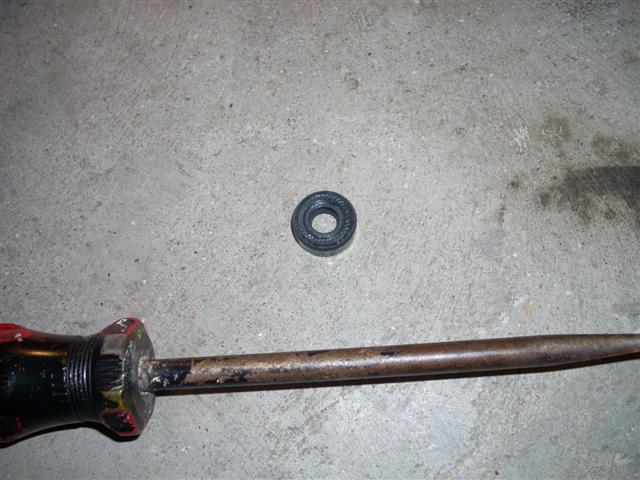
Just a pic of the seal.
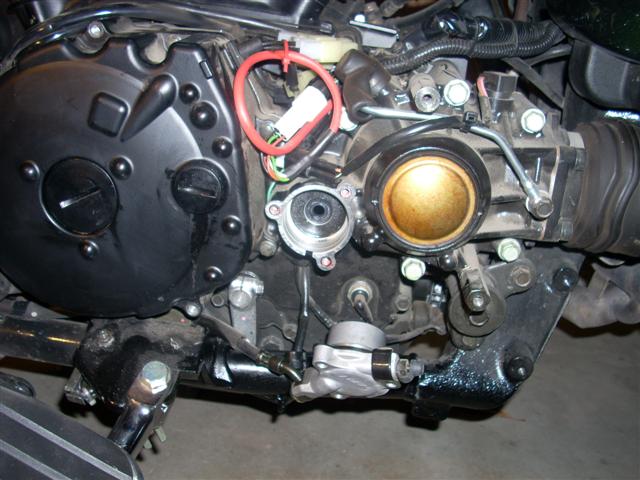
The seal installed. I seated it and then tapped it in with a socket. As Rich said, there is no lip so don't push it in too far!
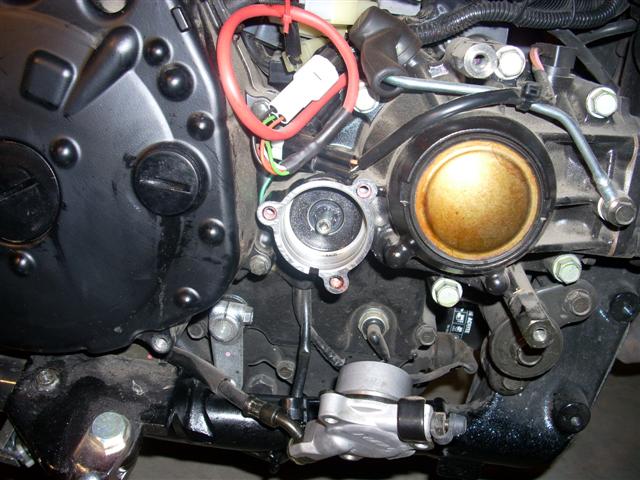
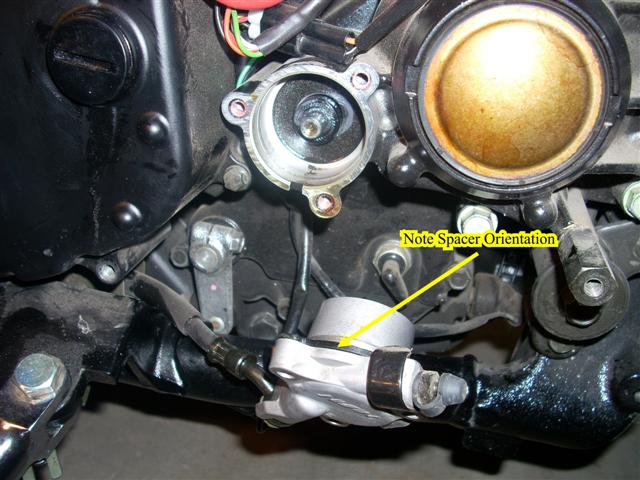
Pushrod installed. The dimpled end must point out. When you reinstall the slave cylinder, there will be a gap. The three bolts will snug it up and torque them to 61 inch-lb. The left outer alternator cover bolt torque is also 61 inch -lb.