Front Brake Rotor Replacement (Update 07/2006):
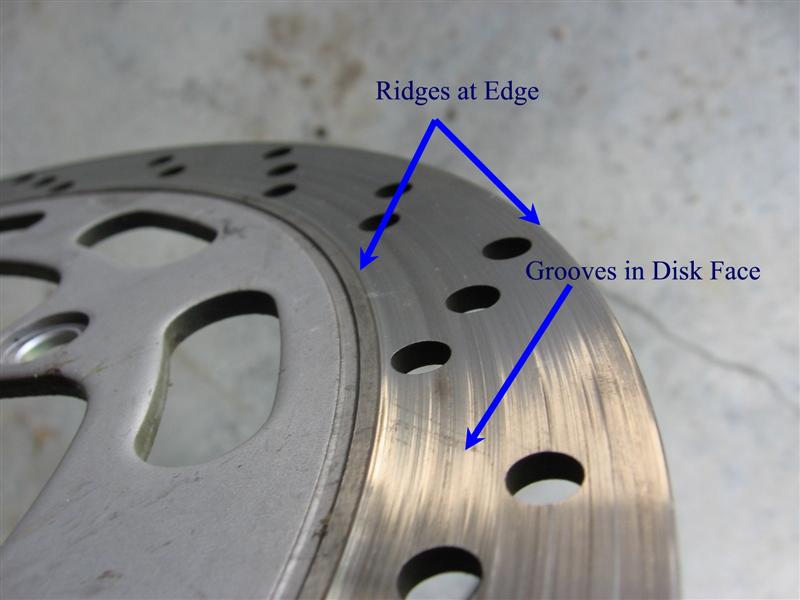
Checking the brake rotor recently, I noticed definite lips or ridges on the outer and inner edges
of the braking surface and the disk was badly grooved and rough
Checking the thickness of the rotor, I found that it was below spec. The manual states 5 mm (0.20 in) as the minimum
service limit and on the rotor the minimum thickness is engraved as 4 mm. Mine was at 0.17 in or 4.3 mm.
I figured it was time to change it.
I checked the OEM disk costs at Bikebandit and Partsfish and they cost around $325. I researched online for alternates and
found the EBC rotor and brake pads were the most recommended. Ron Ayers had the best price at around $145 for the
rotor and $25 for the pads. The EBC rotors are floating rotors which are supposed to result in better breaking. The
difference to the OEM disk is that the EBC rotor consists of an inner mounting disk and the outer brake rotor. The two
are connected by rivets or circlips. My limited understanding of this is that this allows the brake rotor to move
laterally (float) against the fixed inner mounting ring, centering the brake disk in the caliper to make up any misalignments
or movement during braking. The OEM disk is basically a solid disk. However, the construction of the brake by
Honda is such that the caliper can move in and out against the caliper mounting bracket fixed to the fork and
basically achieves the same effect with the fixed OEM disk, I think! Correct me if I'm wrong, please.
Bottom line is that the reviews all stated better braking with the EBC and, importantly, the price was less than half of the OEM.
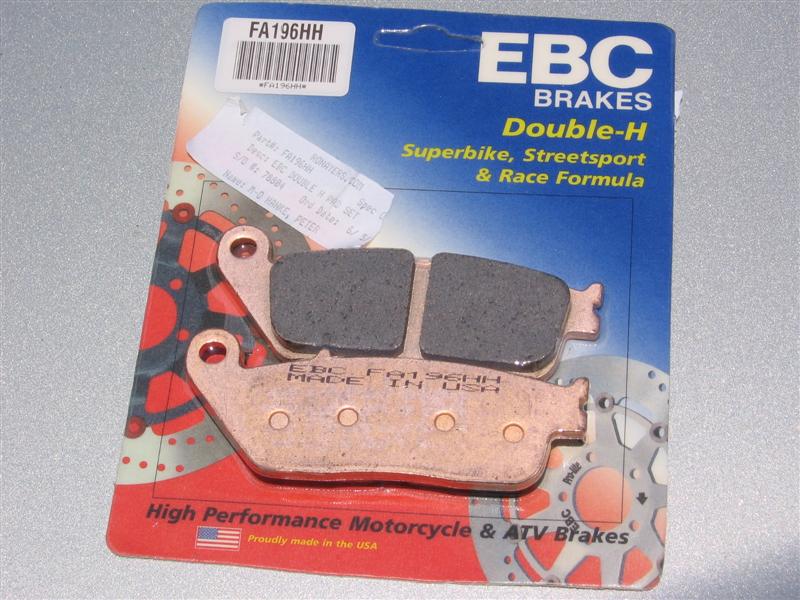
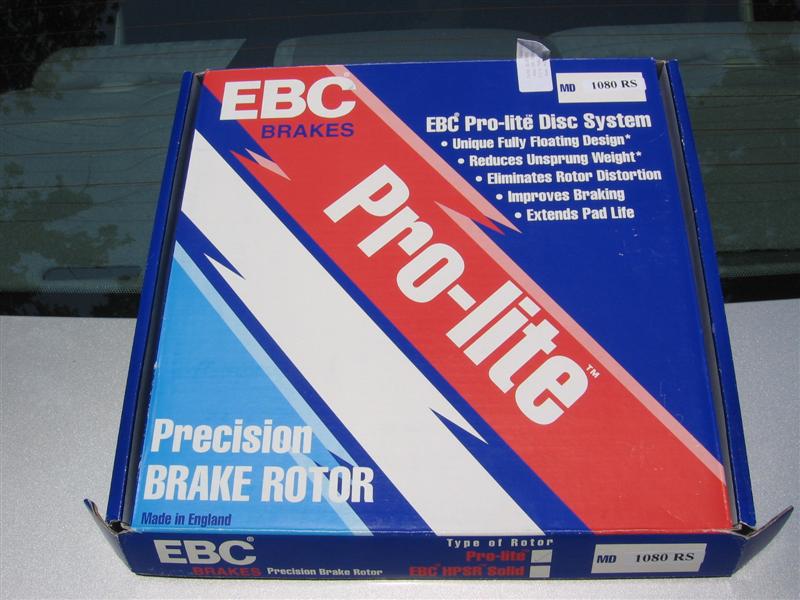
So I ordered the rotor and pads. Part numbers are FA196HH for the pads and MD 1080 RS for the rotor.
Installation was fairly simple:
Remove the front wheel and exchange rotors. The fit is exact. The manual recommends getting new bolts to mount the rotor.
It refers to them as ALOC bolts. Someone on the web referred to this as "Apply Loctite Or Crash" bolts. New bolts do come
with a locking compound but I reused the old ones with blue loctite. The choice is up to you. The bolts are about $5 apiece.
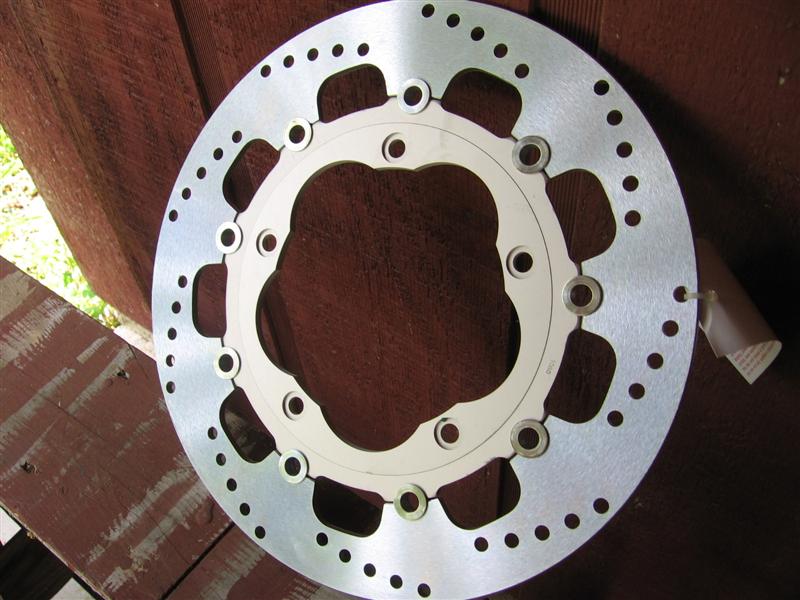
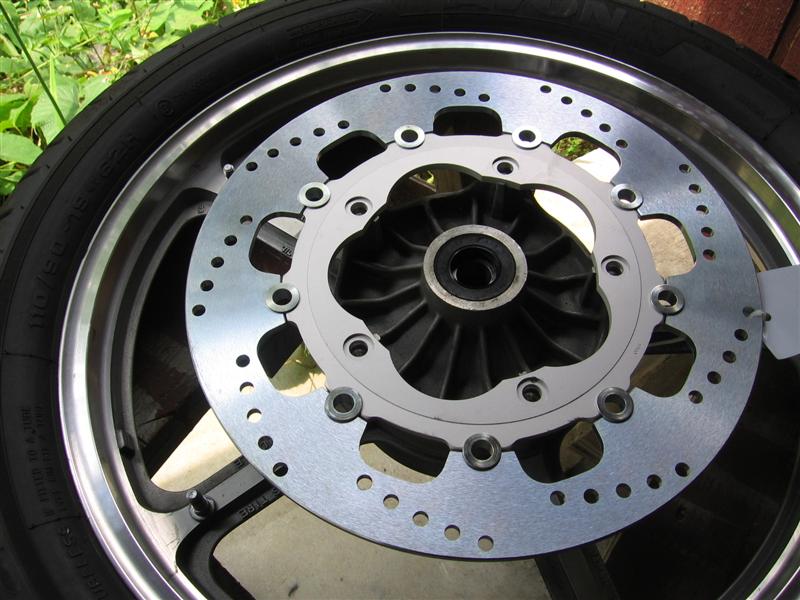
New EBC rotor. Note the two component/ring assembly.
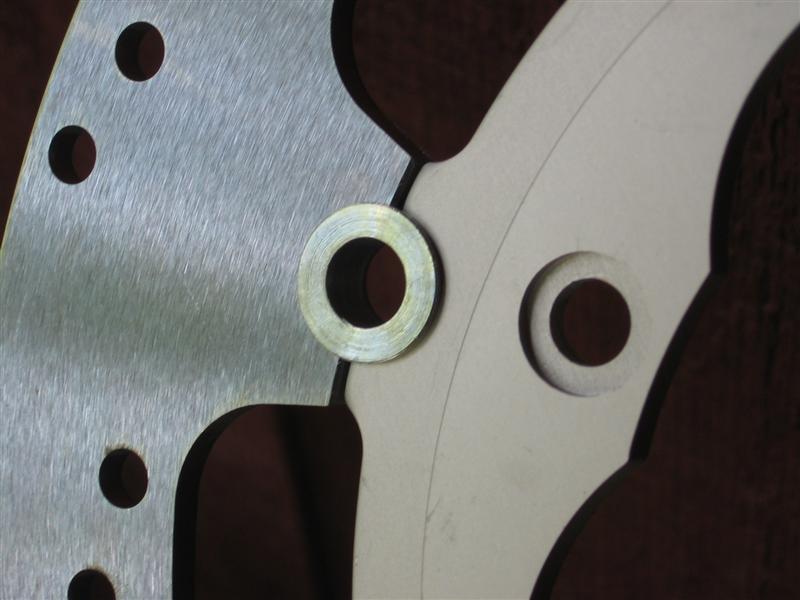
Close-up of the rivets or Circlips connecting the two parts. More on that below.
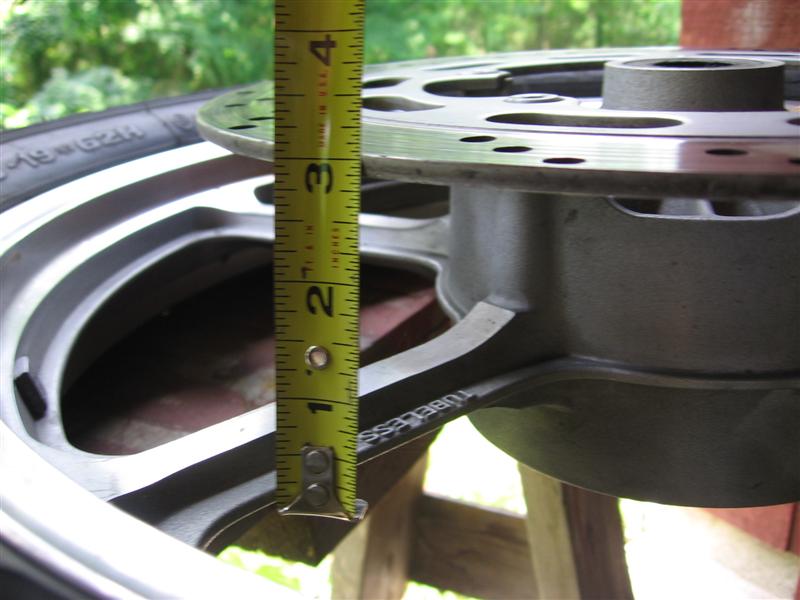
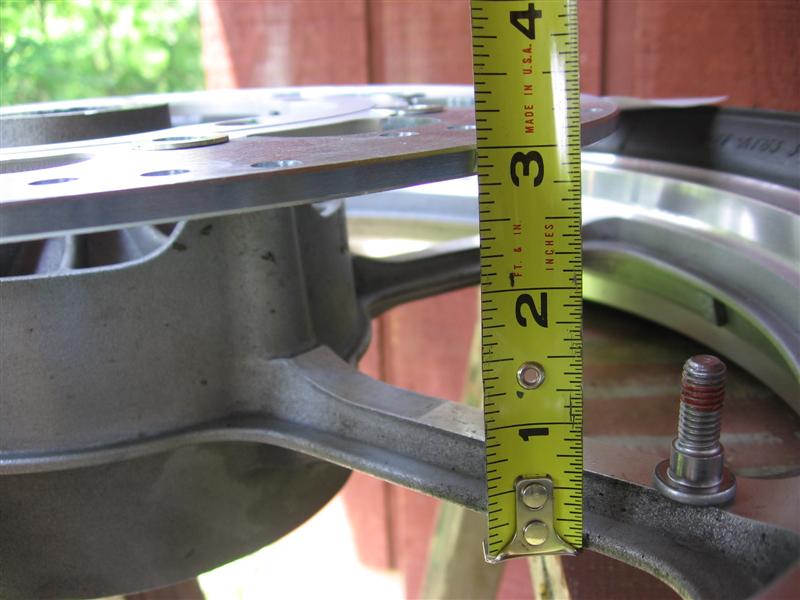
This it the OEM rotor. Just for grins I measured the off-set from the wheel.
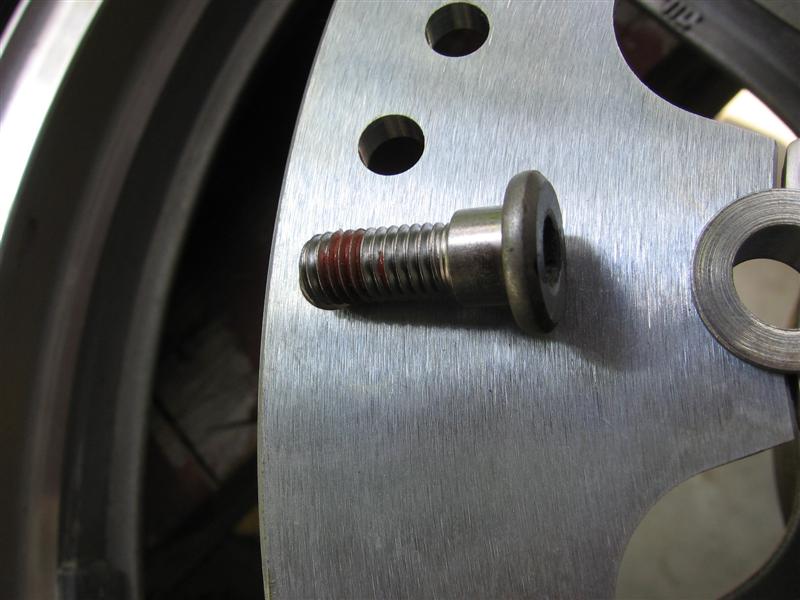
Rotor bolts. Note the loctite. Like I said, I reused them with blue loctite. I'll check them periodically but
so far no problems.
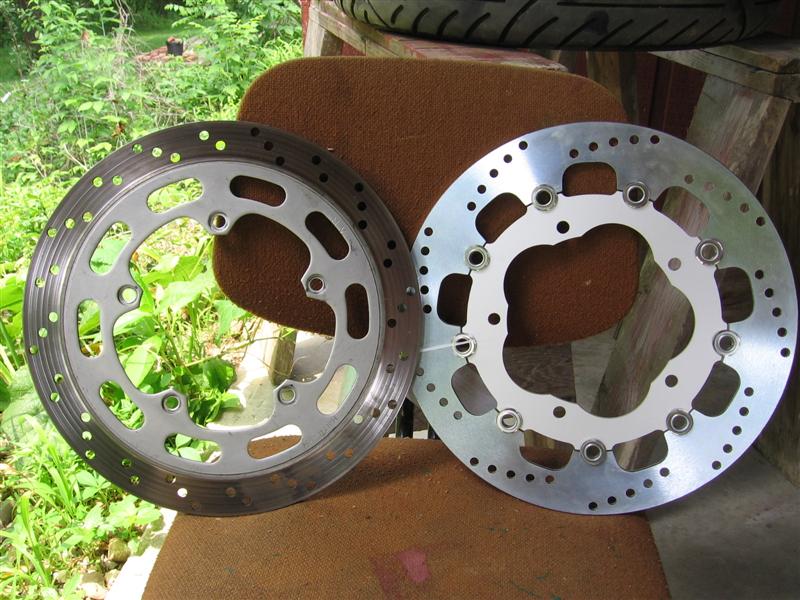
OEM and EBC rotors.
EBC rotor fits exactly and mounts in same locations vs. the wheel.
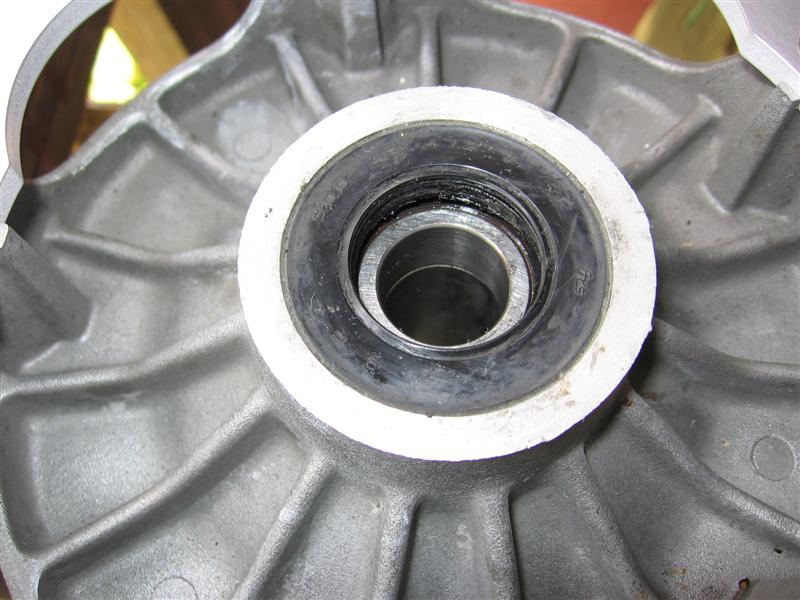
While the wheel is off, check the bearings and dust seals.
The next few pictures show the replacement of the brake pads:
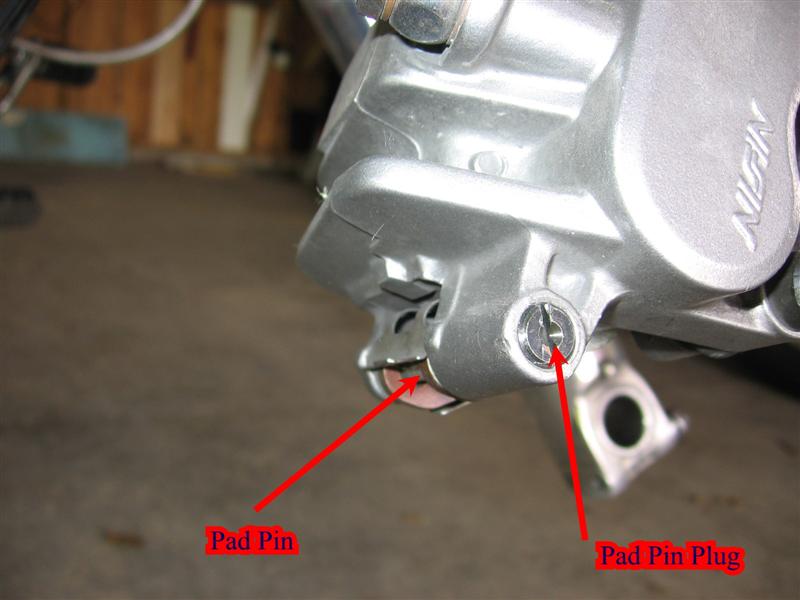
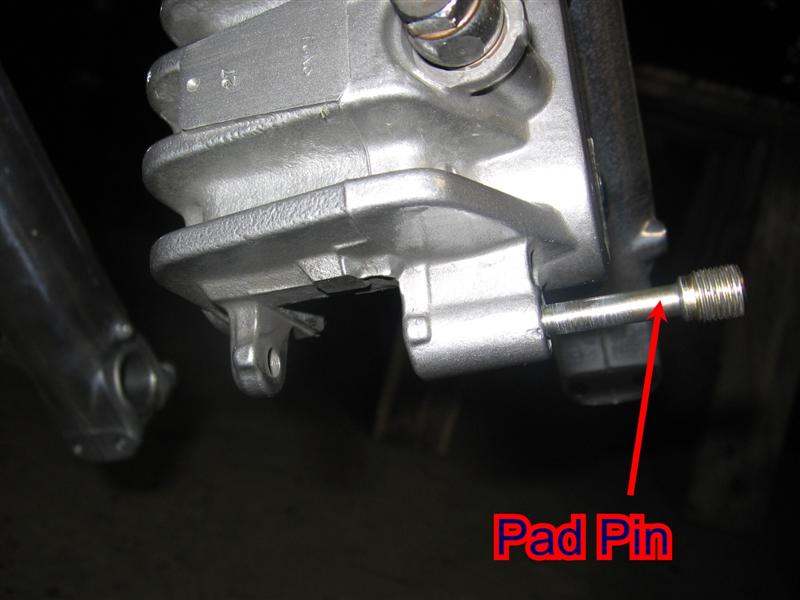
Remove the Pad Pin Plug and back out the pad pin to release the old pads.
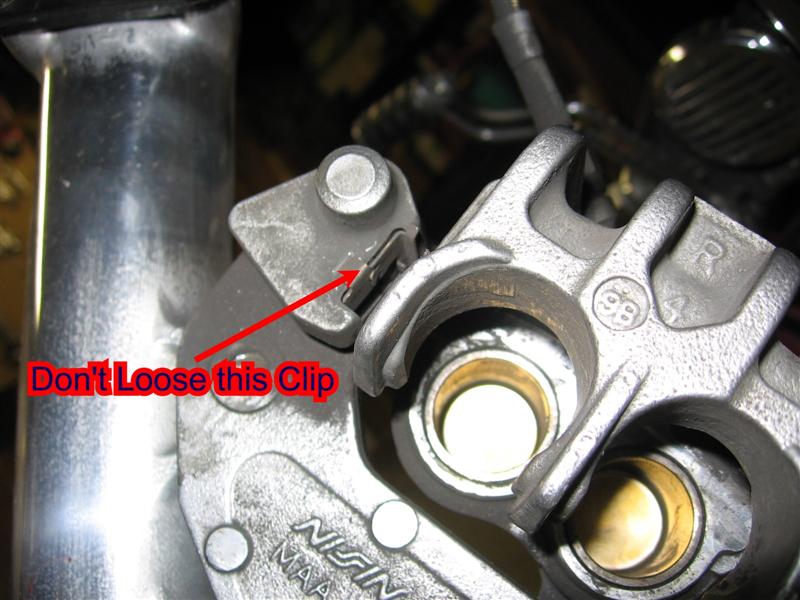
This is the upper retainer clip, Don't loose this and be sure to put it back before installing the new pads.
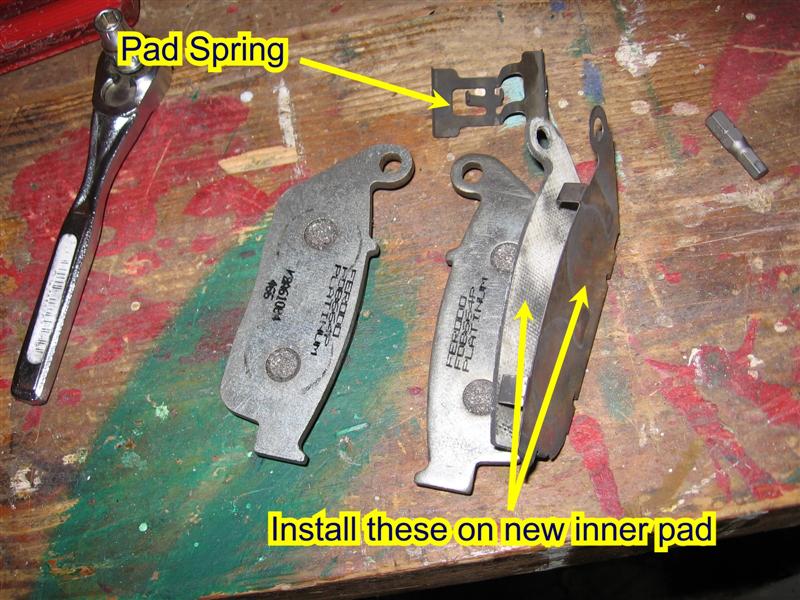
Keep the pad spring and you need to transfer the two parts shown to the new left pad. It's obvious, they will
only fit on one pad and installation of the pads in the brake caliper is hard to get wrong.
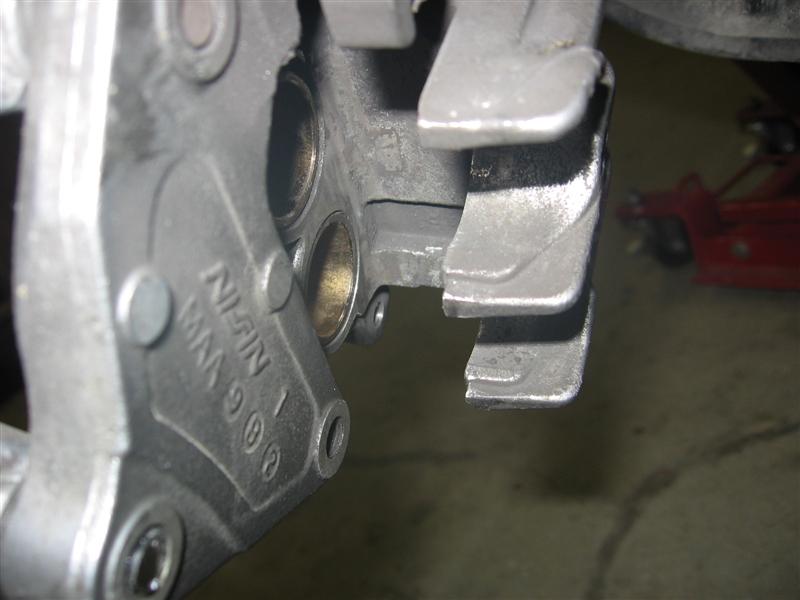
This just shows the caliper without the brake pads. The two circular components are the brake cylinders.
Push them back before installing the pads.
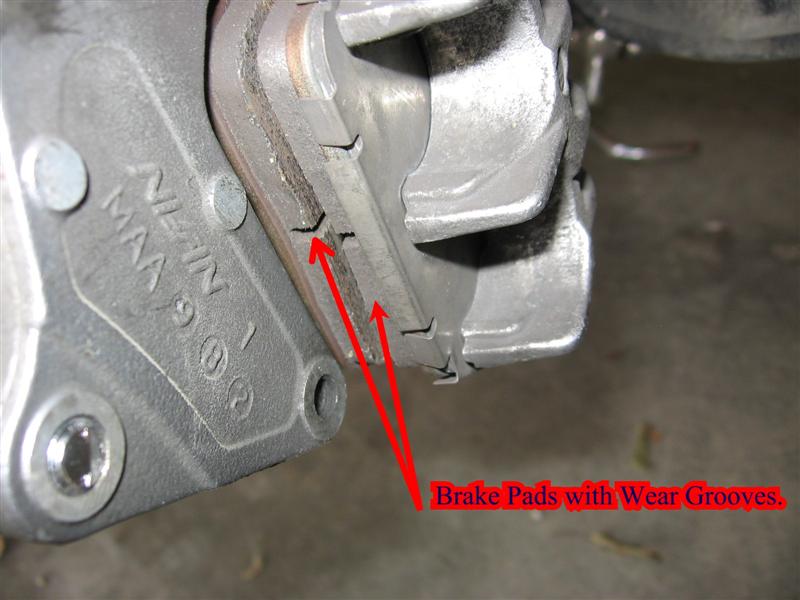
This shows the new pads in place with the pad pin and pad plug installed. Note the placement of the pad spring!
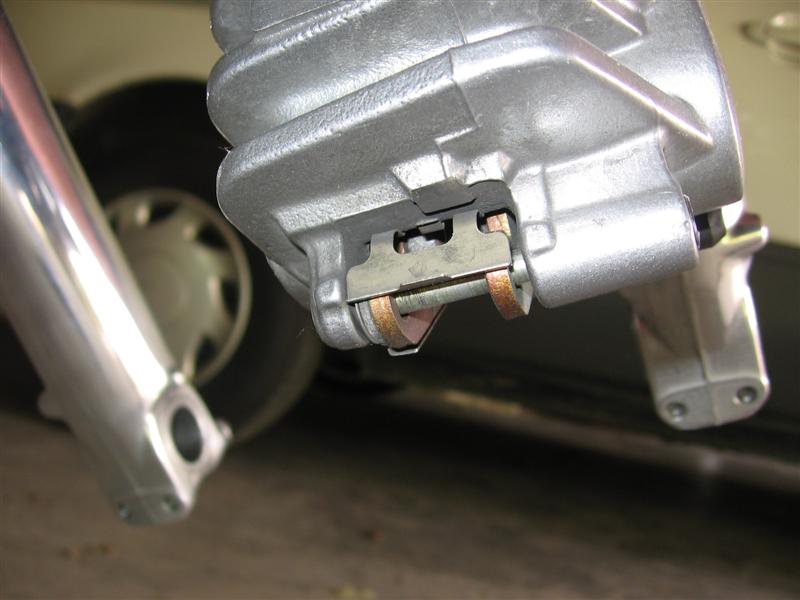
This shows the retaining clip and the new pads seated correctly in the clip.
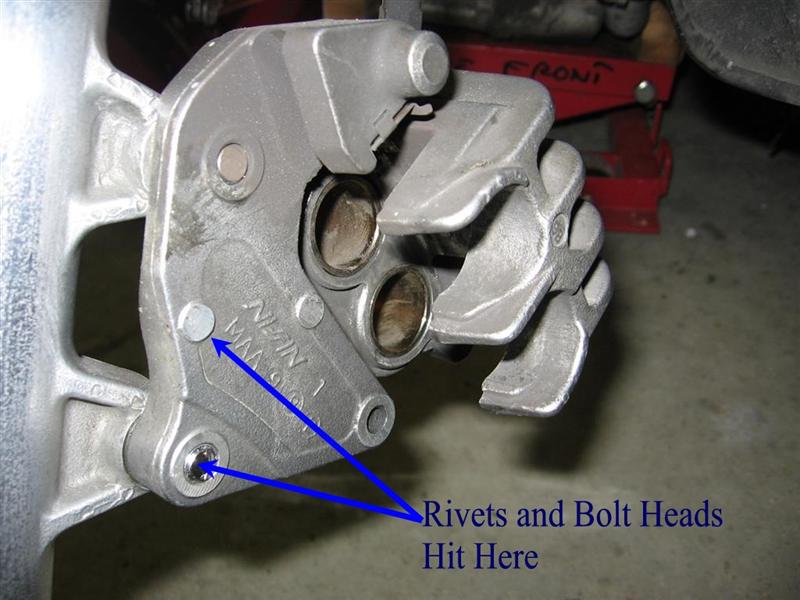
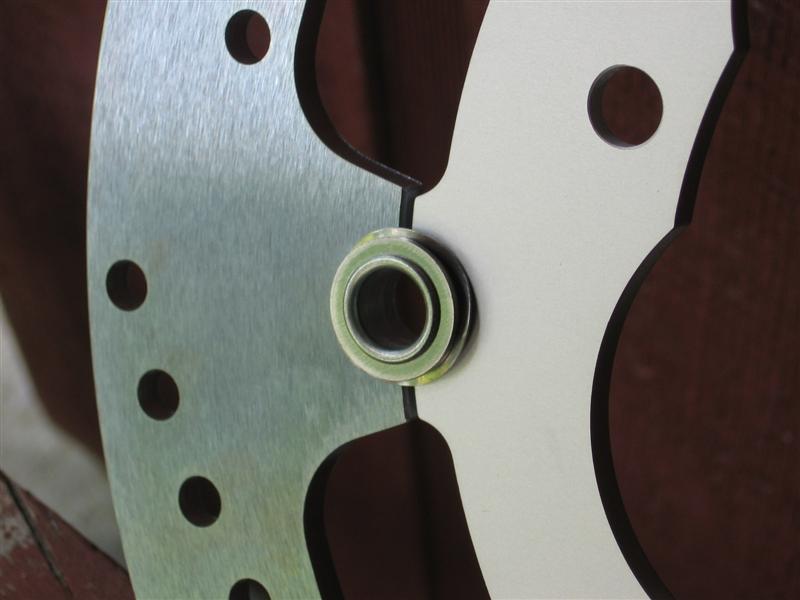
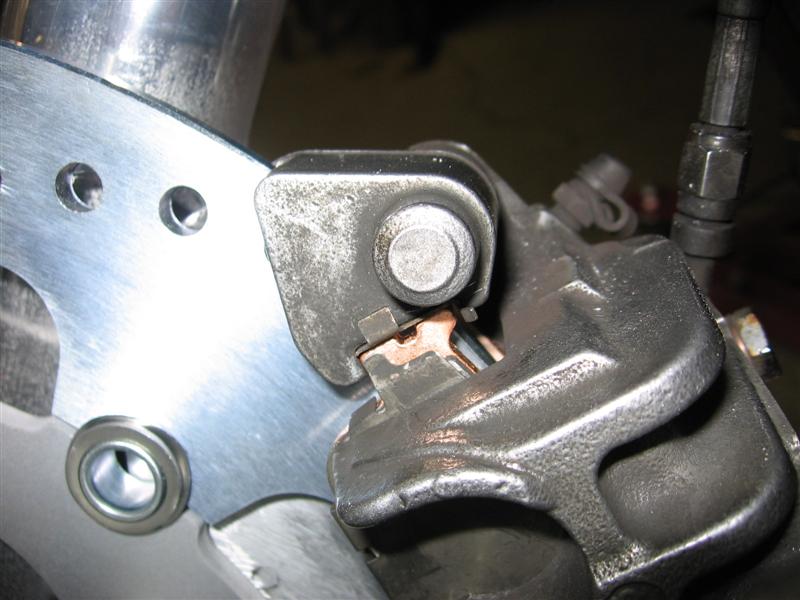
Now to the caveat with installing the EBC rotor. The rivets or Circlips on the EBC rotors are wider than the
OEM rotor thickness and tolerances are very tight to start with. Once you tighten up the axle bolts, the clips
and mounting bolts heads (the counter sinks for the bolts in the EBC rotor are not as deep as the OEM)
will hit the inside of the caliper as shown. I was pretty torqued when I found this and emailed EBC.
To their credit, the replied promptly and stated they have had this problem with some Shadows.
The only solution according to them is to grind off the inside of the caliper bracket or use the OEM rotor.
They did offer a full refund (Ron Ayers will charge a 25% restocking fee) if I did not want to do this.
I decided to grind off the inside of the caliper. I ground off all the ridges, protrusions, etc. including the bolt head.
I don't think it affects the bracket structurally as I didn't take any real "meat" off the bracket.
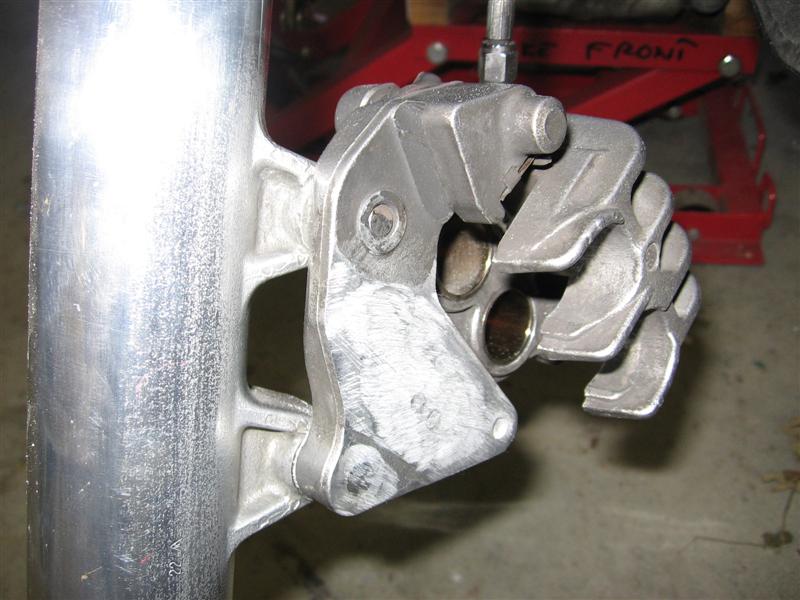
This shows the final bracket mod. I ground off the protrusions and ridges (about 2 mm). I used an angle
grinder which made short work of this but if you don't have one, you can file it down also since the metal
is fairly soft. My opinion is that this is a safe modification since all you are taking off is excess metal.
Grinding on your brakes does not give one a "warm and fuzzy feeling" but in this case I feel it's perfectly
safe. Anyway, the decision is up to you. I have used the new brakes pretty hard and they perform perfectly.
The only option if you don't want to do this is to use an OEM rotor.
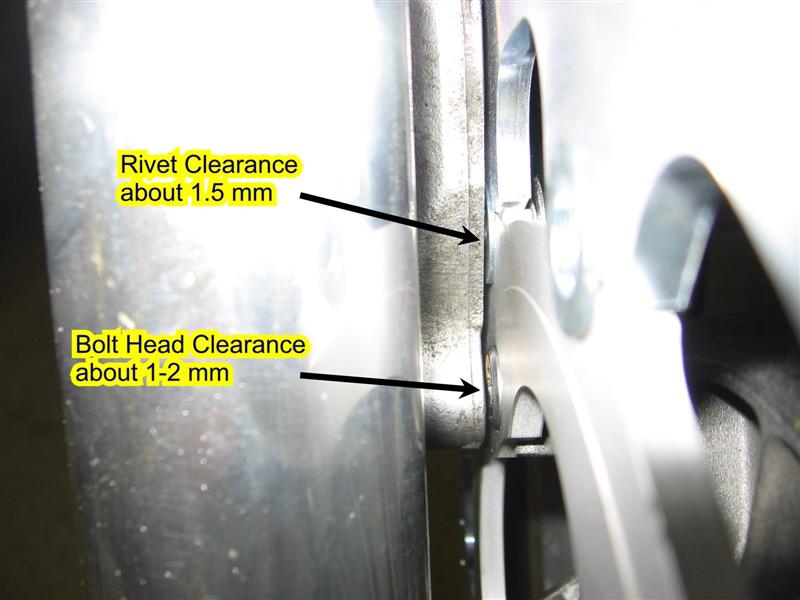
After the grinding, everything worked fine. Clearances were around 1-2 mm which is about the same as the
OEM brake.
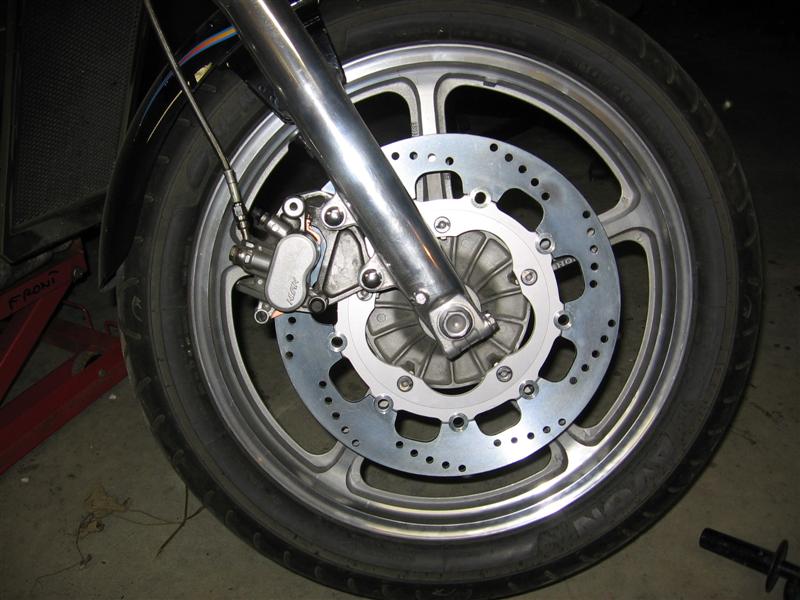
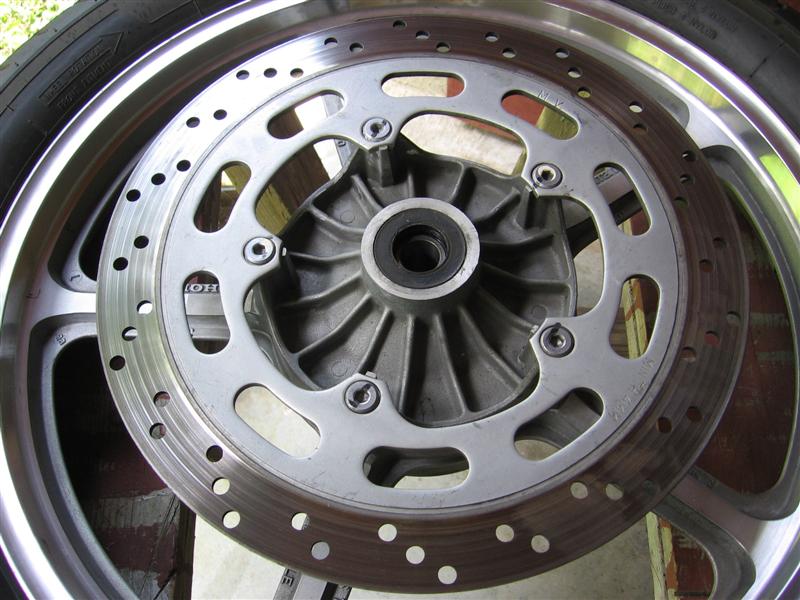
This is the final product. Looks a lot cooler, I think and works much better once you bed in the pads.
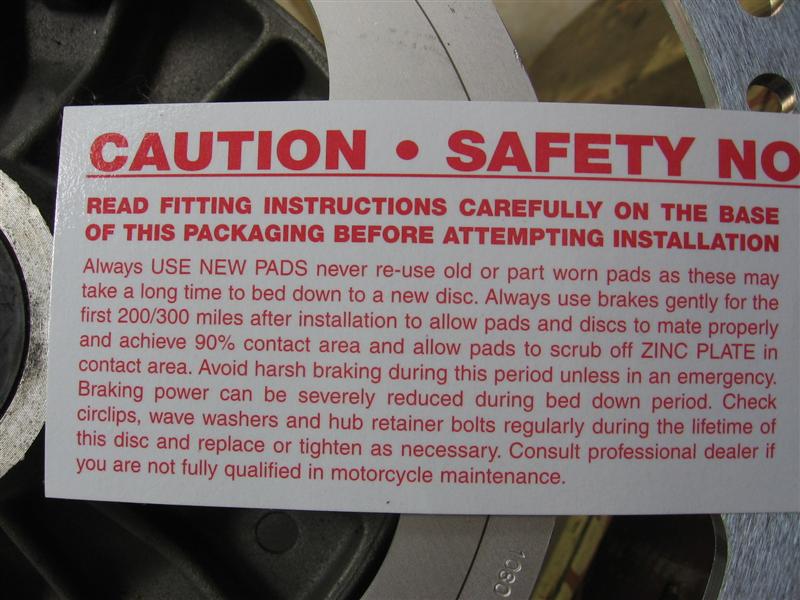
This is the tag that was attached to the rotor on how to bed in the brakes. I bedded the pads in using
something I found online. At the start of your first ride, you will have NO front brake.
I went to a secluded road and used this procedure:
Speed up to 20 mph and apply brake hard to about 5 mph but DO NOT STOP
Speed up again to 20 mph and again brake firmly but DO NOT STOP
Repeat this about 10 times. You'll find the brakes start grabbing better and better as you continue.
After this, drive for about 10-15 minutes without using the front brake to allow them to cool.
Do the same procedure as above from 40 mph and they'll really start to grab. Just don't stop with the front brake applied to avoid burning in the new disk.
After that, I made sure on the first long ride, I didn't stop with the front brake applied for about 300 miles.
It now works just great and the stopping power is much better than stock.