 |
Part 1: The beginning  |
So, after purchasing this nice 2U rackmount case and replacing the guts in it with some modern hardware the question came to me "What am I going to do with this thing?" After some thought the idea began to take shape to turn it into a multimedia PC running on my home network. The basic objectives for this system would be:
My first choice for this project was to use a Windows OS and something like SnapStream. SS has slowly built a pretty nice product with version 3.0 almost ready to ship. This seemed like the way I would go but then I happened to find a reference to some Linux software that would give me mostly the same functions as SS. The software is called MythTV and more info can be found at the web site, www.mythtv.org . Being that I am working to learn Linux for work and personal reasons I decided to look into this further. In the end I decided to try using the Linux compatible software for two reasons. First, because I wanted to increase my knowledge and use of Linux. Also, I could try the Linux software for free and SS costs $50.00. If I feel that the Linux software is just is not able to provide what I need then I can always start over using SS. |
Part 2: The "Fun Stuff" 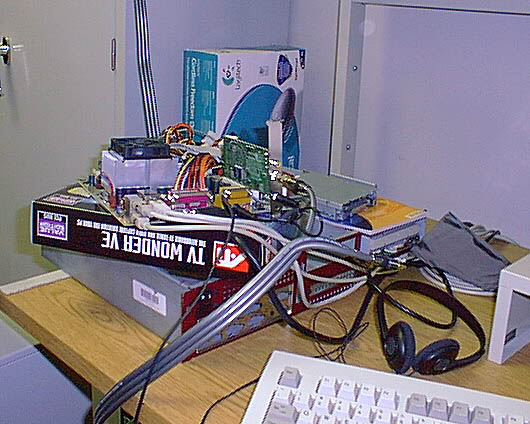 |
Construction for this project had several special needs. I wanted to change the color of the face plates on the floppy drive and cdrom to better fit with the nice red of the rackmount case. I decided to go with black instead of trying to match the exact shade of red on the case. I had seen several articles discussing how to use vinyl dye on face plates so I bought some at a local auto supply store. Its made by PlastiKote and is called 'Vinyl Color'. I purchased the glossy black for this project. |
The floppy turned out really great with the kind of texture it had. The cdrom is OK and will certainly do for this project but it had a smoother texture so the flat black might have worked better. 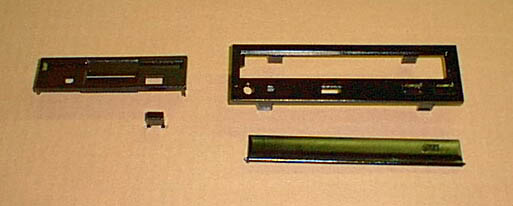 Alright, things were starting to come tegether. I'm still working on the most critical part of the construction which will be to purchase a 1U riser card for the PCI video carpture card. I had one I thought I could use but it turned out to be what I call "left handed" and I need one that is "right handed". What I mean is that the one I have is not a typical riser card because it faces the opposite direction you normally need. Once I started to research places to buy the riser card I found out that there is an almost infinate range of sizes for the bloody things! (Hence you see the system being worked on above with the MB out of the case so the cap card will fit) Once I feel confident in the outcome of the project I will need to reinstall the MB in the case and carefully measure the height I need for the riser. I believe it will turn out to be a standard 1U size but I can't be sure till I measure it. 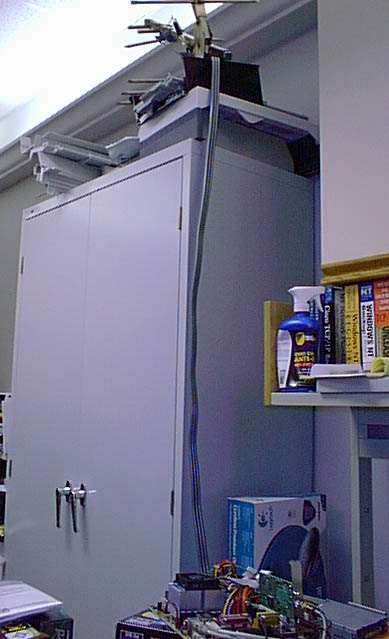 Above you can see one of our early attempts to provide a video signal to test with! Hey, 1 1/2 channels was enought to verify that the cap card was installed and working. :-) Unfortunately, we don't have a really good signal source but have used a color video signal generator and a vcr to give us something to look at while working/testing. I found a place and ordered the 1U PCI riser card I needed. It arrived quickly just a couple of days later and fits great ( I was a little concerned about fit for this). After trying a couple of options for the pci face plate I decided to adapt the blank that came with the case. This made measuring for an exact fit less of an issue. In the end this worked out just fine. 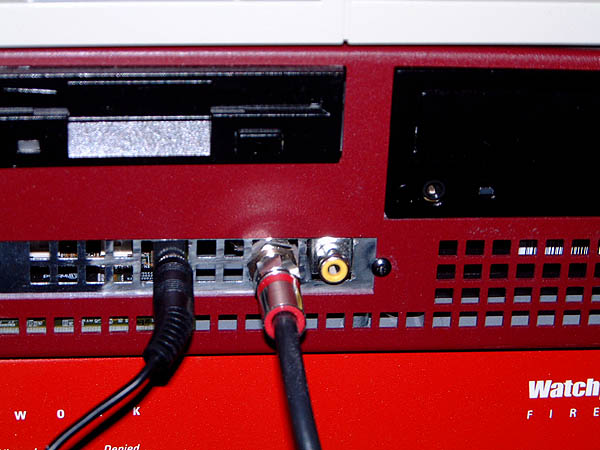 While not great the above pic does show the painted/stained face plates for the floppy drive and cdrom drive. Once we got all of the basic hardware/OS issues worked out it was time to start working on getting this stuff to work with MythTV itself and the several plug in modules that have been written for it. Part3 : One step forward and one step back! Working with any 1U or 2U rack mount cases can be an adventure in themselves. Working with MythTV and its modules was more of a small Odyssey! :-) I'll share the good news up front. Nemesis][ was able to finally get all pieces of the software working correctly. The journey to reach this state of nirvana was a long one. We ran into a pattern where we would get one new module working and then have to go back and fix one or more of the previous working modules due to installing updates to MythTV or other libs etc. 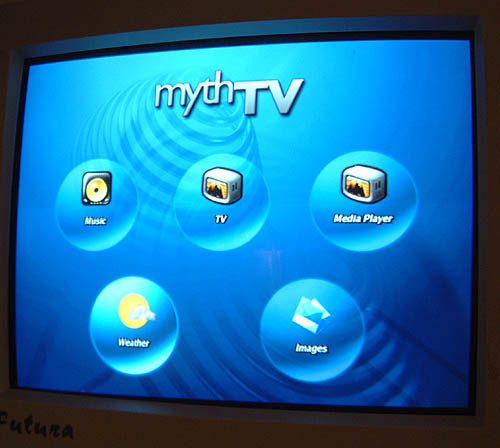 This image shows the top level menu in MythTV with several modules installed. The extra modules include; Music, Media Player, Weather and Image viewer/slidshow. We did not get the web front end installed to allow the user to setup recordings via browser nor did we get the imulator front end installed. The interface for MythTV is themeable. So far there are not many themes but I like the one shown called "Blue." When we started working with MythTV we downloaded the latest released version .7 from the mythtv.org web site. Using this version we were able to get the basic TV style PVR functions working. Sound via the onboard sound card took some tweaking but finally came up just fine (using ALSA). As always when working with new software for Linux there were various libs that had to be updated etc. When we started working on some of the plugins we found some issues that gave us trouble. We decided to download the newest developement version from the CVS repository which is .8x. This version is getting close to release and will replace .7 on the web page (he hopes this month - February 2003). The really big change in .8 vs. .7 is that the Frontend and Backend have been split. You can now run the Frontend GUI etc. on one machine and the Backend database/recording on another. With the machine that I have I did not split the Frontend and Backend across two machines. Instead of filling up this small project page with tons of interface pics I will refer you to the MythTV.org web site where screen shots are available of most of these components. :-) One of the first modules we got working was the Weather module. This is a great module that will show your local weather stats via your zip code. The interface rotates through three screens showing current conditions, tomorrows forcast and three day extended forcast. One small issue is that we had to fix the interface installation as the GUI did not install quite right. Next I believe we worked on the Image Viewer module. This module installed fairly easily but we did have to fix some slight errors in the interface install and correctly hook into the Mysql database for it to show the images in the directory. Next on the list was the Music module. Installation was not to big a deal once we realized we had to hook into the database again for this one. This module seems to work well although ripping a cd seems to take a long time for some reason. Last to be completed was the Media module. We had not originally installed MPlayer so after that was installed the Media module is working just fine. Again we had to adjust the GUI and we reused the icon for TV playback. This module give you the ability to play different kinds of video files other than the proprietary ones created by MythTV. Part4 : Miscellaneous Info As I belong to a great group who participate in the SETI@Home Distributed Computing project I have S@H running in the background on this machine. I will have to test and see if this will be a problem for any of the media functions. Here is a description of the guts of this system: 2U rackmount case with front facing connectors Socket A integrated MB - video/network/sound AMD Athlon XP 2000+ oc'd to 2100+ 512megs of PC2100 DDR memory WD 80gig 7200rpm hdd ATI TVWonder VE video capture card 32X cdrom Floppy drive I have considered replacing the CDROM with a DVDROM drive. I might also add another hdd to the system at some point but I don't need the space currently. |
I would like to thank Nemesis][ for all his hard work in getting the hardware and software working under RH 8 for this project! I would also like to thank Davidsnot for his help in adapting the PCI face plate. |