 This is the short story of a man and his need for a "kewl" firewall! ;-) 11/08/2002 I just realized, after looking at an hold bookmark, that I never gave credit for the inspiration of this project to the main source. Vincent, thanks for having all the great info on your Firebox project online for others to follow. :-) |
I'll be updating this page with lots more pictures and info as I complete the FB100 conversion project over the next week or so. You can check out my home lab at this page which is for my SETI@Home stats. I have been wanting to build a linux firewall/router for my home lab for some time. Currently I am connected via cable service and I have used various SOHO routers such as Netgear and Linksys. While these products work well and the new models have very easy setup and control they just cant match a fullblown linux boxen! I started this project many months ago by just keeping an eye out for some kind of interesting rack mount case/system (I have a 19" rack at home in my lab). A few weeks ago I came across a web site that documented the conversion of an old Watchguard Firebox 100 model firewall to a BSD firewall. The unit is a kewl red color, 2u rack case style and could be had cheap enough to allow for lots of mods/adjustments. When I started watching EBAY for one of these units I found three overall. The first one slipped by me for $103, the second one eluded me for $61 and I finally snagged the third one for $56. Pretty cheap for a commercial firewall that originally sold for about $4000 (and my unit has the upgrade kit installed which was another $360 and has a 8meg flash ide drive). It appears that many of these units were slightly different. My unit came with an Intel Pentium 133mhz cpu, 32megs of 72pin RAM (no SDRAM slots), black floppy drive (which I have to replace), and the 10/100 upgrade kit installed. I have upgraded the cpu to a P233MMX Pentium cpu, 96megs of 72pin RAM, the new black floppy and an 8gig 7200rpm hdd. I'm loading Red Hat Linux 8.0 and will be using IPTables in the firewall. |
This pic shows the FB100 while loading RH8. 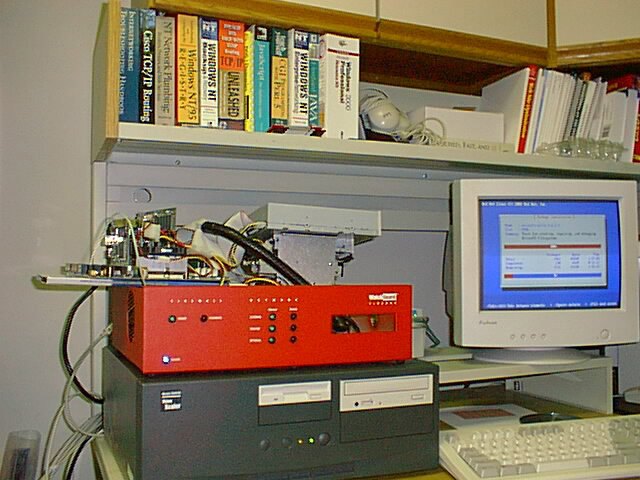 |
This pic shows the FB100 from overhead with a view of the custom wire harness to run the new leds I installed. 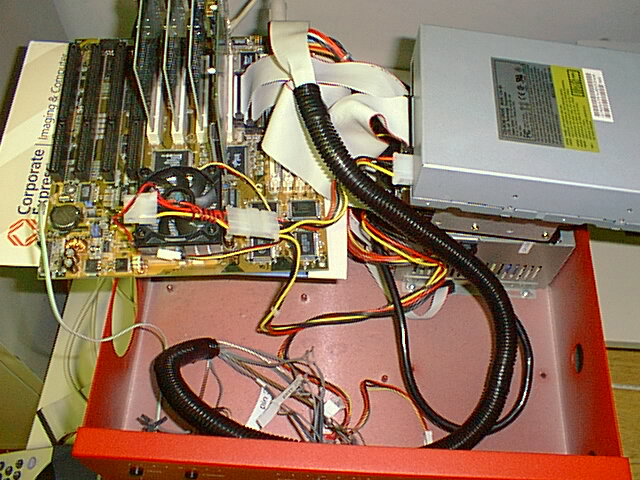 |
This pic gives a pretty fair view of the new blue led used for power on. This led was so bright that we installed a resister inline to bring it down some! 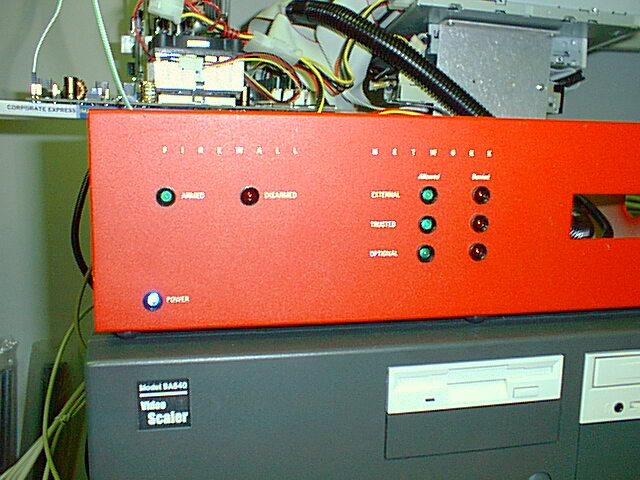 |
UPDATE: 11/11/2002 Here is the new front panel that is included in the upgrade kit for the FB100. It includes an 8meg flash drive (IDE) and a new LED controller. We had to remove this as we could not seem to control the LEDs through the controller. You can see the control chip next to the 25pin parallel connector. I'm still trying to decide what to do with the 8meg flash drive, it works great and is bootable just like any other IDE drive. Today we were able to get the LEDs arranged and working using a couple of programs. Portato is controlling pins 2/3/4 (green) to show network card status. Ledstatus is being used to show a heart beat on the left most LED (green, pin 1) and also to control pins 6/7/8/ which show CPU load. We are still trying to figure out how to get the last red LED (pin 5 and second left most) to show any user logins on the box. 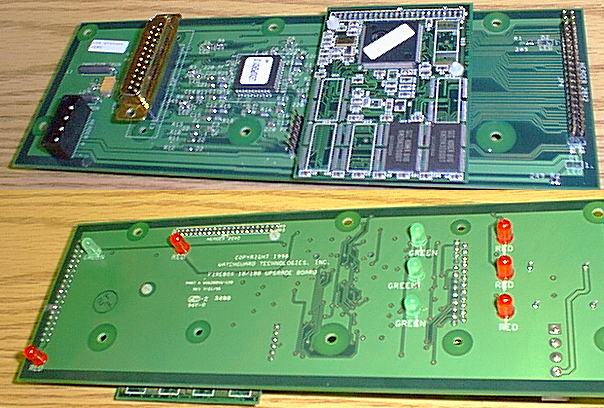 |
UPDATE: 11/12/2002 This picture shows the FB100 reassempled. We finally got all the LEDs the way I wanted them and also got all the hardware installed and working. This included a 80mm intake fan. In the pic you can see the LEDs labled with the following functions:
Now we will work on getting MRTG graphing up and running, SQUID is already running currently and the final firewall setup needs to be completed. Once the software is finished I will setup some simple web pages to show the status of the unit and the MRTG graphs. I'll add these pages to my local intranet. 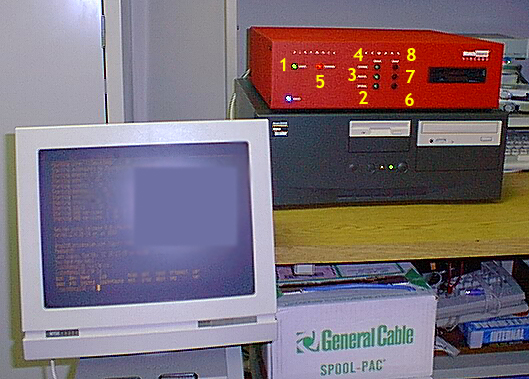 |
UPDATE2: Here is an updated picture showing the firewall in the 19" rack. After a few adjustments to handle how my cable provider runs their DHCP service the unit works perfectly and will handle a change in IP correctly without my having to do it manually. I have since added another red 2U unit to fill in the remaining space. 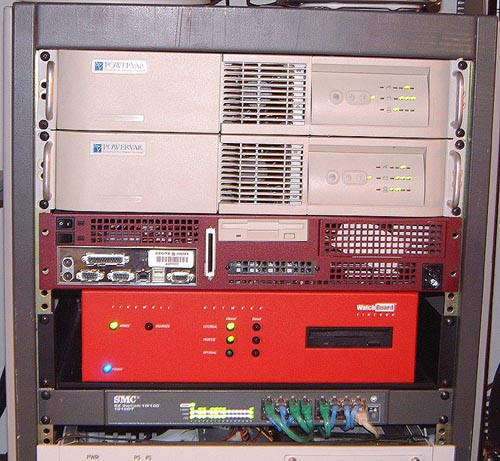 |
I would like to thank all the people who helped make this project fun and relatively easy to accomplish:
|