|
|
CORUSCANT CUSTOMS
Figure and Diorama by:
Blue Snaggletooth
 |
|
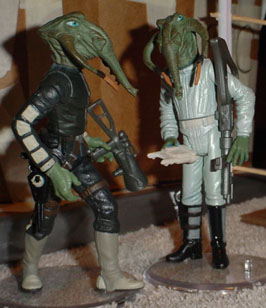
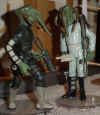
Trying
to stay as true to the movie scene as possible I needed to make a
couple of Ketwol pilots/smugglers as seen in the film when the main
heroes are walking into Mos Espa for the very first time. It was
easily done by using the chop-shop technique on a small batch of
figures. Djas Puhr, Ellors
Maadak, & 2 Ketwol all fell to the blade to create these two
aliens. This photo shows you an undone product but gives you a good
idea what is going to happen where these creatures are concerned.
After two Ketwol heads & hand sets were super-glued to the
Djas & Ellors bodies a few other things still needed to be done. I
am going to file down any rough areas on the figures, re-paint certain
aspects of the flight-suites and do some paint detailing and shading
on the weapons and equipment. The theme to this whole update is to
show you totally unfinished product so you can see the entire piece in
working progress. |
 |
|
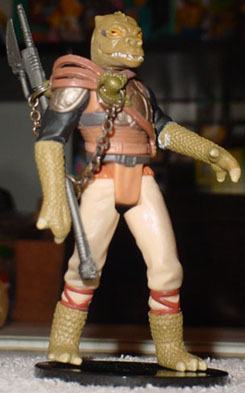
This
figure was mainly made for the street environment.
However, I don’t want to be just making random figures but
actual universe/EU characters only. So I looked at my stock pile of
misc. pieces/parts for an idea and hit my reference books & Red
6’s site for the character info I needed for the flow of this story.
I decided to make a version of the Saurin known as Gauron. Little does
this guy know that we will one day become Jabba’s personal Gamorrean
Guards trainer. He already has direct links to Jabba at this point in
his life. Gauron was made from a POTF2 Bossk (head, hands and feet), a
POTF2 Lando Skiff Guard main body, and a Massif (SAGA) saddle used as
a combat themed shoulder pad. He carries his weapon of choice (vibro
pike) chained to his back. This figure will also need some final
touchup done before this diorama is fully complete, but this gives you
a good idea of the progress being made. |
 |
|
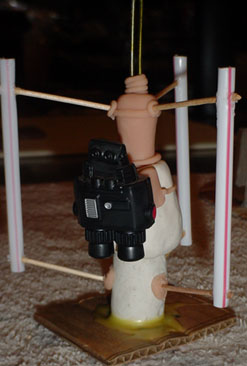
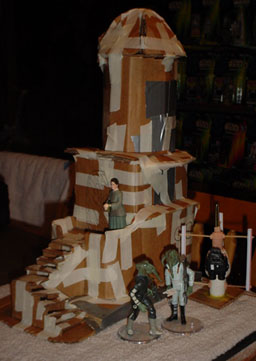
All
desert cities need moisture evaporators and Mos Espa is no different.
This piece is one (of three) evaporators that you will eventually see
on this first stretch of street. This evaporator is going to get the
total paint and sand dusting treatment soon, but for now I wanted to
show it off in its basic state. To construct this piece I needed a
small square cardboard section, Ellmer’s wood glue, a few 10 penny
nails, a metal coat hanger, tooth-picks, some drinking straws, Sculpey,
Super Sculpey and the big black box on the front is 12” Luke’s
Tatooine binoculars. This photo is self explanatory in terms of
construction with the only thing you can’t see are the nails
sticking through the cardboard for Sculpey anchoring purposes. This
structure will look great when finally finished. I can’t wait to
finish it up and get started on the other two. |
 |
|
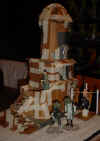
This
is a new structure prior to the plastering phase. Up until this point
I have only showed you finished product. I thought it would be fun to
show you various stages of the process so when you see the final
product you will have seen it from multiple points of view. The
structure itself is made from cardboard and it is all held together by
lots of masking tape and a little bit of duct tape in some feisty
areas that require more of a hold. The next step is to cut out the
door way and windows with a hobby knife (you can see where I have
marked certain areas) and then we can start the plastering process.
After the entire structure is plastered and dried we will paint its
entirety, lay down the sand, lightly dust the building and do any
special detailing work that may need to be done. As seen in the photo,
the moisture evaporator will set in from of this building to the right
of the two Ketwol. I don’t think that I will leave Shmi in this
area, but for now I am just playing. |
 |
|
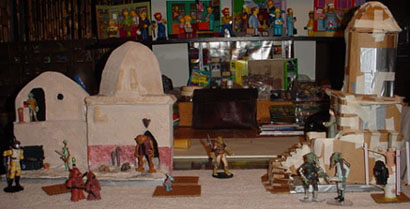
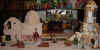
This
picture shows you the city flow at this point. I will share my future
plans. There will be an archway connecting structure #2 to structure
#3 (above Gauron) which will open my next strip of street running
north. Both sides of this new strip will have structures and activity
scenes. The archway will add more base depth to the newest building
structure as well. The small cardboard squares are placement squares
for the next two moisture evaporators (this is how the first one
started out). The Aleena
square will have three more Aleena figures on it soon. These figures
are finished, just not painted. I am making a smaller square for a
photographer Aleena so it can be placed near his 4 buddies. ….Ah Mos
Espa, what a wonderful vacation spot…… To the right of the newest
structure will be a parking lot which will eventually house 2 swoops
and a waiting Dewback. This piece is slowly coming to life, slowly but
surely. Once all of this section is complete I will attach it to an
appropriately sized base board and start on the northern running new
stretch of street. I have many exciting ideas for this Diorama and I
hope to implement as many of them as I can so keep checking back on
the progress.
|
|
|
|