|
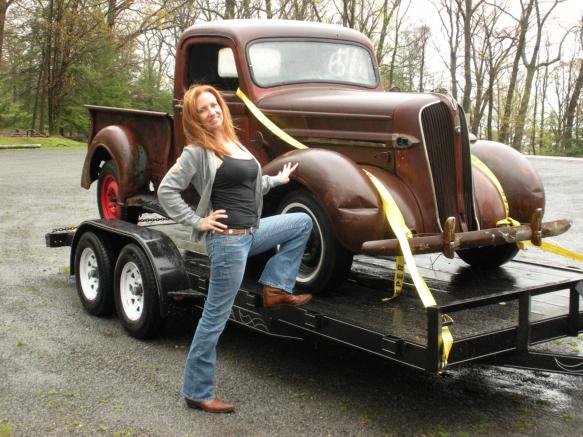
Purchased
May 28, 2009
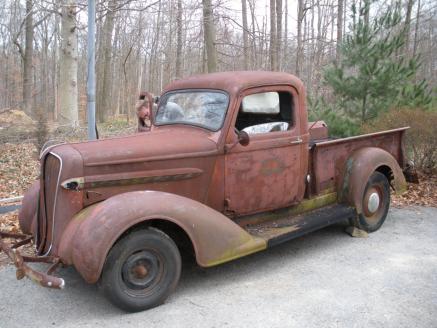
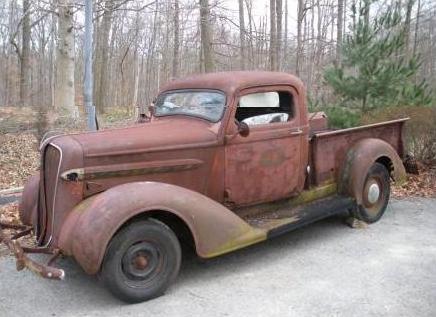
My newest
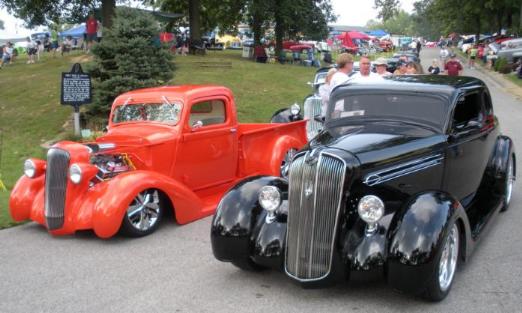
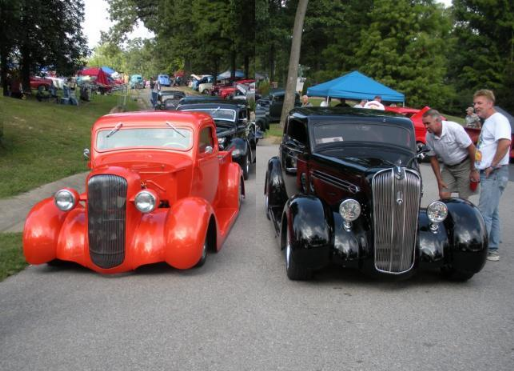
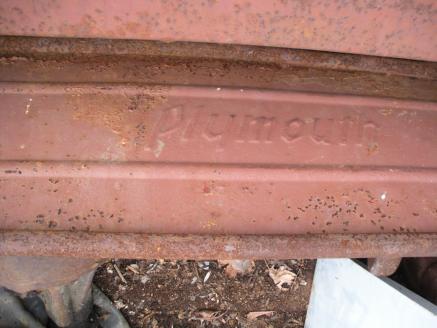
project a 1937 Plymouth PT50 Pick Up

Hot Rod
and Hot Babe!
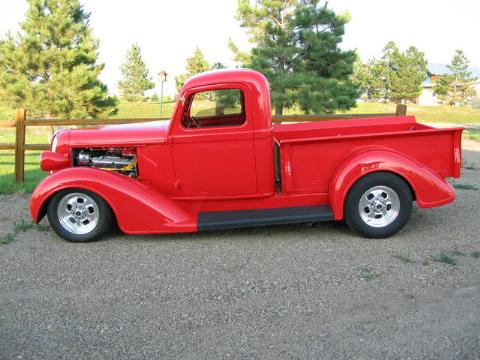
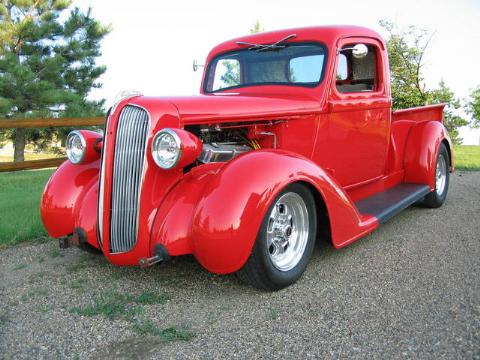
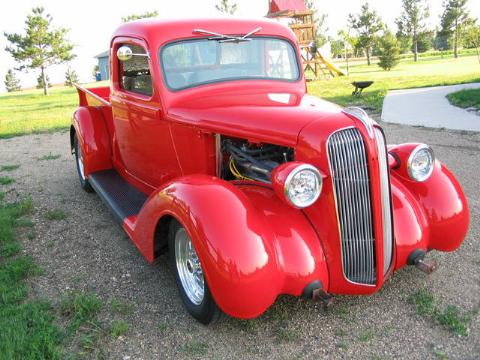
How it looks today May 8, 2011

I'm always looking for 1936, 1937, 1938
Plymouth, Dodge & Fargo Pick Ups
Any
condition—pieces/parts or whole vehicle,
what have you?
anyone out there have a
lead, ready to sell one you have?
Email me please
pedalit@insightbb.com
Do you need
Rear Cab Patch, Lower Cowl Patch Panels or Splash Aprons?
I've made them for my project and can make a few more...

Other patch
panels, I've seen do not have the drive shaft hump like the original
cab and sell for up to $235.
These are made like the original cab and fit perfectly. I have them
for $125.00. Just email if you need one.
These are 5" tall and 41" wide which will easily reach replacement cab
corners.
(If the back of your cab is as bad as mine, you'll need cab corners too.)
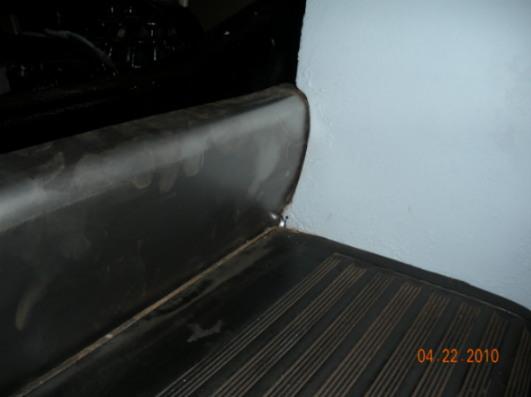
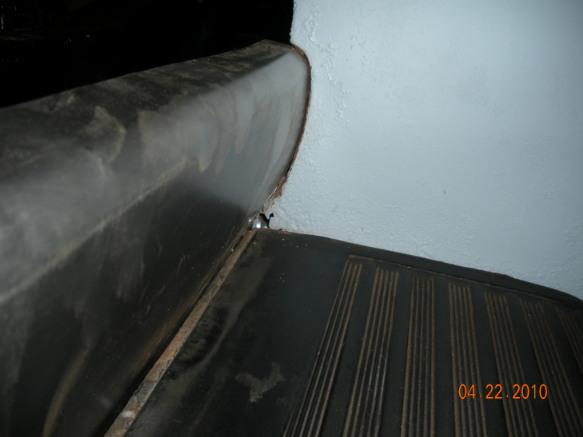
Here's what the back of my cab (and most of these trucks)
look like...
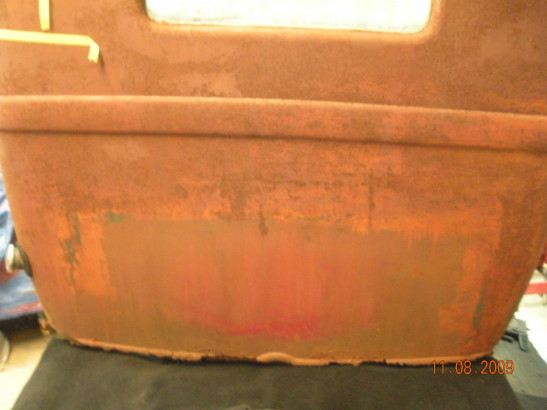
Before
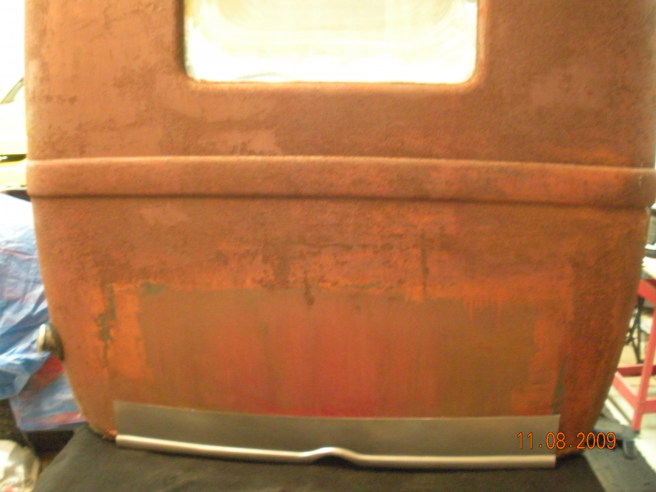
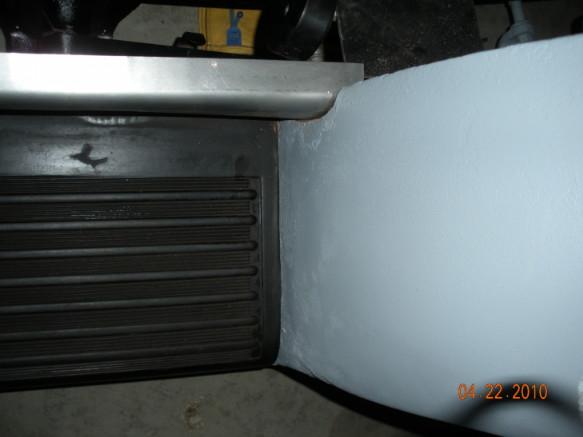
After
A definite improvement.
This will fit late model 1935, 36-38 Dodge pickups, as well as 37-38
Plymouth pickups, and 36-38 Fargo pickups. The bottom
inside of the patch panel has the lip for welding to the floor back brace.
My floor is actually pretty solid but I have a few pin holes in the channel
that runs along the back of floor where it meets this panel. I'll make
a piece to replace that section of the floor as well.
Email me if you need one $125.00
+shipping
pedalit@insightbb.com
Here are the lower cowl patches $80.00
each.
Email
pedalit@insightbb.com
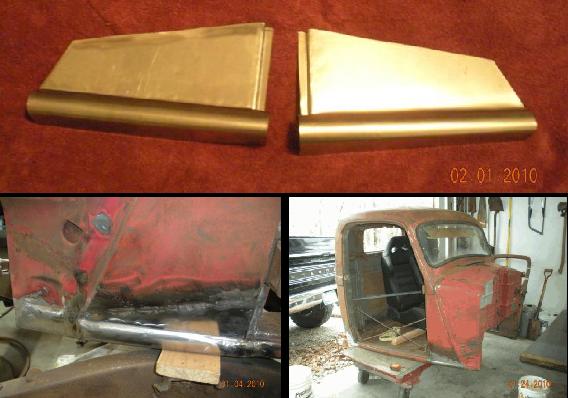
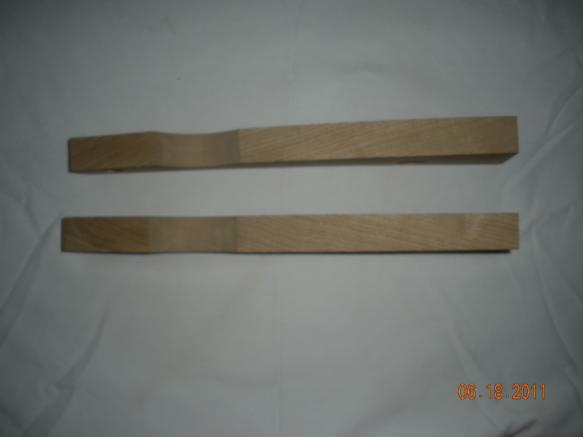
Here is new
wood(solid oak) for cab front $75.00 pair.

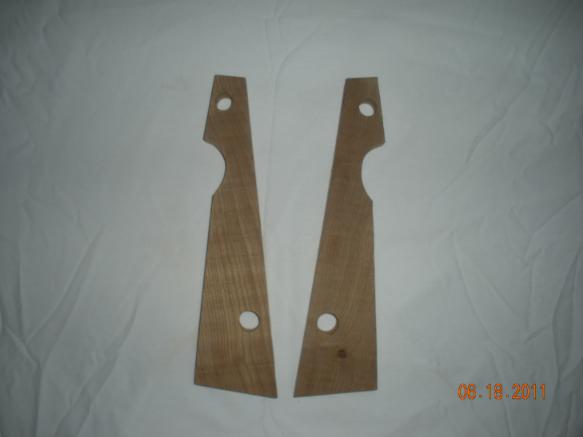
Email
edalit@insightbb.com
Here are the Cab
Corner repair patches $115.
Email
pedalit@insightbb.com
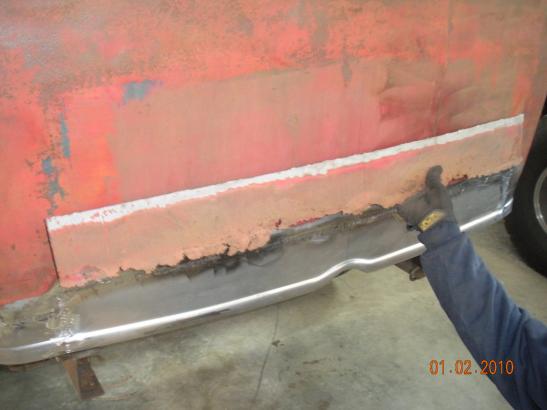
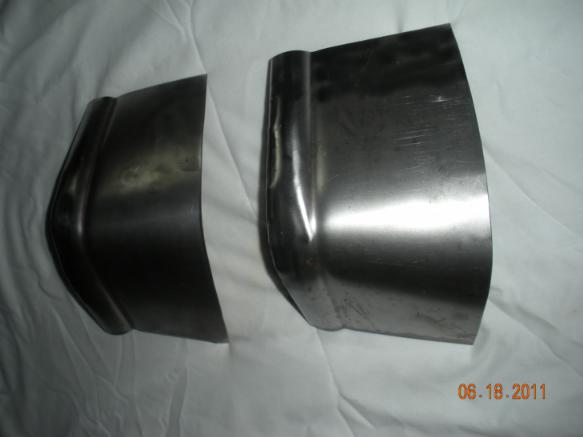
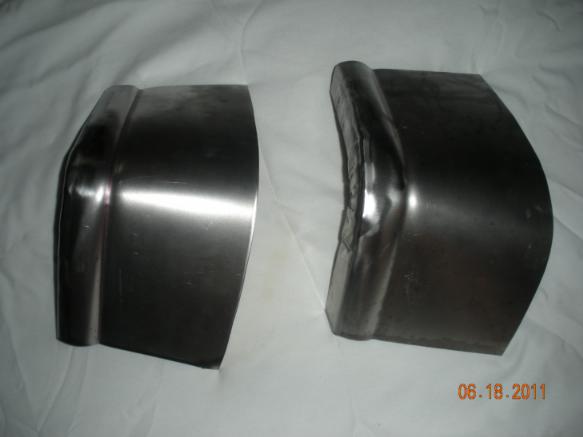
Here are the Splash Aprons
$455 a pair.
The originals were made out of 22 gauge steel, that's pretty thin. The toe
of a boot could easily dent them. We made these out of 20 gauge, just
slightly heavier metal and they are an exact replacement for short bed half
ton Dodge and Plymouth trucks.
Email
pedalit@insightbb.com
Available now $455.00 a pair.
The patch
panels I'm offering here were all made for my 1937 Plymouth PT50 truck.
So I know they will also fit 38 Plymouth trucks, late model 35, 36-38 Dodge
trucks and 1936-1938 Fargo trucks.
The originals were so thin you hardly see one that doesn't have some rust
through.
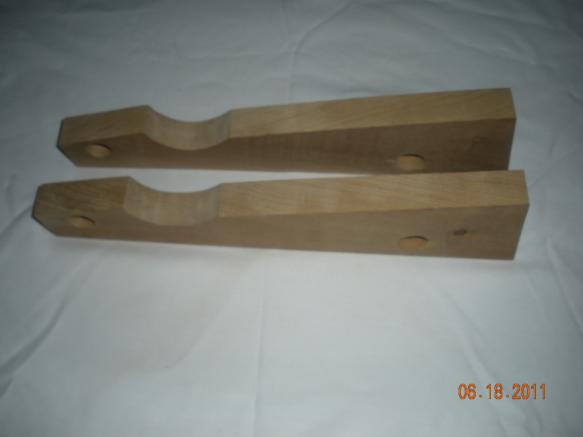
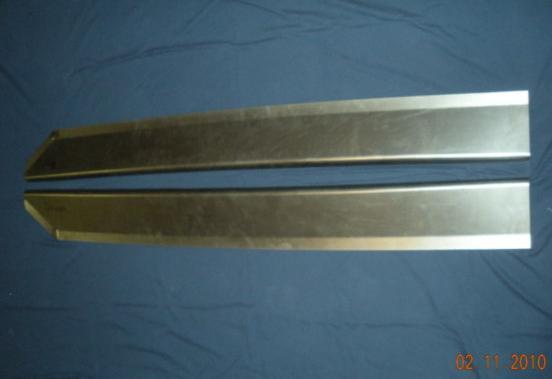
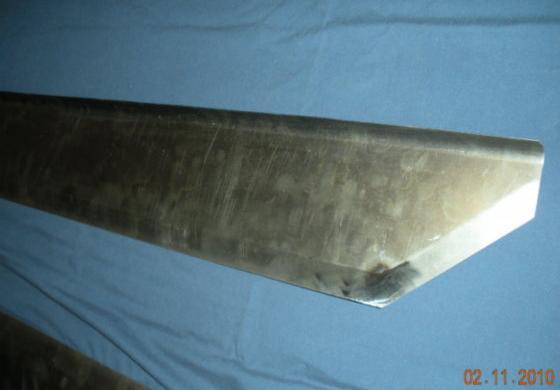
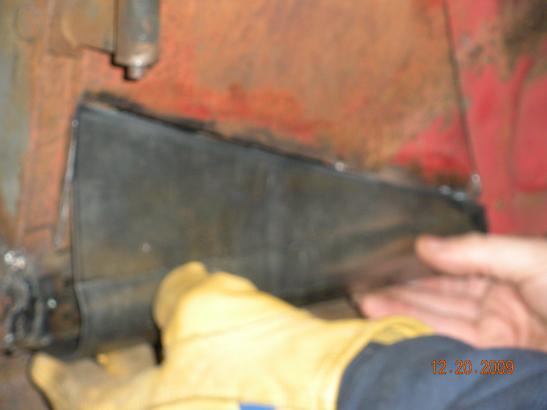
Here's a
look at the front portion
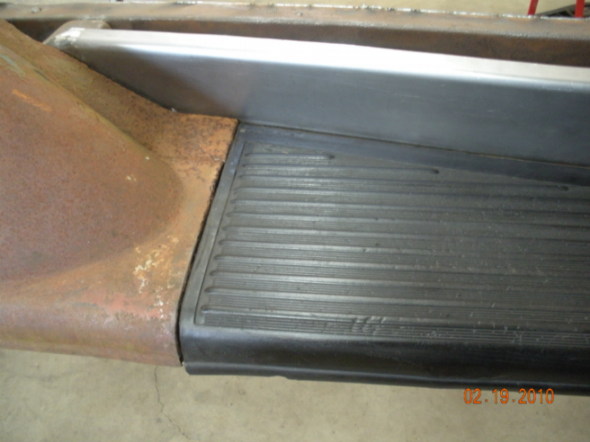
the middle
with cab mount tab
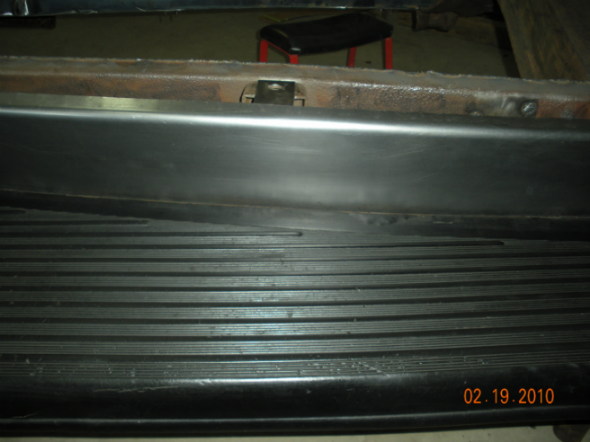
the back.
I
haven't drilled mount holes, might be best to do at your application.
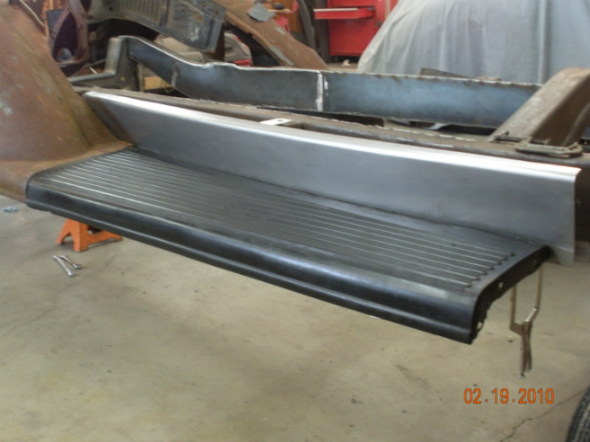
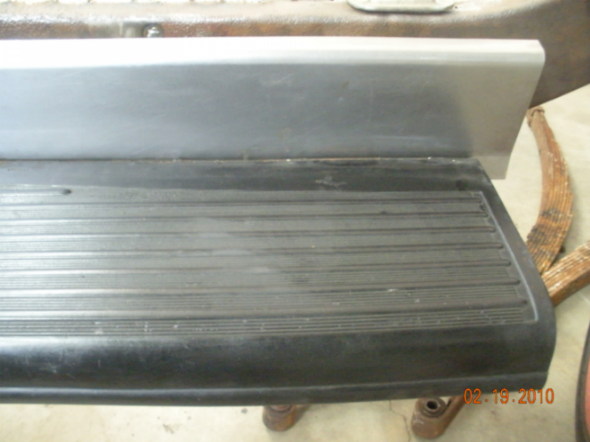
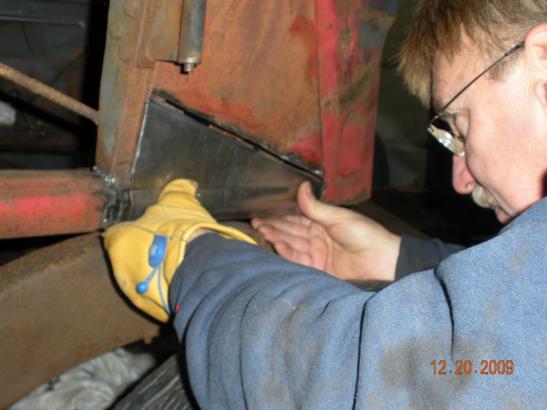
A view
from the top.
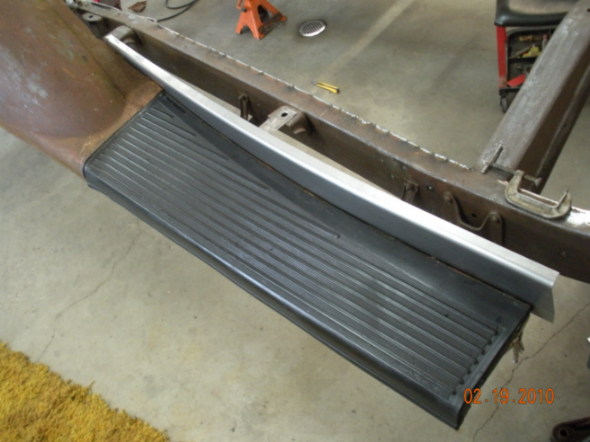
This shows the fit at the rear fender.
Yes, my rear fenders are rough--I hadn't started working them at this point.
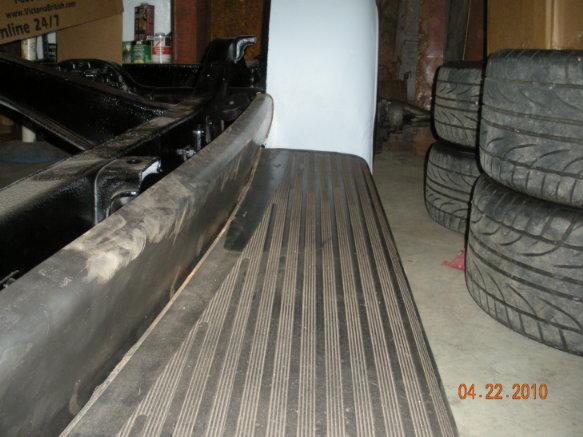
Anyway... this gives you a view of the running board fender fit.
I
haven't drilled mount holes, might be best to do at your application.
Here's a couple shots of my
splash Aprons after final fit and finish!
Frank and Debs 1937 Plymouth
PT50.
Great job Frank, Deb your 37
looks fantastic.
1937 Plymouth PT50 from South
Dakota
My newest item...
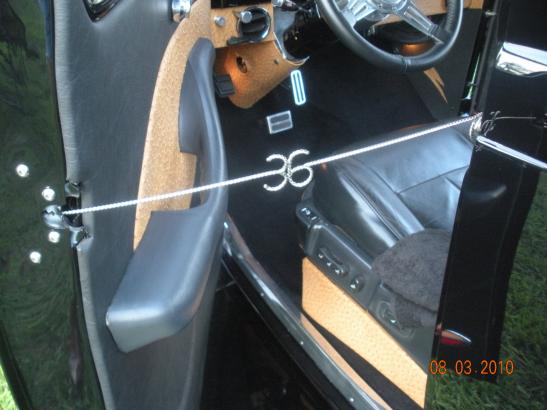
Need Door Prop Rods
for your show vehicle? I made these for my 36 Plymouth Coupe. I
can put any two digits you desire. $85 sold in pairs
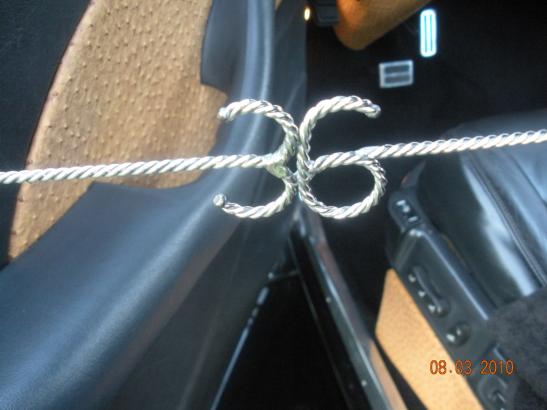
Twisted stainless
steel, looks like jewelry.
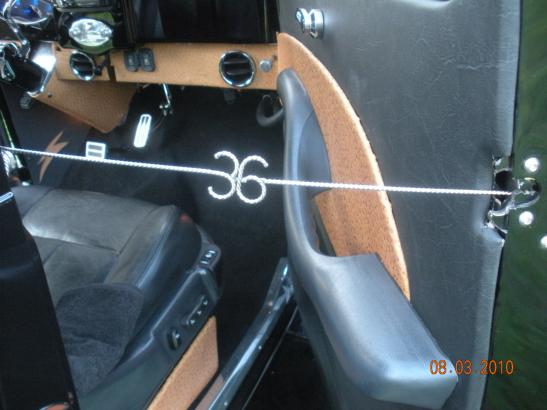
Holds door so
interior can be viewed. Works when vehicle is parked on uneven surface or
even against wind gust. Hopefully will keep little ones from hoping
in, while their parents are distracted by the beauty of your display.
Feedback Profile
Received: May-5-10
Good Morning
The
splash aprons arrived here this
morning. They look great!! Checked
them against the originals and found
them an inch or two long which will
be great for final fitting as I can
trim them easily. Thank you so much
for the chance to purchase these.
As you progress through your project
please keep me in mind for any body
panels you may be making. Corrosion
seems to have a way of eating the
same places in the same body
styles. I thought that I should send
this e-mail as there is no other
format for feedback on this
transaction. Thank you again.
Bill
|
Received: Apr-21-10 Dear j,
Hi Thanks for the heads up. Found your relisting and
put
it on my watch list. The cab patch panel I got from you is superb. You do
really nice work.
XS
Received: Jan-25-10 Dear j,
Got the panel today and it
looks great. Let me know if you get corners done to where you want to sell??
Att
Received: Mar-16-10 Dear j,
I got the Aprons today.Looks
great Thanks again.
Brian
Dear j, thanks
Looks great!!
Buyer: yenwa168 (710 ) Mar-16-10 11:13 1937 Dodge Pickup Splash Aprons 35 36
37 38 Plymouth
Dear j, Fast shipping
nice panel Great price very satisfied Thanks
Buyer: colin26 (29 ) Mar-12-10 20:42 1937 Dodge Pickup Cab Patch Panel 35,
36, 38 Plymouth
Dear j, Just what I
needed
Buyer: kam999 (238 ) Mar-04-10 17:22 1937 Dodge Pickup Cab Patch Panel 35,
36, 38 Plymouth
Dear j, cool
item!!!great seller!!!thanks!!!
Buyer: motbumh8 (1493 )Mar-04-10 14:23 1937 Dodge Pickup Cab Patch Panel 35,
36, 38 Plymouth
Dear j, It is perfect. Got a
wheel well bead? Thanks
Buyer: fisuald (406 )Feb-24-10 16:15 1937 Dodge Pickup Cab Patch Panel 35,
36, 38 Plymouth
Dear j, Great panel for
my truck++++++++++++++++++++++++
Buyer: 35internat (102 )Jan-25-10 19:21 1937 Dodge Pickup Cab Patch Panel
35, 36, 38 Plymouth
Dear j, AAA
Buyer: xjsjag99 (8) Jan-08-10 04:56 1936 1937 1938 Plymouth, Dodge Pickup
Cab Patch Panel
Dear j, just as
described AAA+++
Buyer: 1kodiak (149 ) Dec-20-09 20:02 -- 1936 1937 1938 Plymouth, Dodge
Pickup Cab Patch Panel
|
I will add pics of my progress as I have time.
I hope
to end up with a cloned Pick Up version of my coupe.
Yes, I do love a challenge.

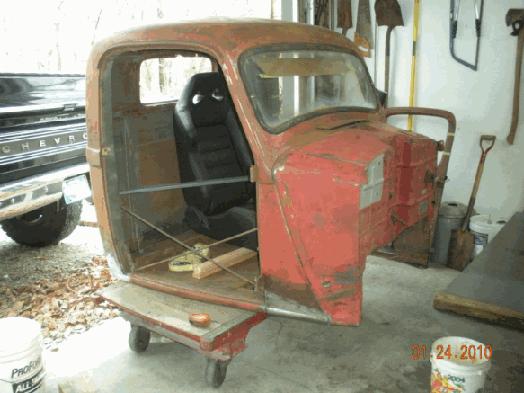
The next few shots are from the day we picked it up.
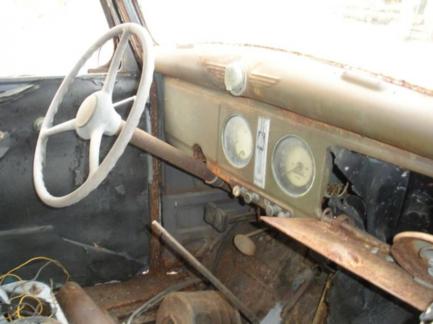
Yep... it's a rusty mess!
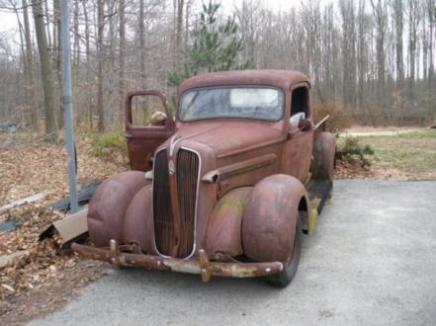
But fairly complete
I'll have to cut that top down
(modified photo)
This will be more of the look I'll be going for.
(modified photo)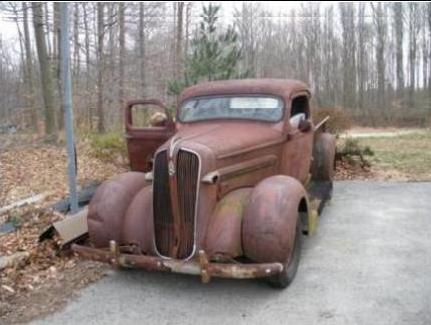

Disassembly begins October 2009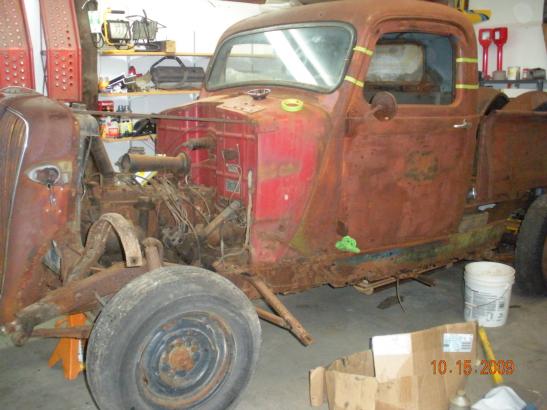
Anyone need a boat anchor?
Wonder if this will be enough off
the top...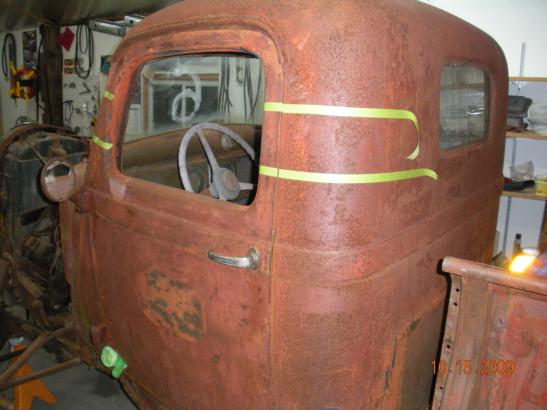
201 CI & 75 horsepower--not plated
since 1958, but it still turns over!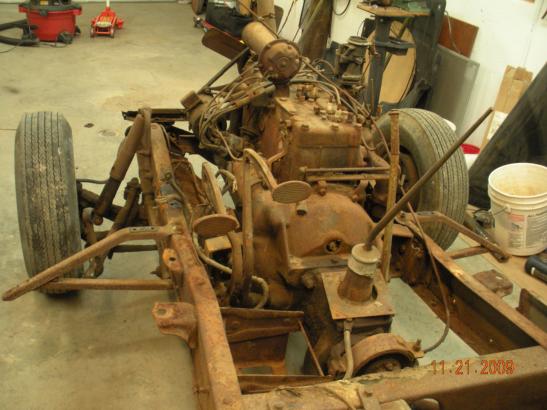
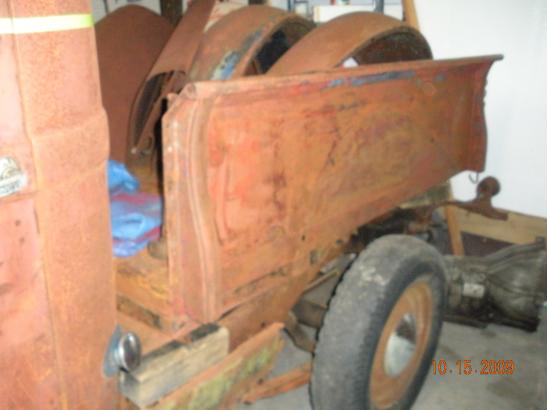
Don't have a dolly but this is one
way to keep the cab mobile.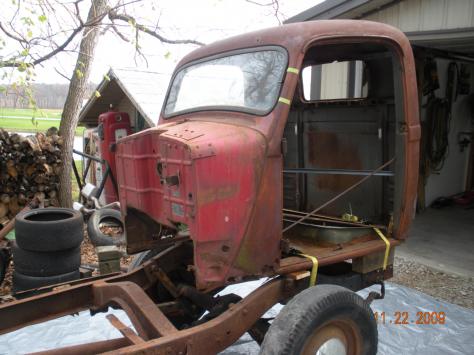
I measured the cab and it seemed
perfectly square before removal...
You can see some of the bracing
I added by X'ing both doors and across the cab interior in the next two
pictures. Hopefully it will
still be square after patch panels.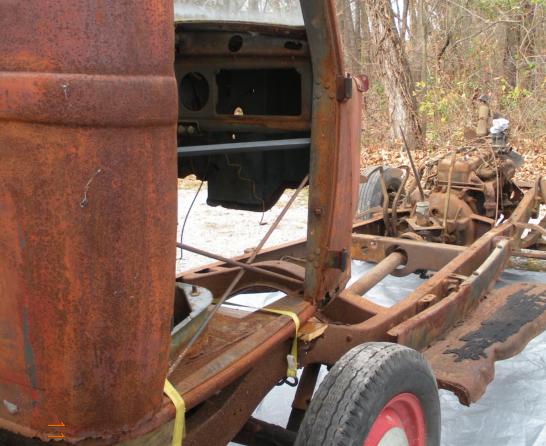
There is always hope! Started a little patch work between
Christmas 2009 and New Year. this is the passenger side lower
cowl.
As you can see, I had to replace
some of the frame work.
Trial fit
and again.
Not bad--I'll do better on the
driver side.
Not much to work with on the driver
side.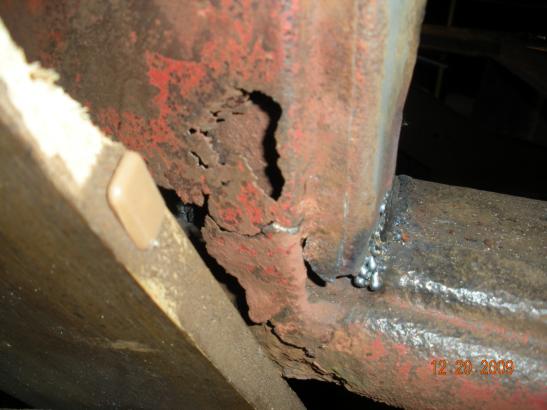
This thing is worse than I remember
when I brought it home last spring.
This is the inside of the Driver
side lower cowl
I had to replace the outer frame of
the front of lower cab.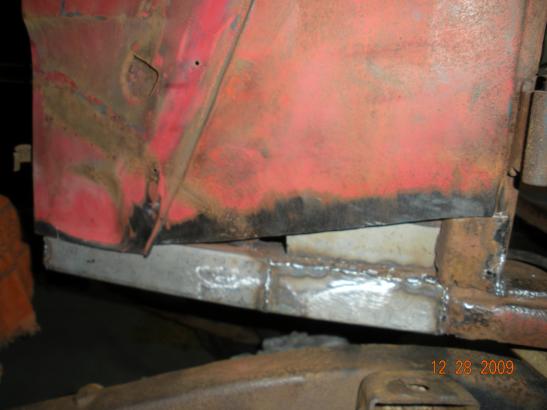
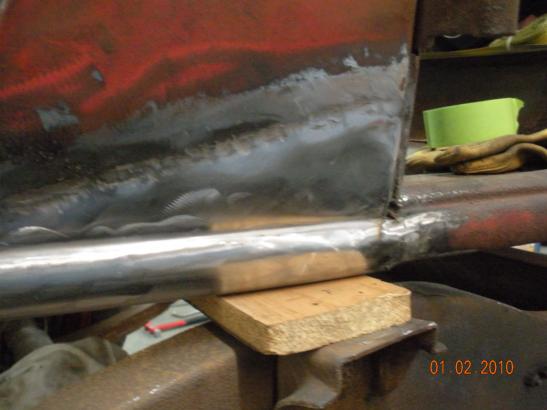
My second patch panel.
Man that's an almost perfect fit.
Guess you can tell, I've never had
a lesson in welding.
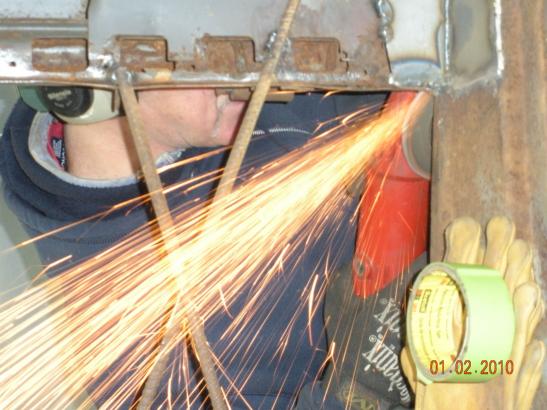
A little clean up will help.
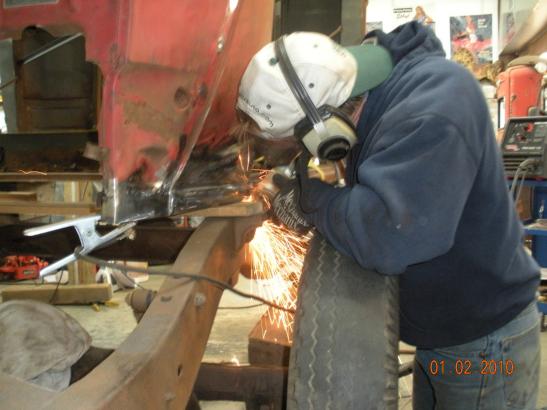
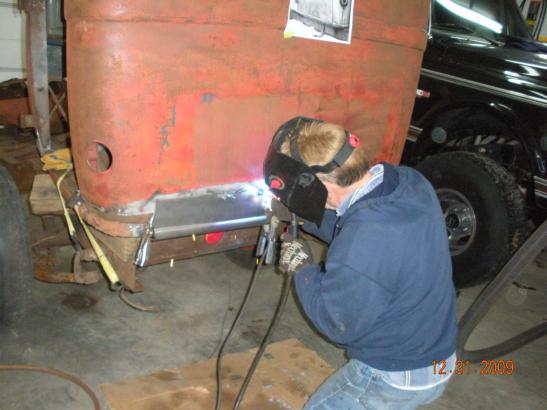
Making sparks fly.
Not bad considering I'd never made
a patch panel of any kind before...thanks to my buddy Joe for the confidence
to do it all myself...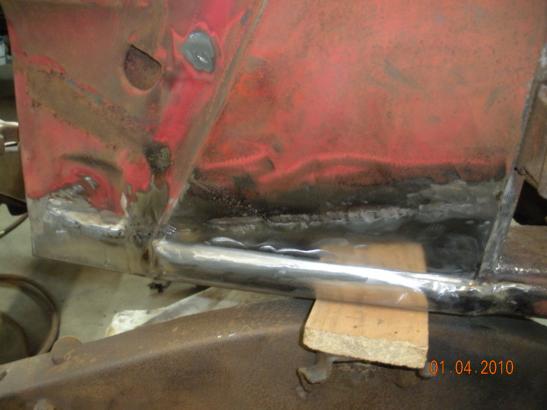
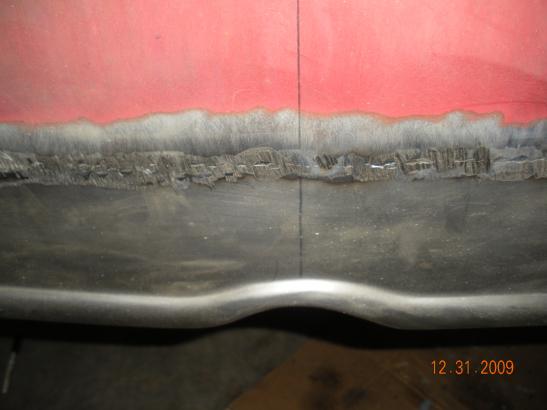
Next I'll tackle the rear of the
cab.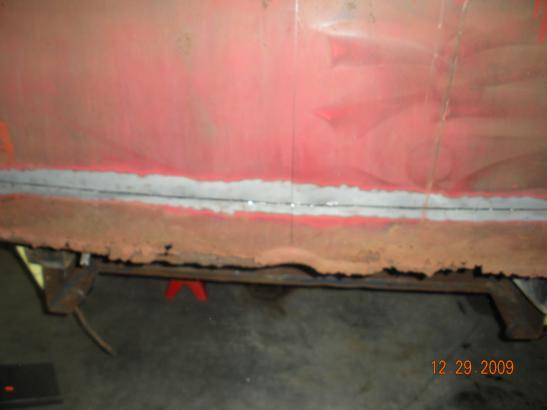
Not much left here either.
I just traced around the patch
panel when deciding where to cut.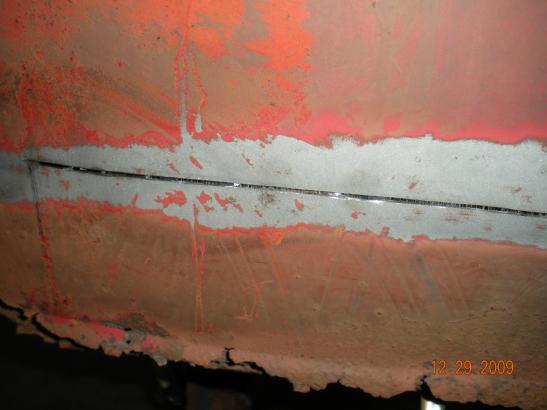
The metal was so bad here, I wanted
to be sure I cut the weak out.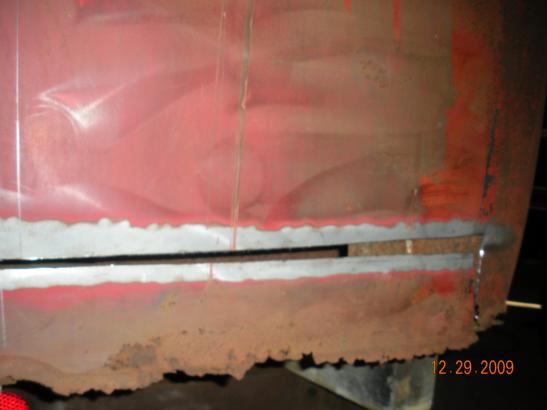
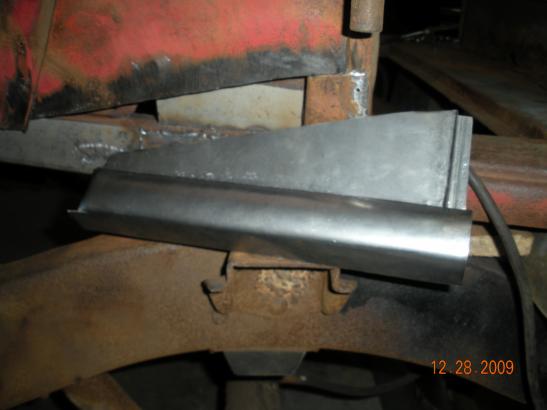
The brace around the back of the
cab floor was pretty well gone too...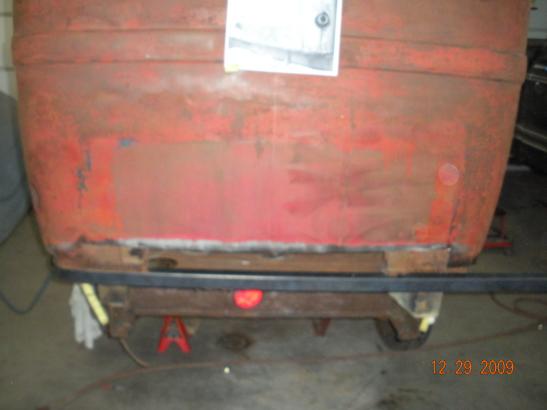
So I just made a new one out of
straight stock and rolled it to fit.
It slid right in side the frame
channel at the cab corners.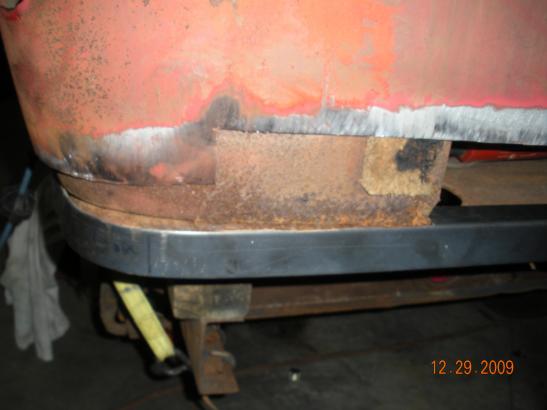
While getting the curve right I
have it on the outside of the frame here.
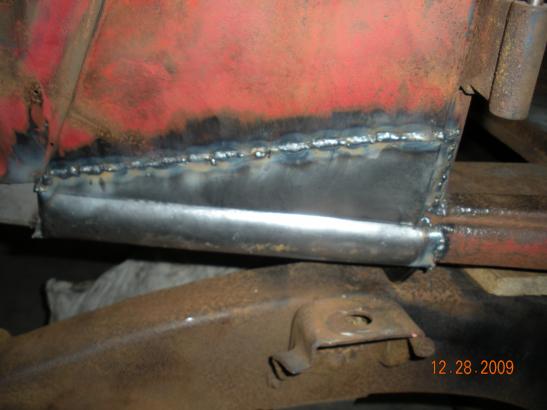
Now it's inside an fits like a
glove.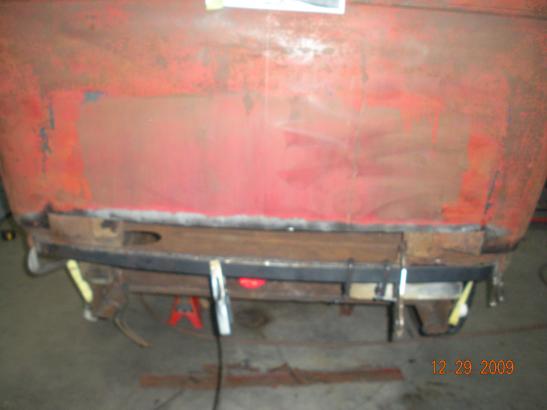
Ready to weld in place.
The old cab is starting to feel
solid once again.
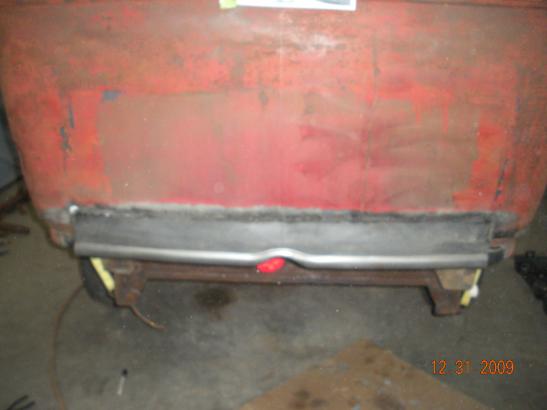
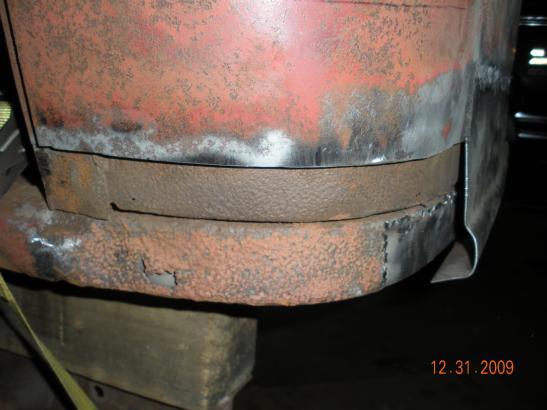
With the lower frame replaced, I can
start fitting the lower cab patch panel.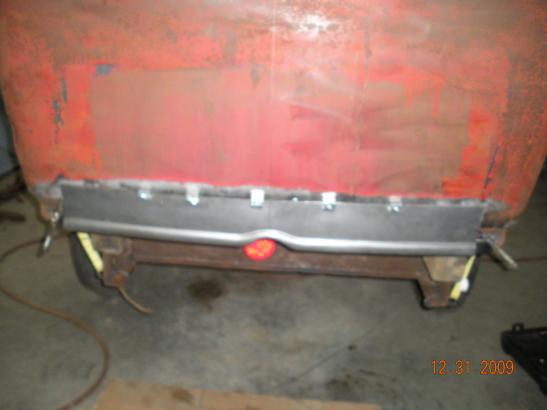
Looks like my cut was right on.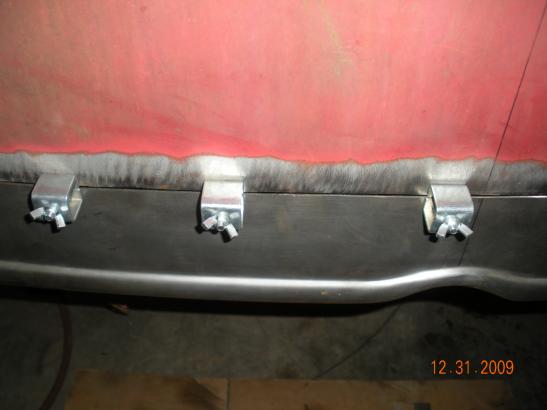
Get this thing tacked in place and
see what it looks like.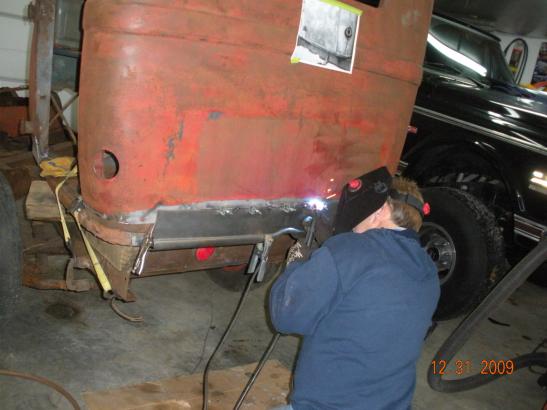
.
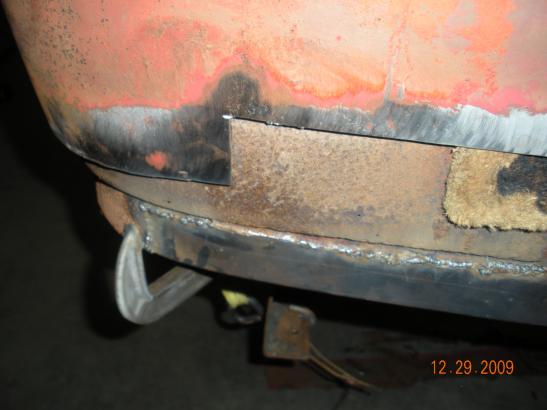
Time to try a cab corner...
While it's not done in the picture
below--I did weld the bottom of the patch panel to the frame
of the floor, to make sure it was pulled in correctly along the bottom,
before starting to fit the cab corner.
The lower cab corner on the Plymouth
pickup has a lot
of curve to it--this piece was a lot tougher to make than it looks.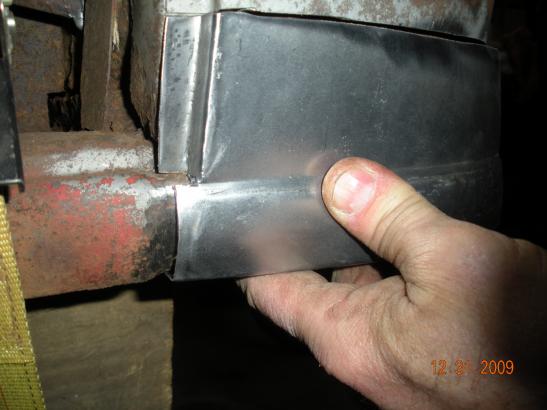
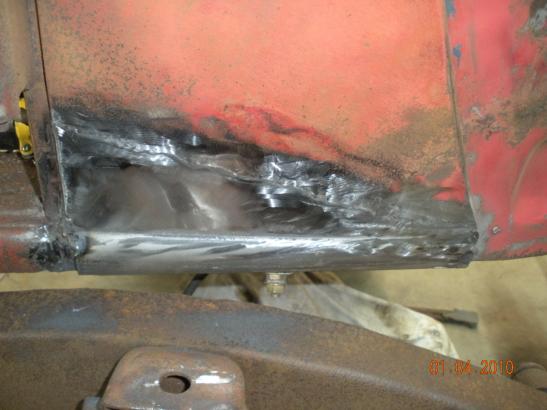
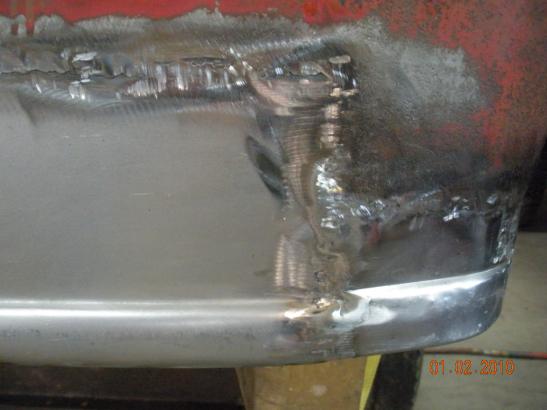
Above is a shot of the front of the
driver side cab corner.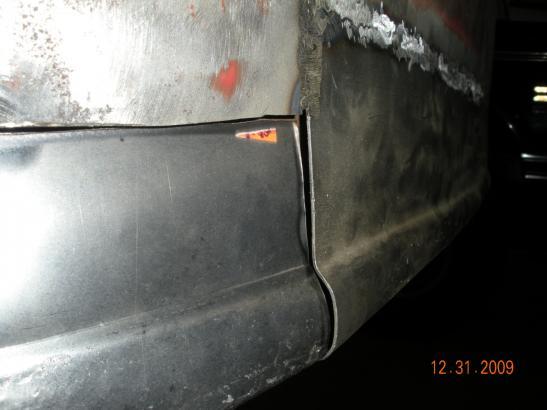
This is a shot of the back of my
cab corner patch.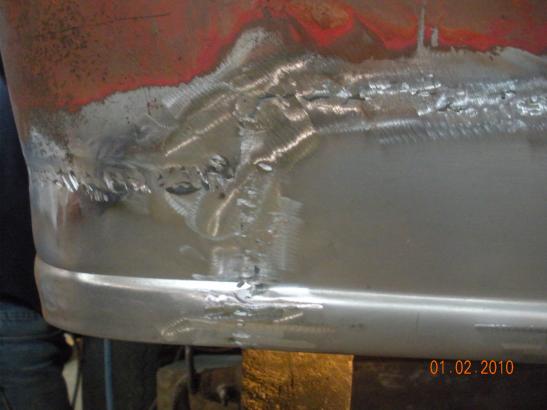
Starting to take shape.
Another look.
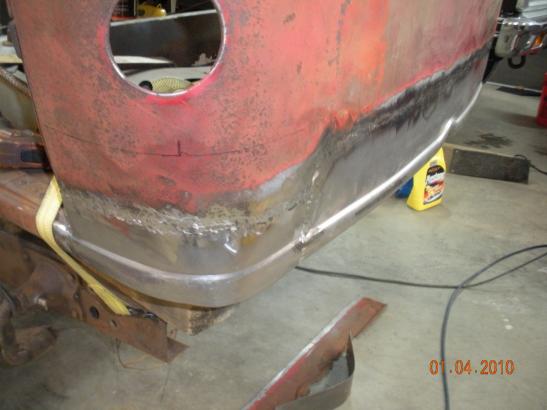
Here's what the passenger side
looks like...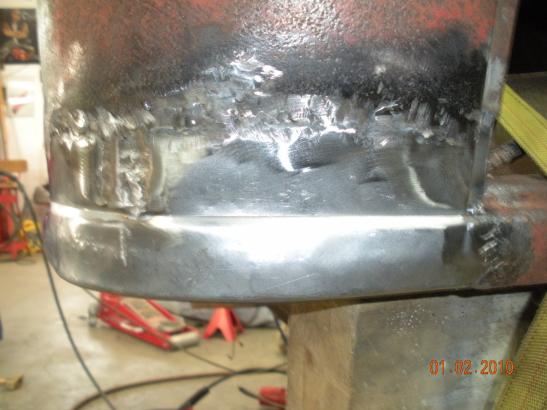
This is a shot of the back of my
cab corner patch.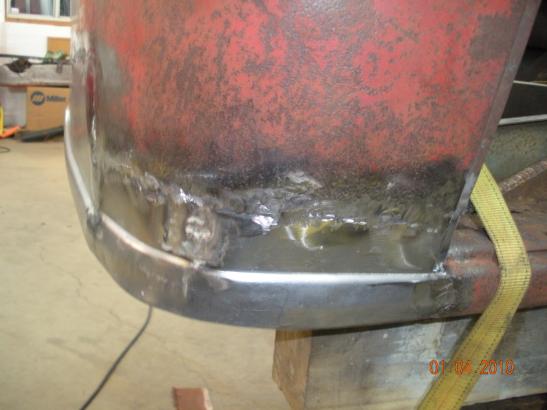
I think this will be workable... it
sure did make the whole thing more solid!
A definite improvement.
which is better one or two...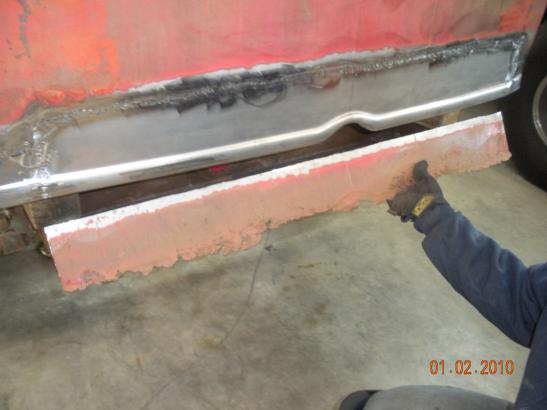
I've wire brushed and sand blasted
the frame till I'm tired of it. I've also welded up all the extra bolt/rivet
holes that I won't be using. I bet there were 50 holes on each rail. Now
I'm going to box the whole thing from front to back. I did remove one
center cross member... It was never going to clear a transmission hump and I
intend to "X" the frame with a driveshaft safety loop anyway.
Getting started on the frame...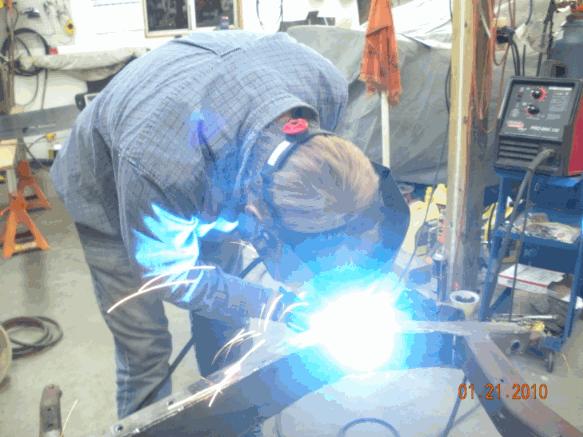
Picture above I tacked newly cut
pieces in place. Frame is upright.
After tacking top in place I
turned it over and tacked bottom side of frame.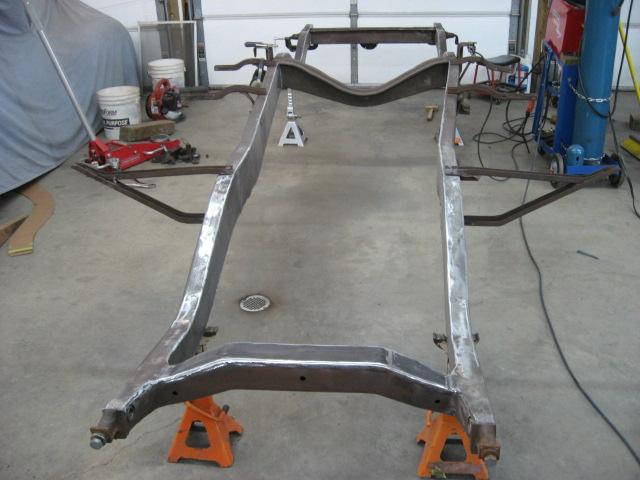
It's still upside down here but
this front cross member had some rust through...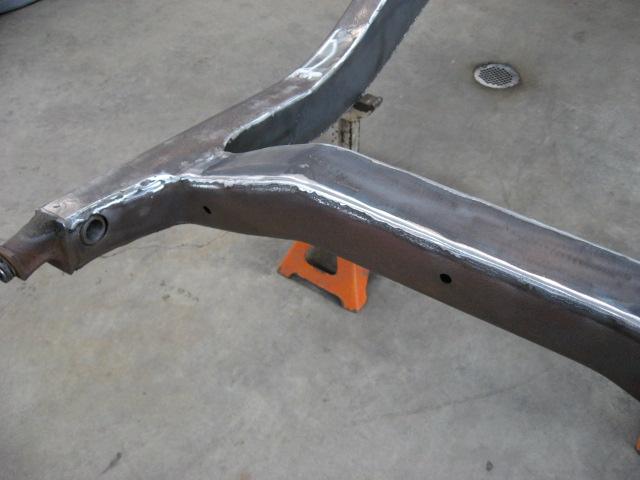
So I cut out the bottom and put in
new metal...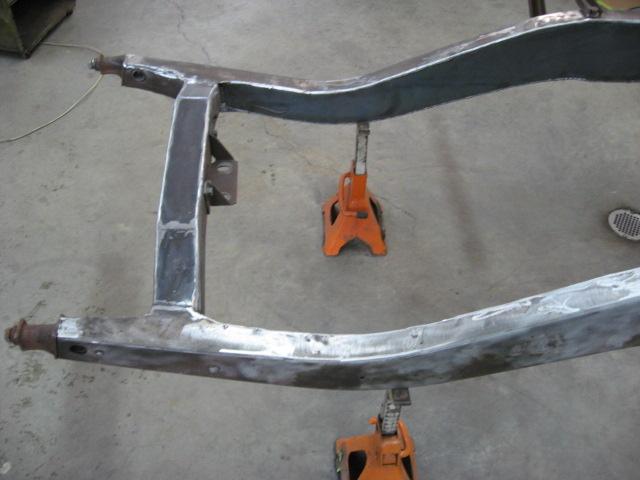
Here's the back cross member...
figured I could strengthen it up too, by welding seams.
And there it is completely boxed...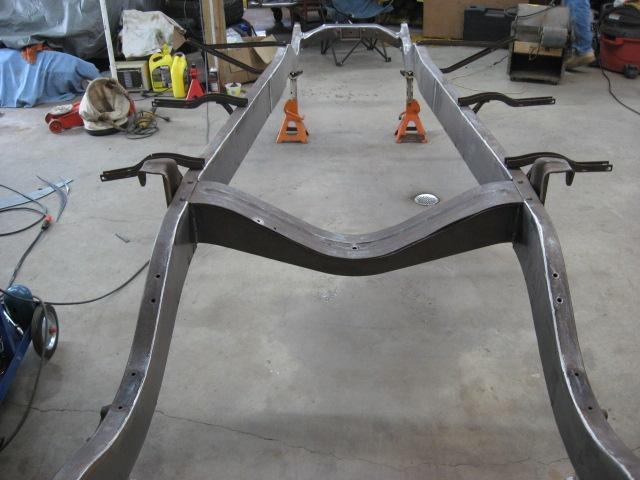
This thing should paint pretty nice...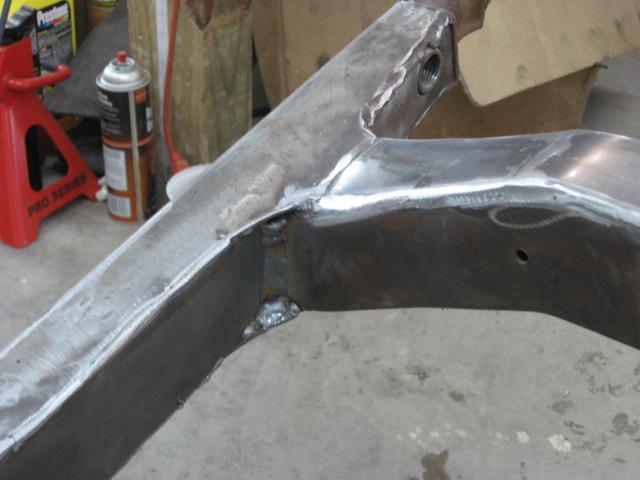
I purchased my IFS from
JW Rod Garage
out of Belgium, WI.
I decided to go with the MII Hub to
Hub Coil over Kit. Bob at JWRG has been very helpful.
Check out their web site
here JW Rod Garage maybe they'll give me a deal when I
get ready to order more parts.
Time to get it in! Oh
and thanks to my friend Bobby, for showing me how a Pro welds!
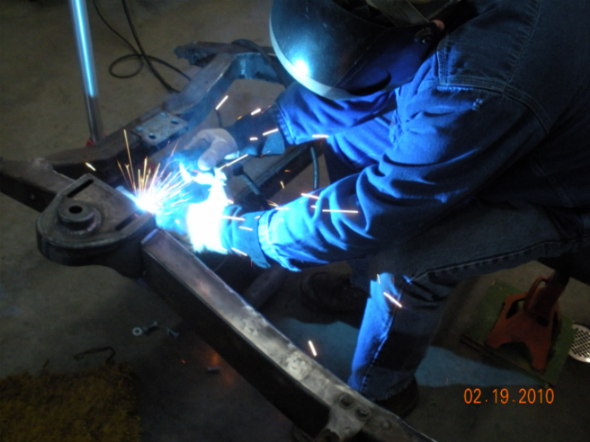
I have the cross member in and
welding in the top hats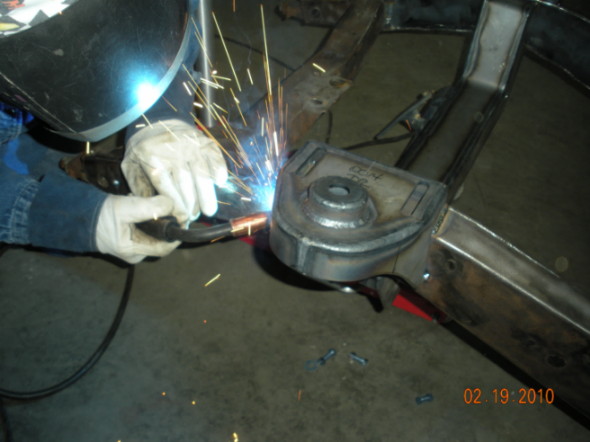
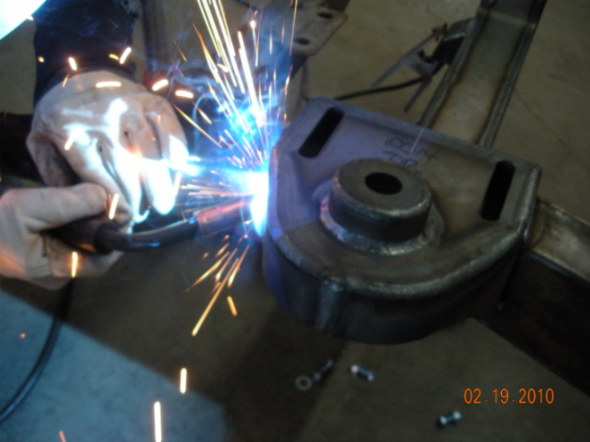
Check out those welds--Not bad for my little Lincoln 135
welder!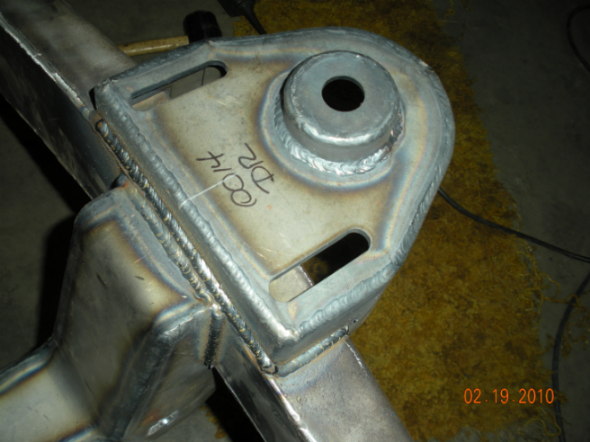
I welded this thing inside and out.
Turned the frame over to get inside too!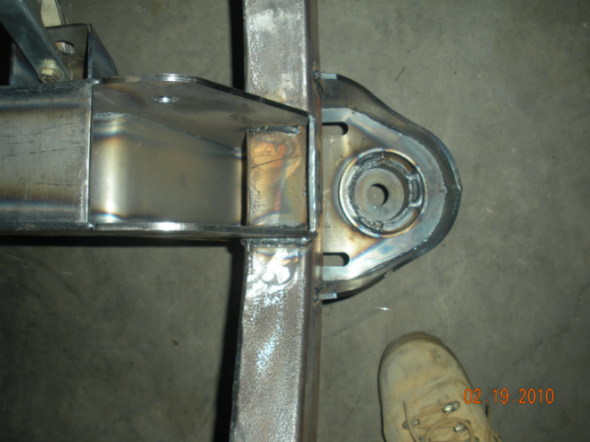
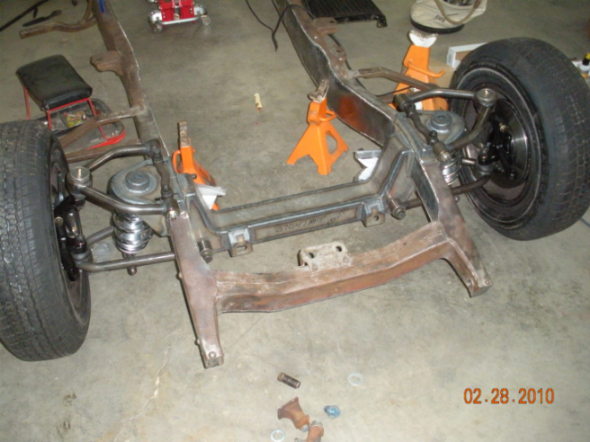
Start putting this thing together.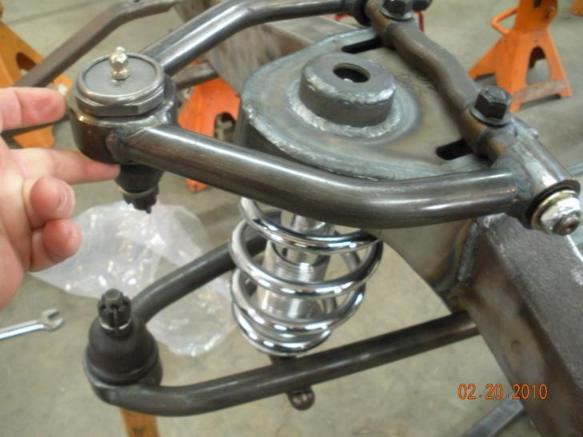
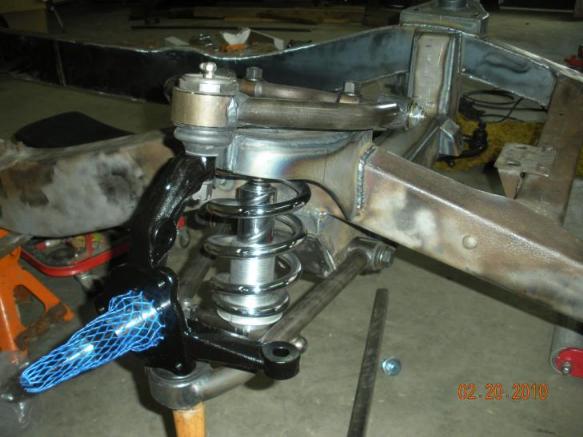
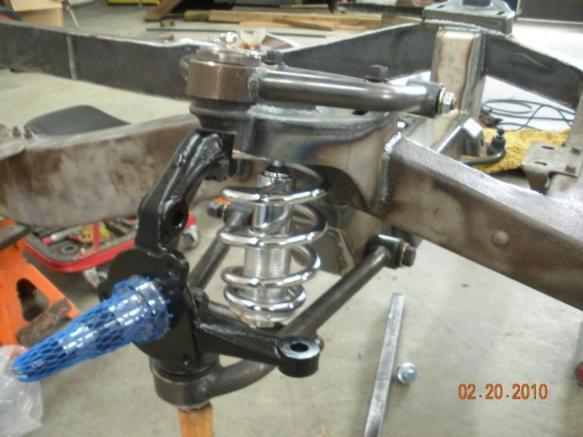

The front end is in! Man,
it's slammed--hopefully when I
crank the coil over's up they will raise me at least a couple inches. 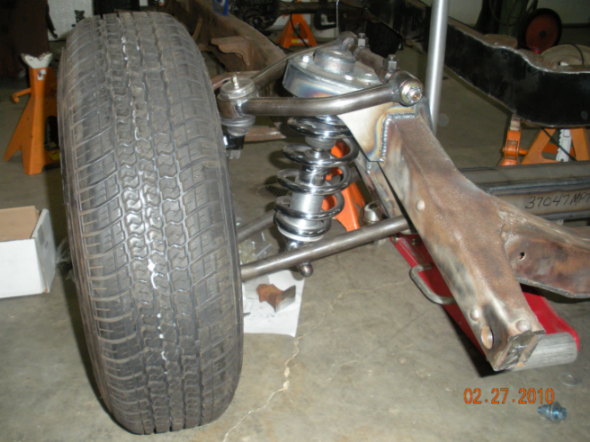
Time to move to the
rear end.
I'm going to try to
use the original springs and mounts with the 8inch. I can't believe
the 1/2tons came with 9 leafs. I've removed 3 of them, so down to a
total of 6 leaves now and at that, when I stepped on the back cross member,
along with two tires and rims and a 5 gallon bucket of sand for even more
weight, the frame only goes down less than 1" at the back of the running boards.
I may have to remove a couple more leaves.
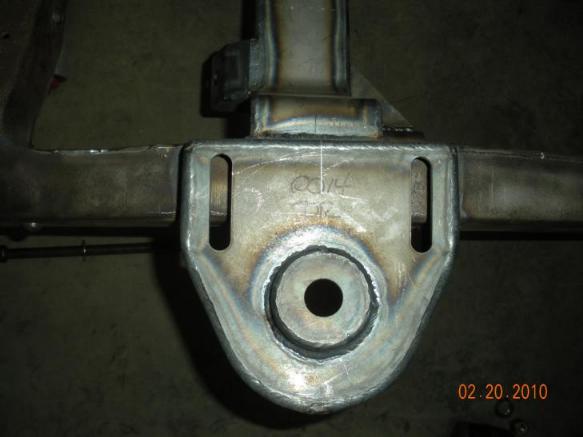
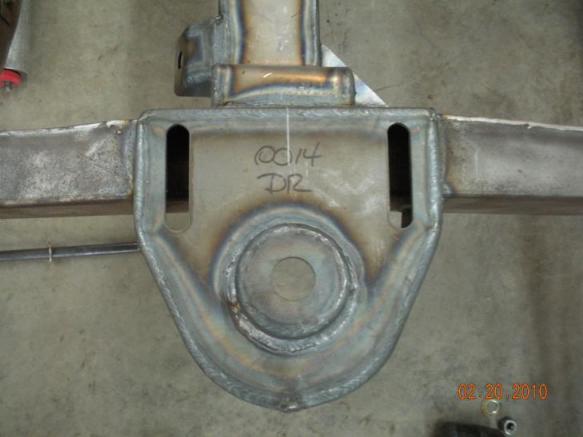
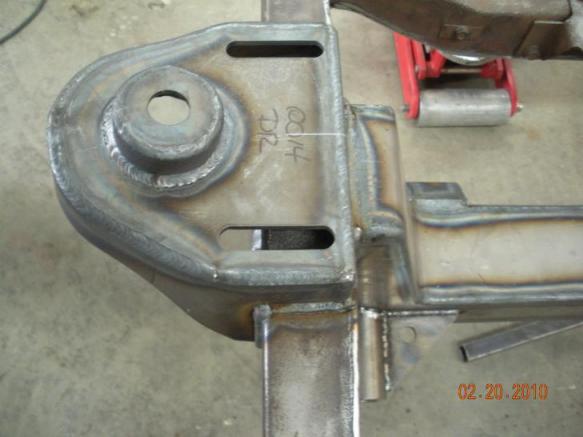
Here's a mock up of the rear...
notice the C clamps. Now for new spring pads welded in place to get 2-3 degrees up on the
third member and a 2-3" lowering block and I'll be ready for paint!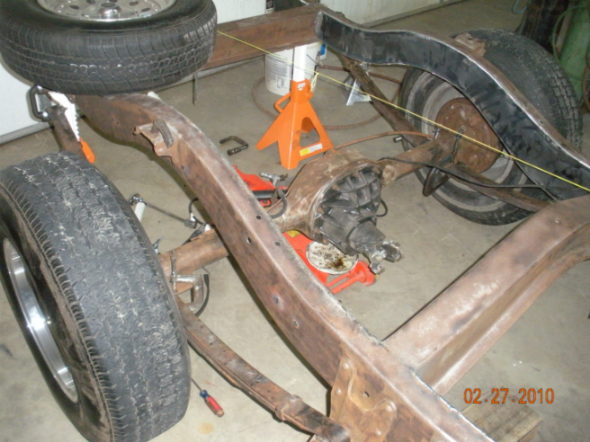
About 10" too high
in back.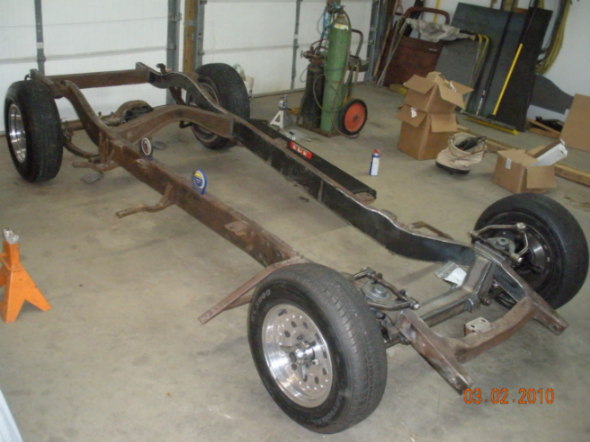
I flipped the shackles over here,
that lowered the frame about 4 inches.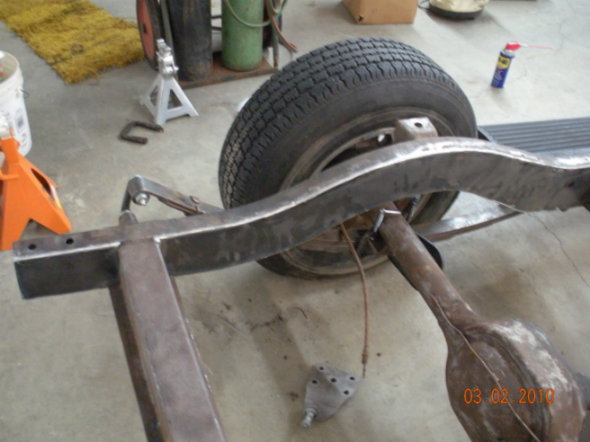
Have to do some measuring now...
I'm not sure the bed floor will clear the shackles....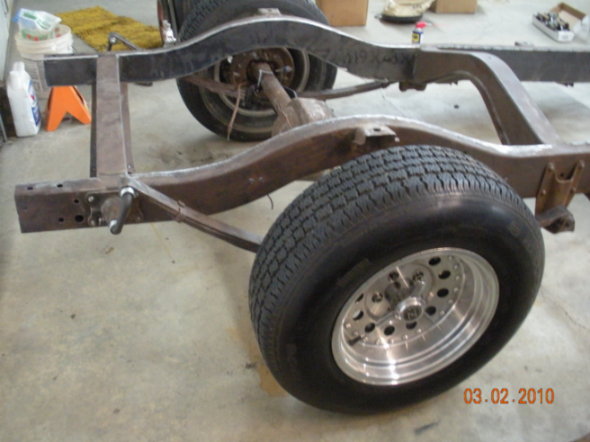
I took out two more
leaves, two longer leaves. Down to 4 now--with six leaves, the springs
just didn't give at all. It's getting closer,
and I can always add leaves as I add the weight of running gear and body.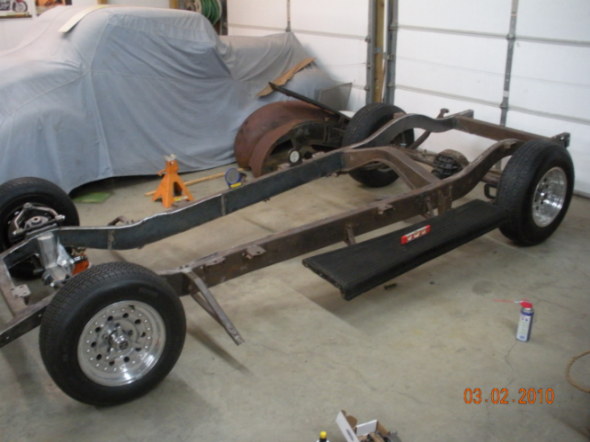
I think with 3" lowering blocks
it will be close to the stance/rake I want. But it's all guess work
at this point, until I can get body sheet metal, motor and transmission in place. 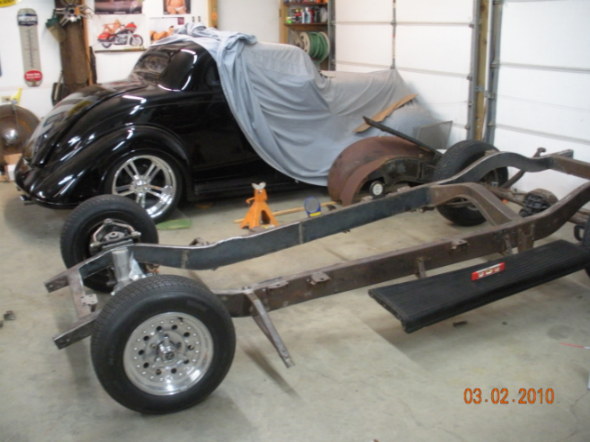
I bet a rotisserie
would not be that hard to make, I could sure use one now. 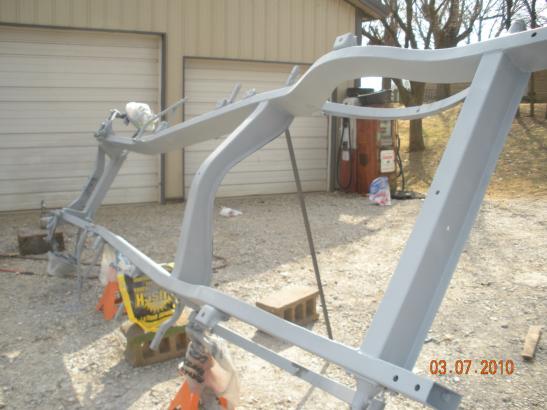
I've got 3 inch
lowering blocks in place and it looks about like the stance I want... Now if
I can just keep it here while I put it back together? 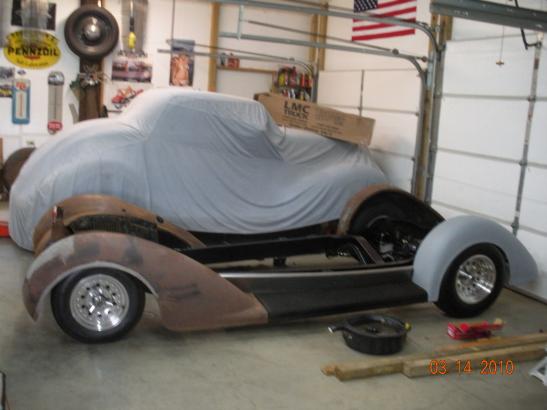
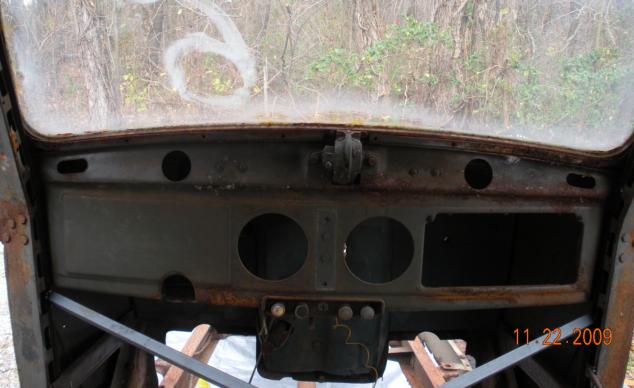
Started welding up holes in the
firewall and holes from screws that held hood felt in place. I think
there are about 40 holes in the firewall from the factory.
Set the cab back on the frame so I
don't forget how it looks.
I have my winter project planned.
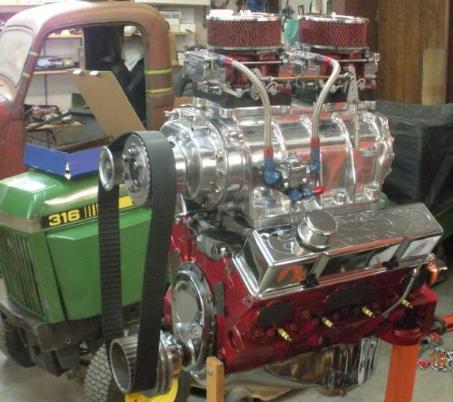
I've always wanted a blower
motor, gonna see how this fits in the 37.
Best of Show October 2009 Burdette
Park
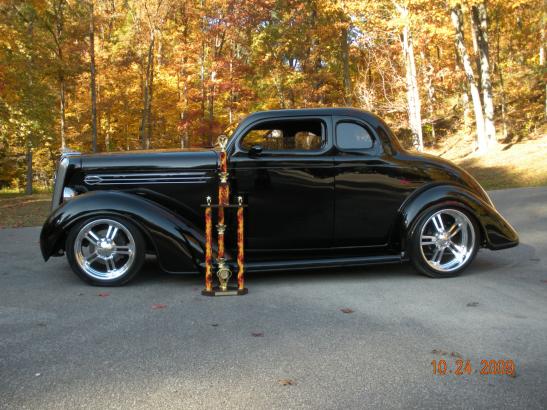
Frog Follies 09