|
|
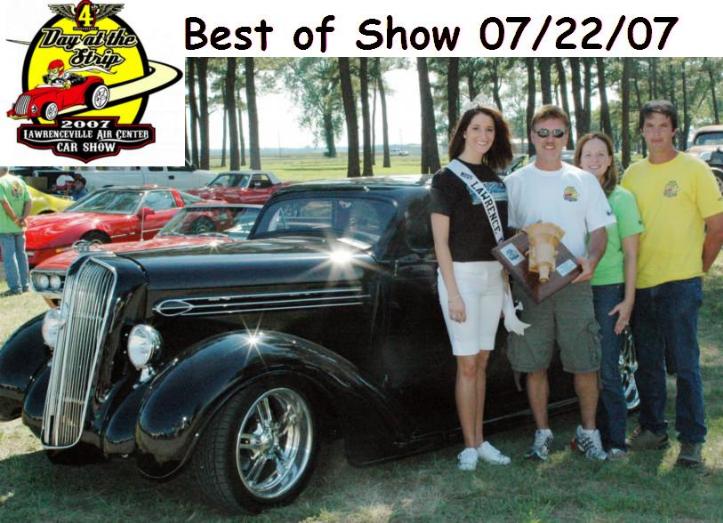
05/01/09
Well this is my next project a 1937
Plymouth PT50 pickup
one of only 15,564 made.
If you have parts or whole truck
1936, 1937 or 1938 Plymouth, Dodge or
Fargo pickup,
like this one...
I'm interested in buying.

anyone out there have a lead,
ready to sell parts or one you have?
Email me please
pedalit@insightbb.com
Click
here to check progress on the pick up |
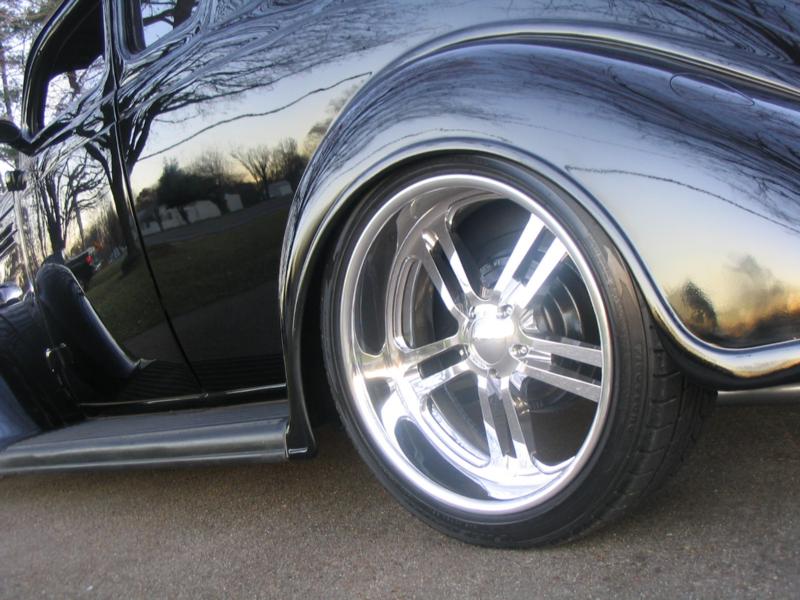
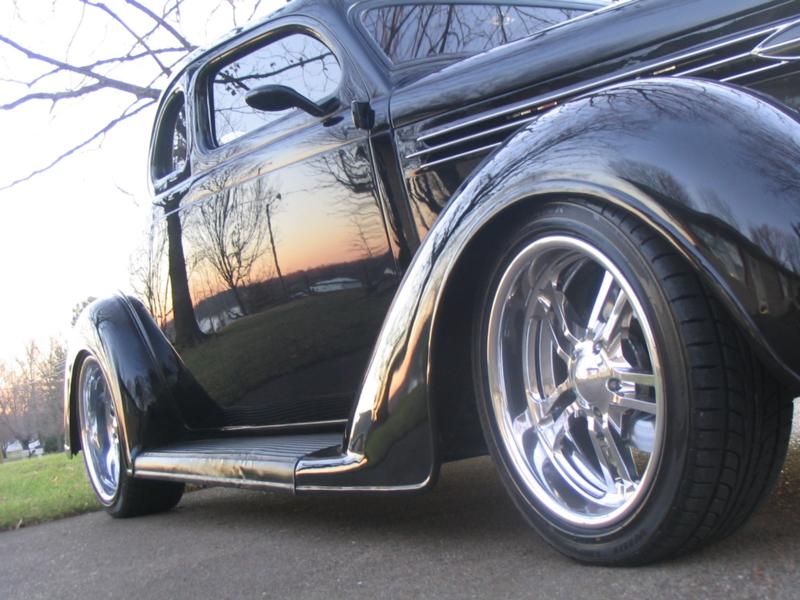
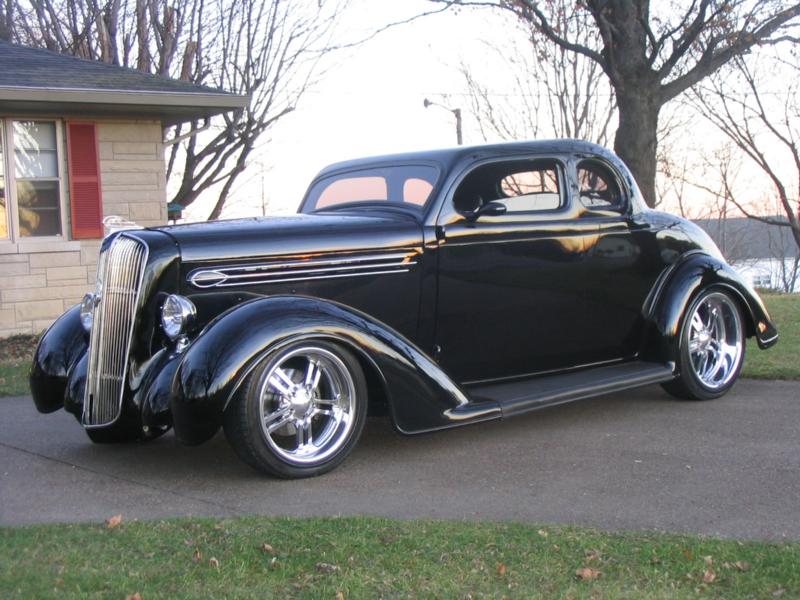
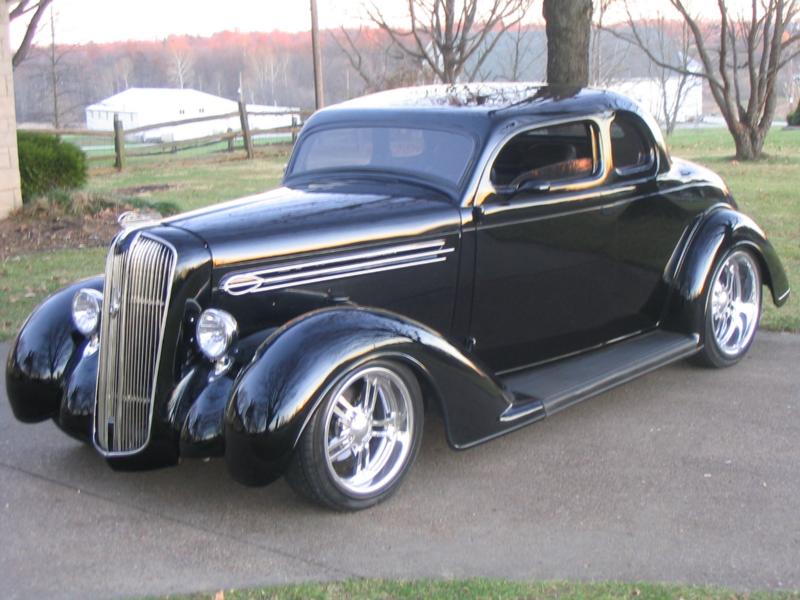
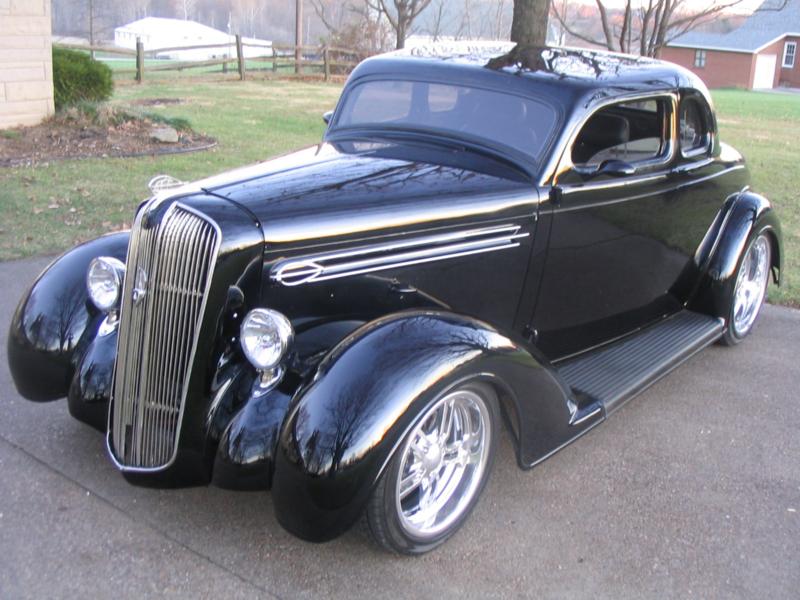
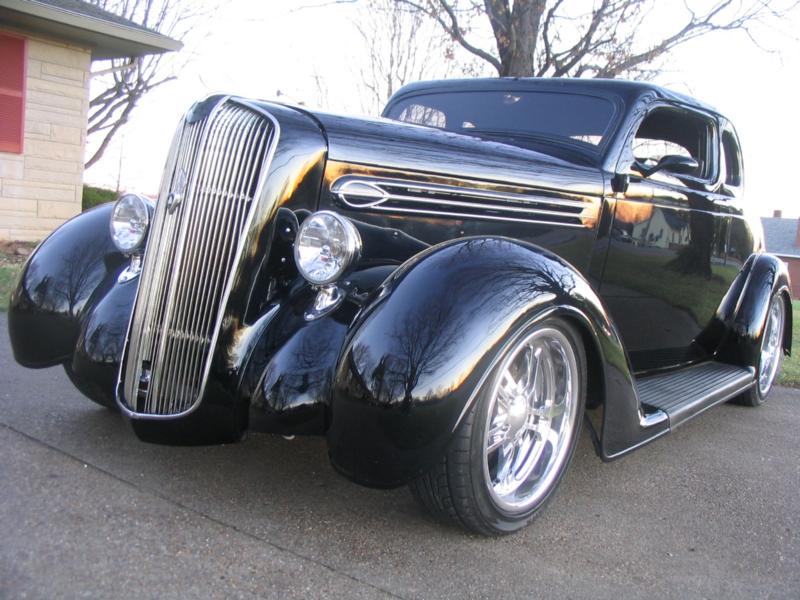
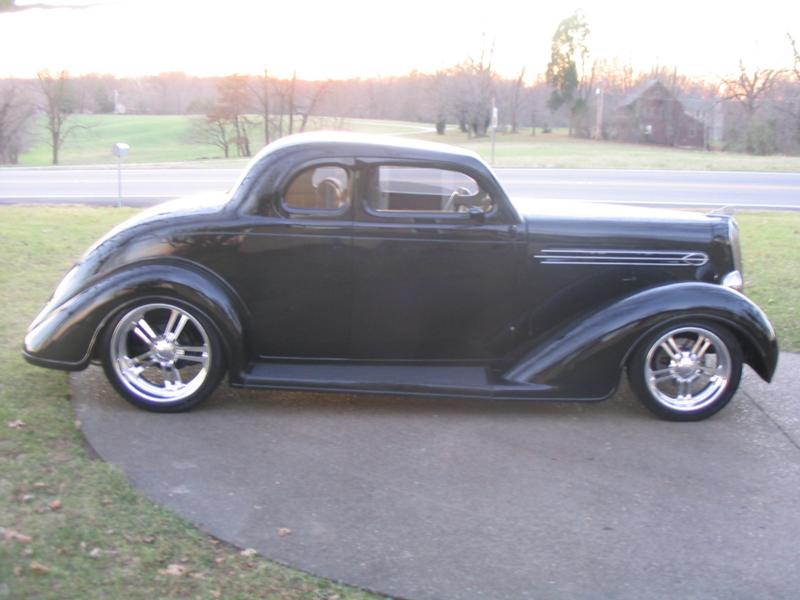
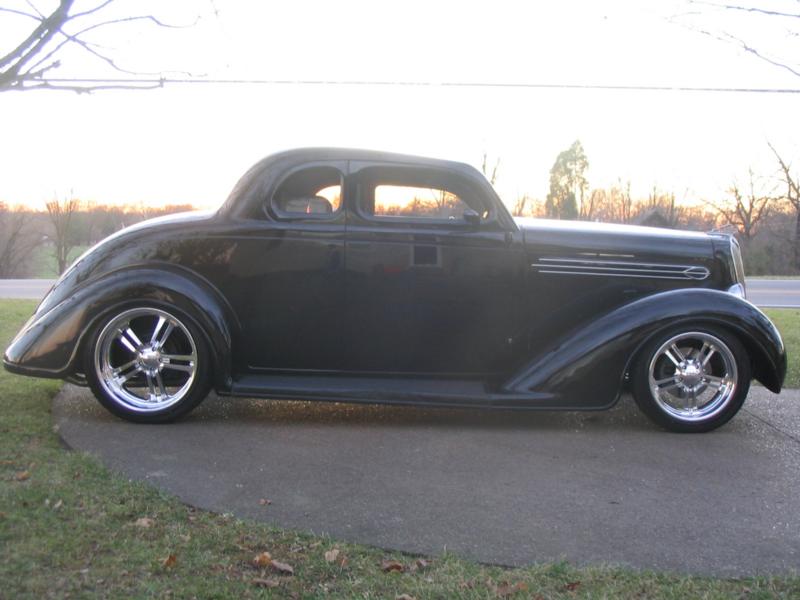
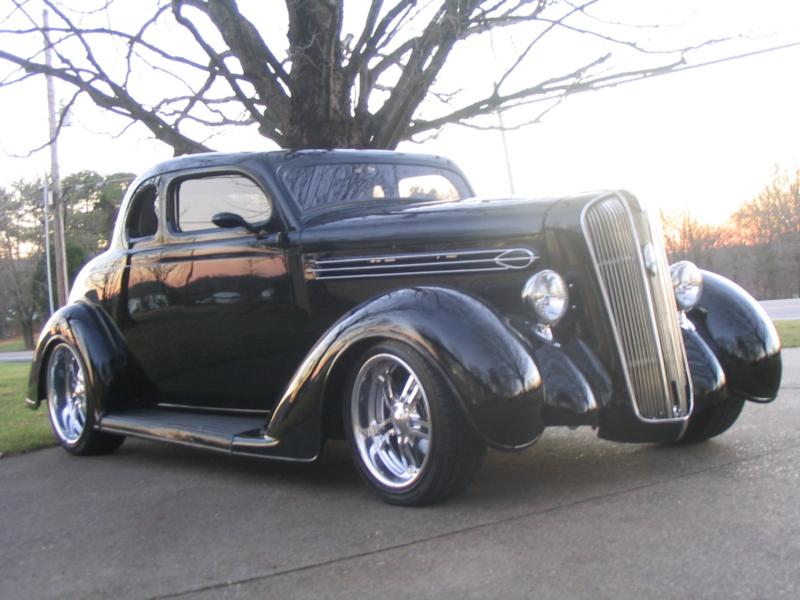
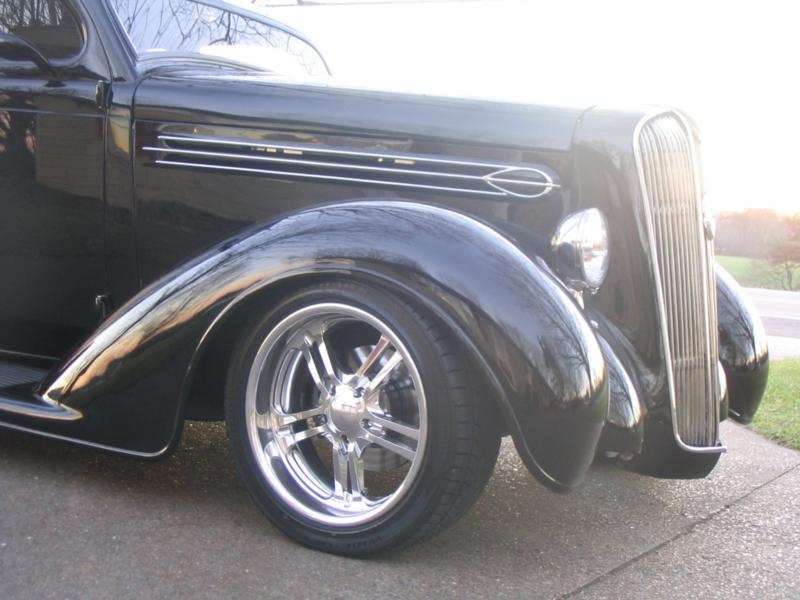
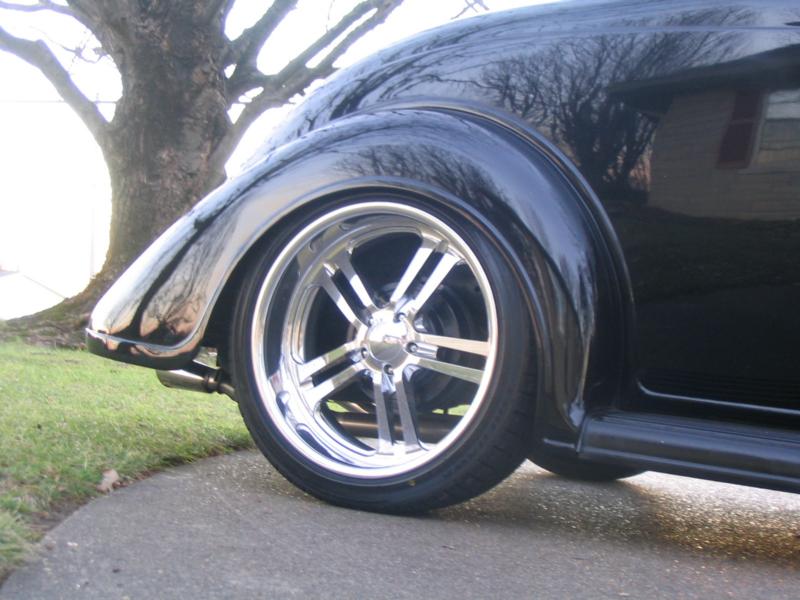
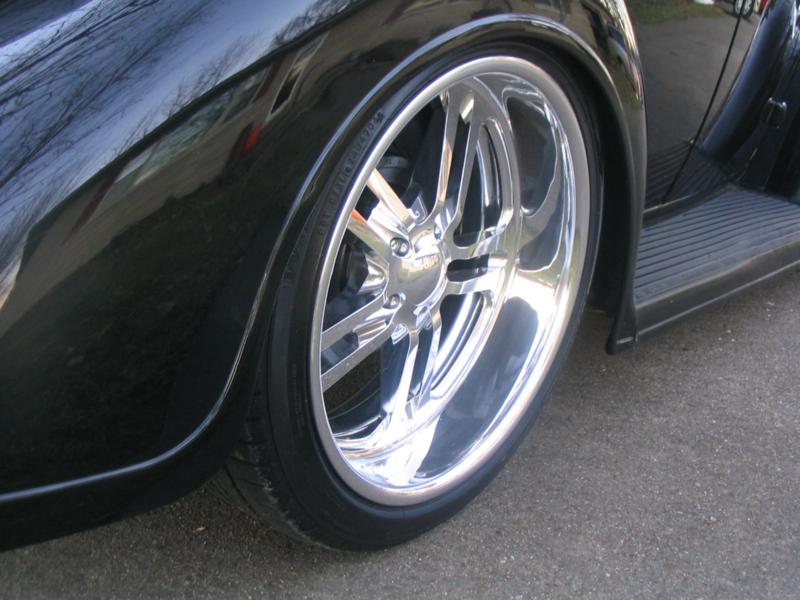
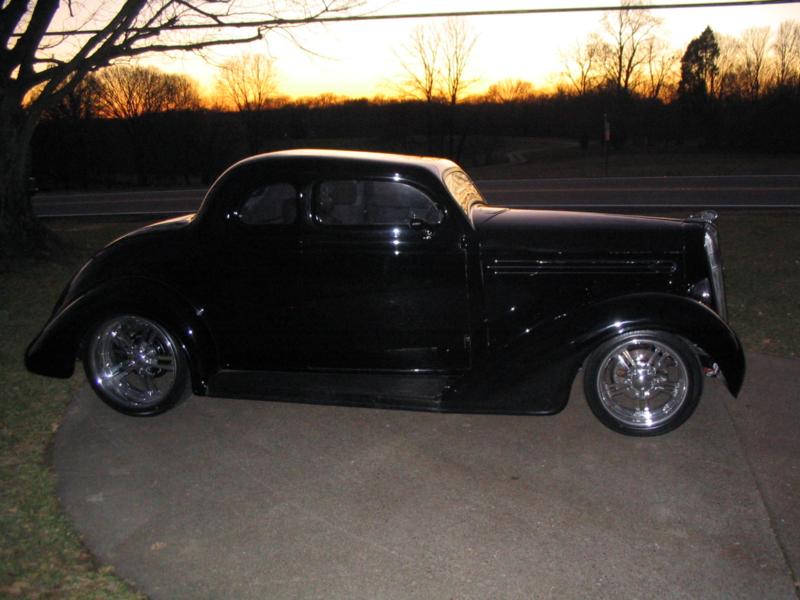
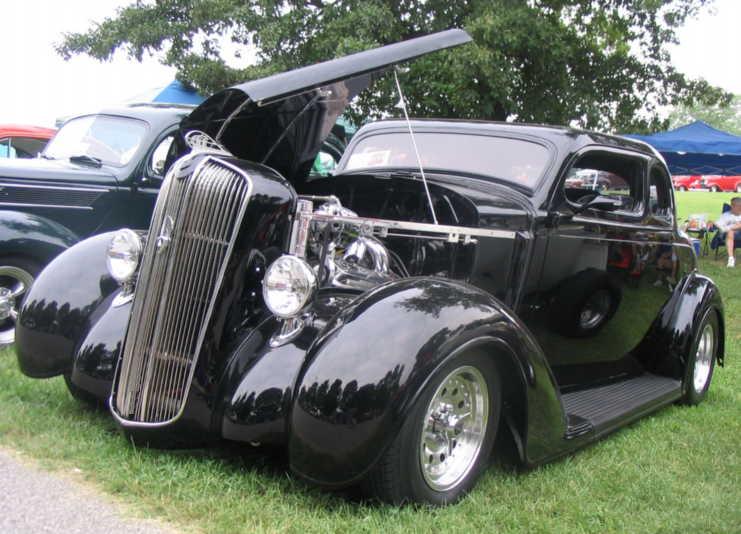
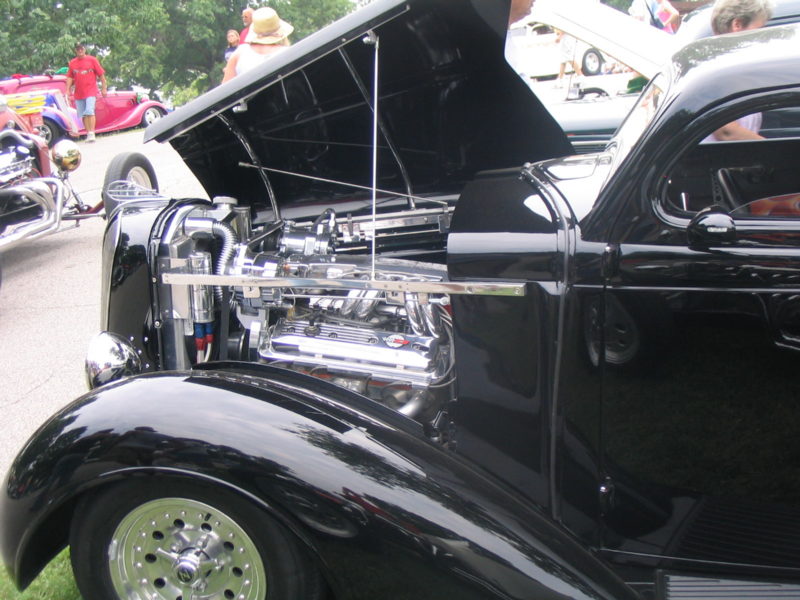
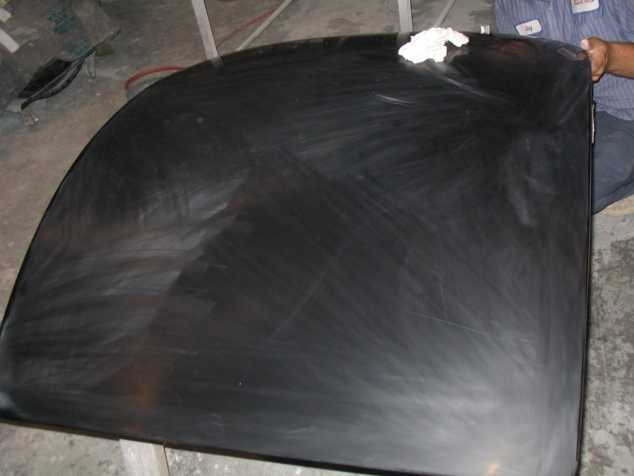
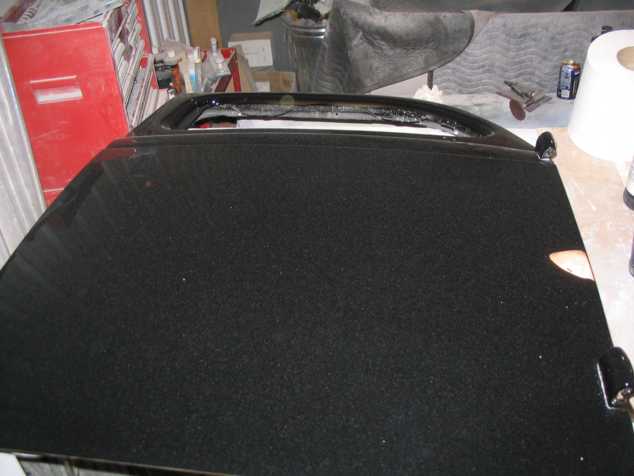
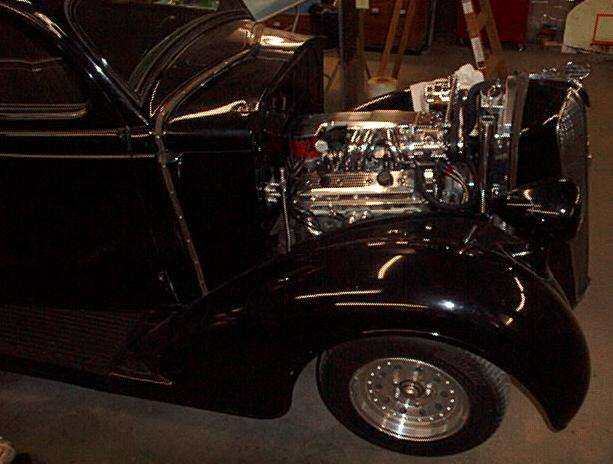
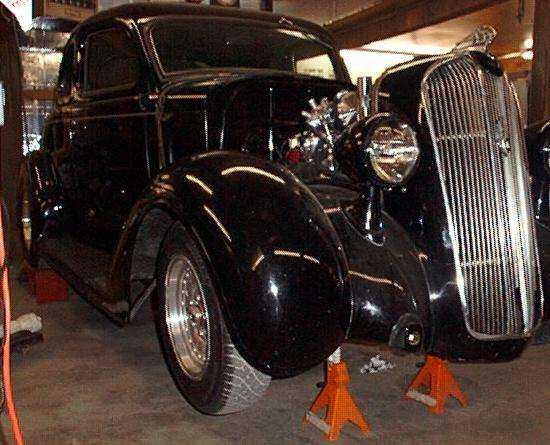
Finally the hood is painted, the Budnik wheels (17's and 20's) are
on. I bought another set of running boards stripped the rubber off and
painted them.

The next few shots are from last Thanksgiving day 2006.
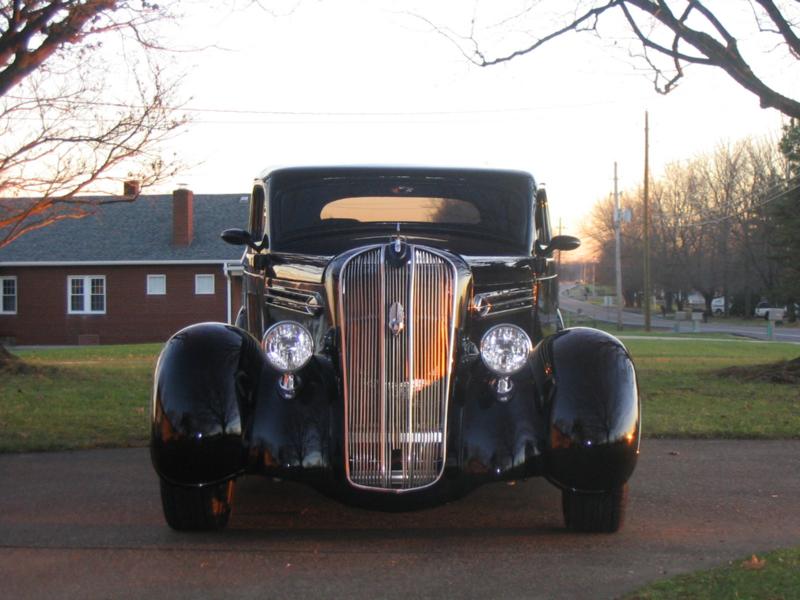
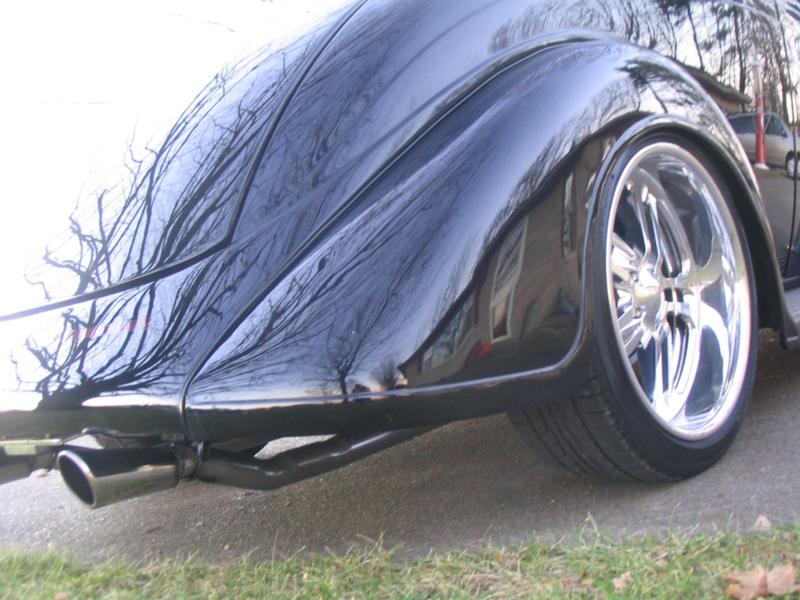
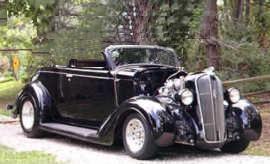
Don't even try to tell me the chop didn't give this car a little
attitude!
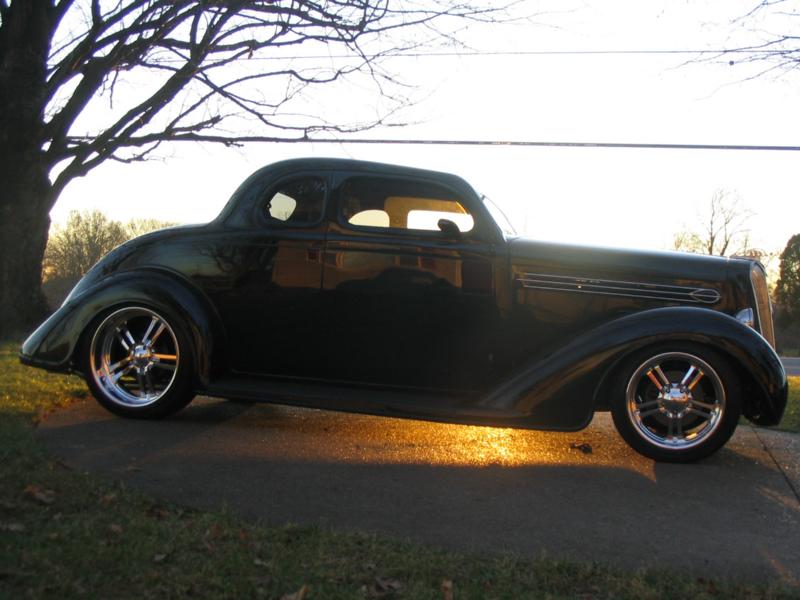
There are some fine lines in those 36's!
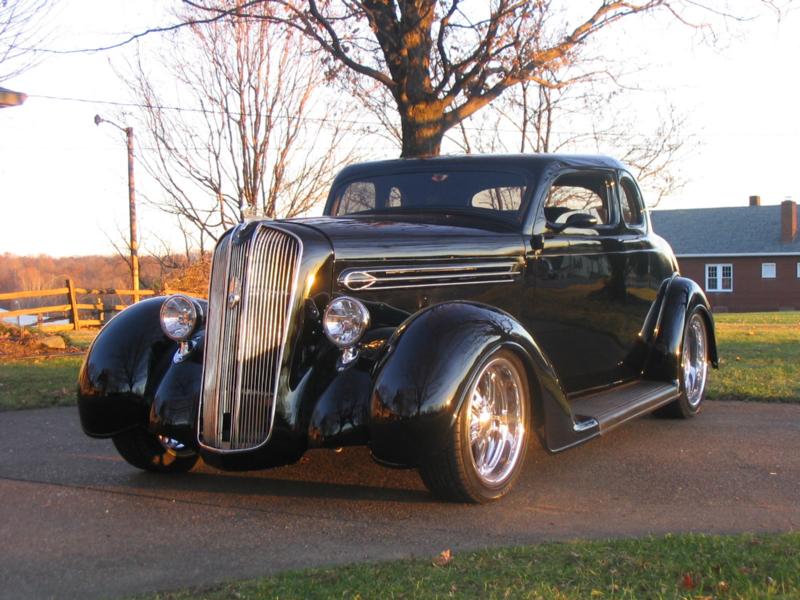
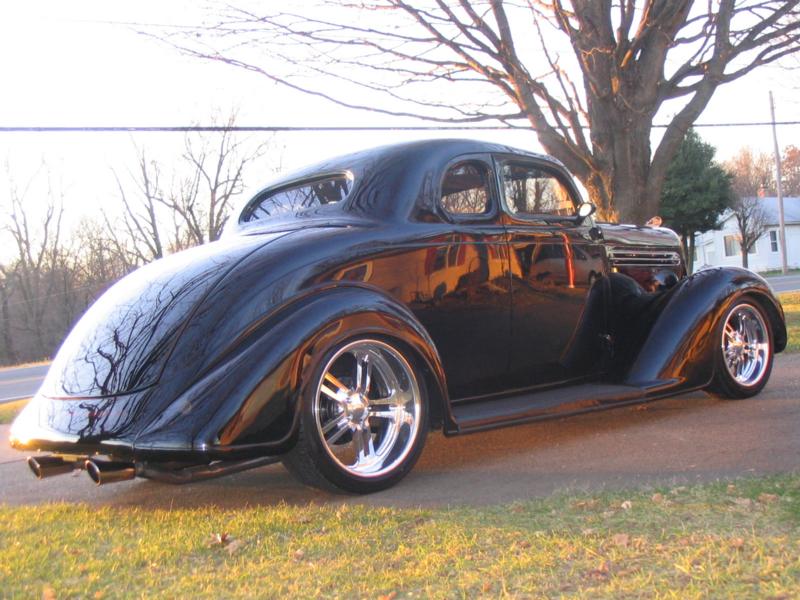
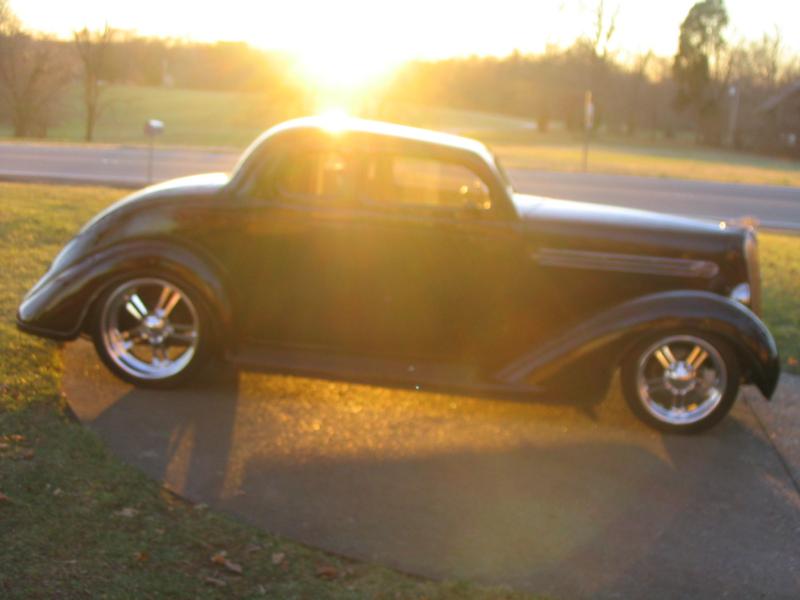
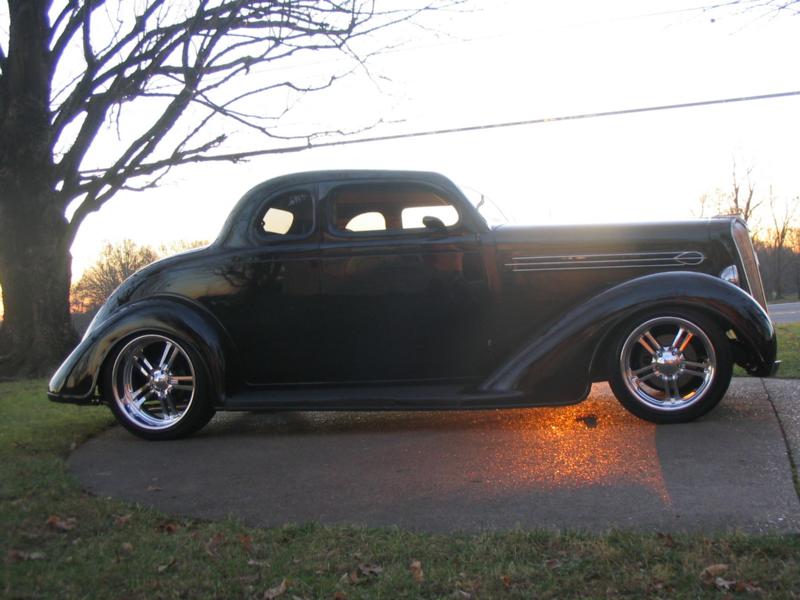 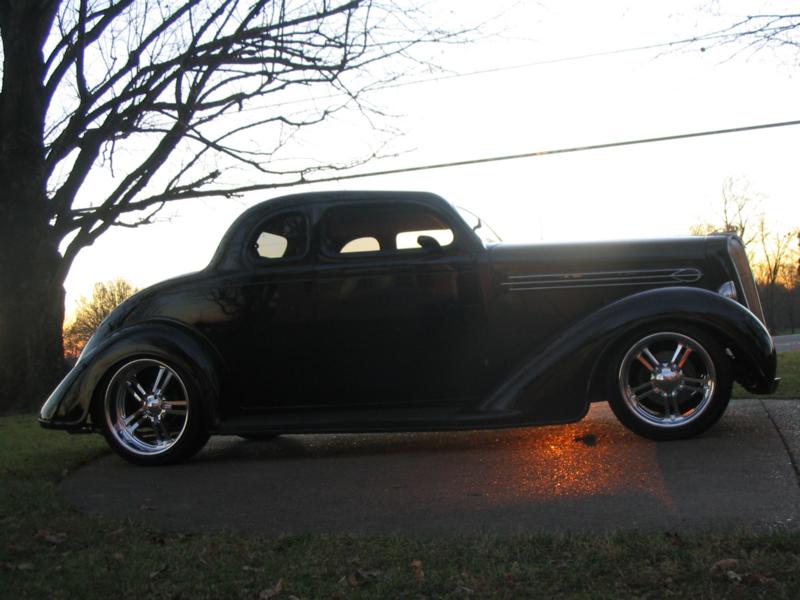
 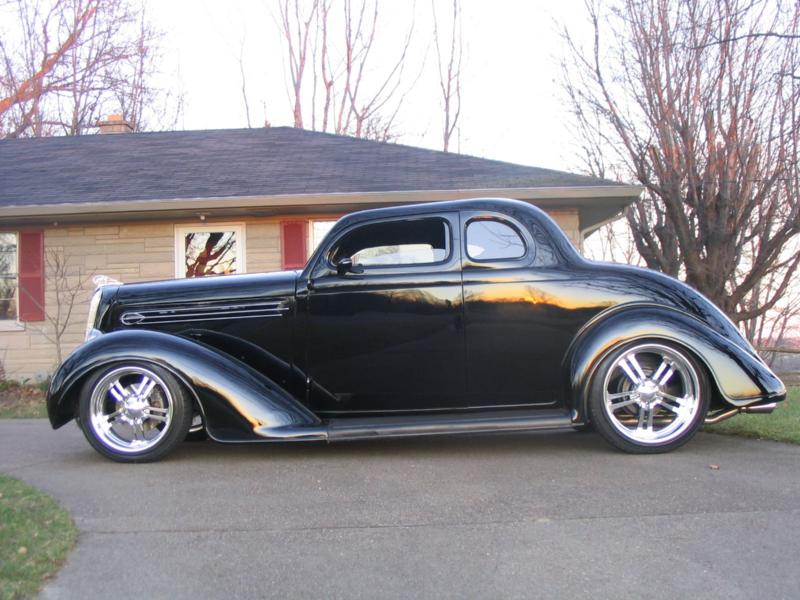
Budnik Ice 17's and 20's
The following pictures are from months ago as
work was progressing.
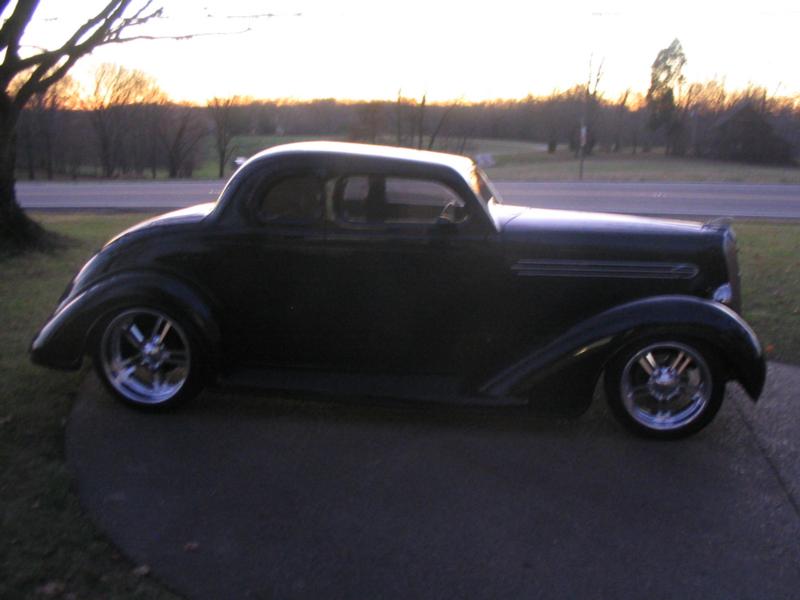
My car is still under construction but it's coming along.
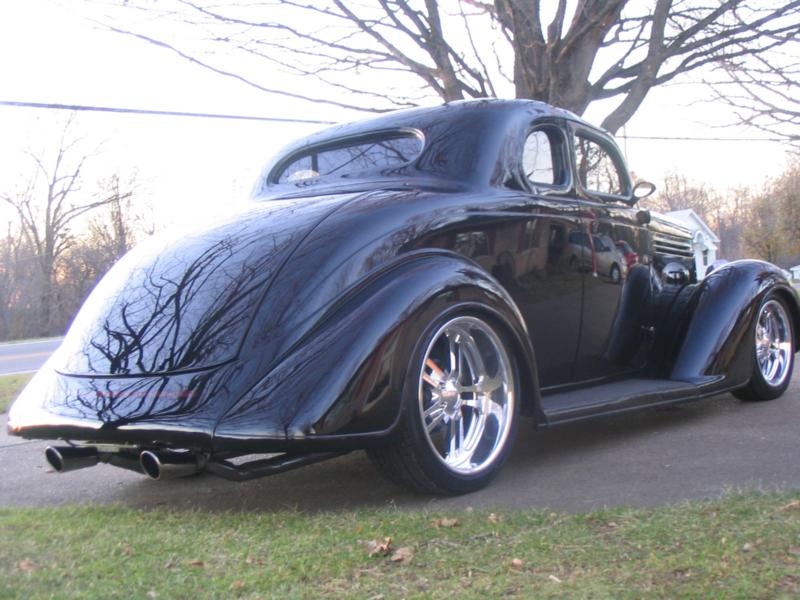
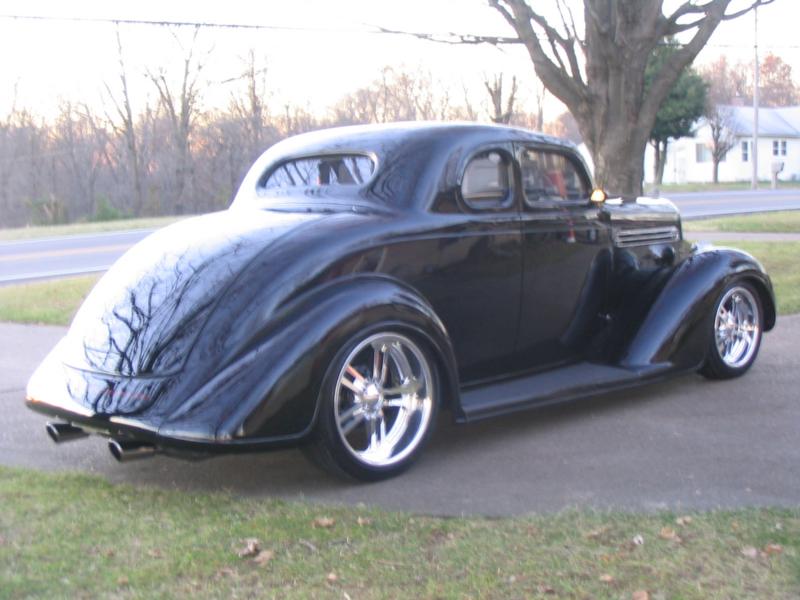
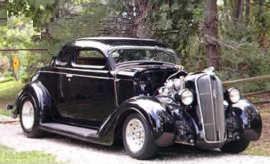
Here's pictures from the 2006 Frog Follies. I was there--Primered
hood and all. I also have another set of original running boards
I've stripped the old mat off of and in the process of readying them for
paint. While at the Street Rod Nationals last month in Louisville, I
ordered Budnik wheels (20's and 17's). They should be here soon.
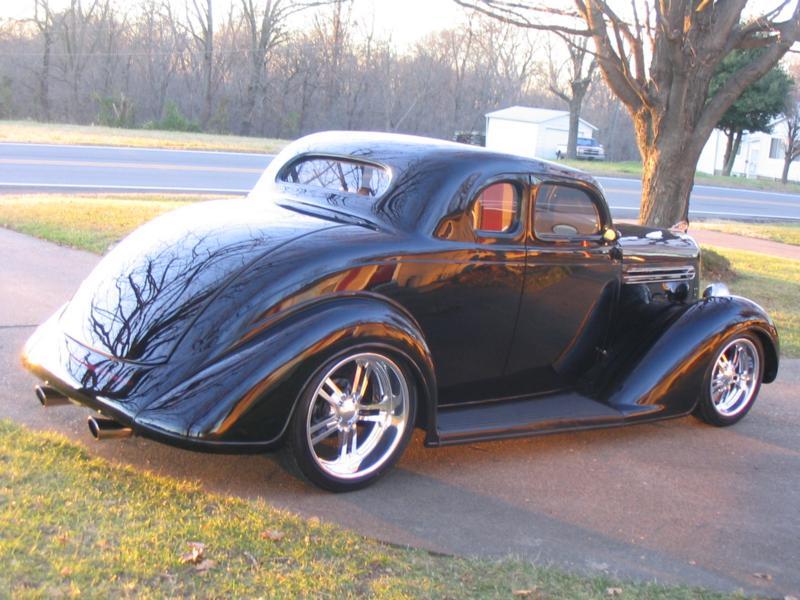
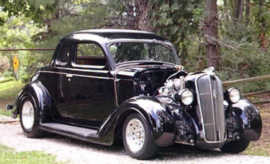
Don't even try to tell me the chop didn't give this car some
attitude!
Notice the hide away plate & those bad flush mount led's, the
third brake light barely shows!
Email me
pedalit@insightbb.com
The poll is over. Thanks to the 161 people who voted.
The original choices follow:
1) Leave it alone.
2) Chop it 2 1/2 inches.
 
3) Chop 2 3/4 inches.
4) Chop 3 inches.
5) Chop 3 1/2 inches.
6) Who needs a top anyway.
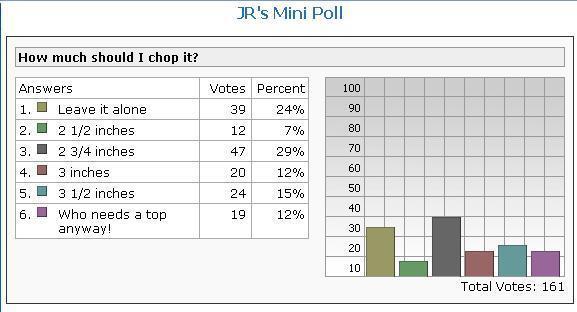
So the winner is Chop it 2 3/4
inches!
Keep scrolling down to see my progress!!!
email pedalit@insightbb.com
Please
check back often to see my progress!
|
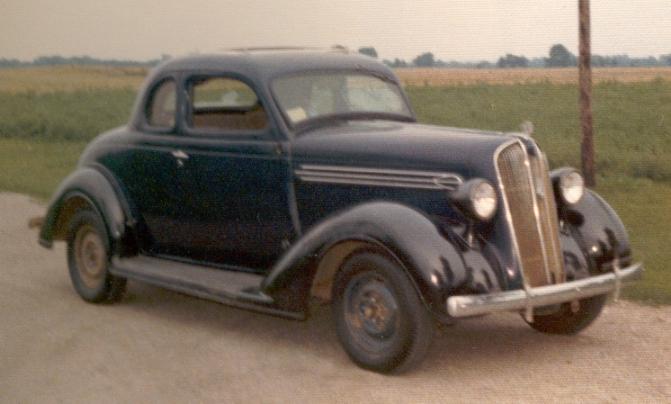
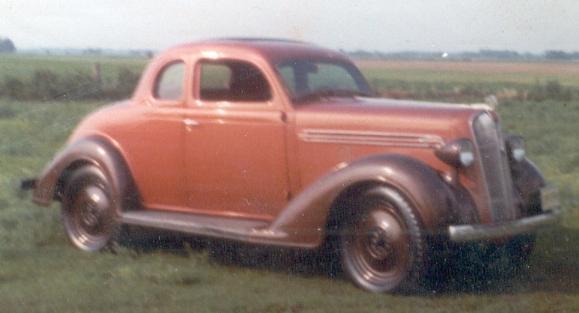
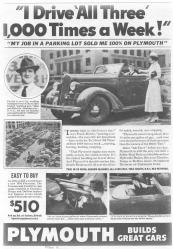
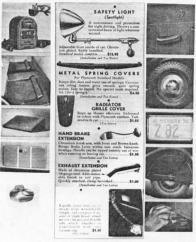
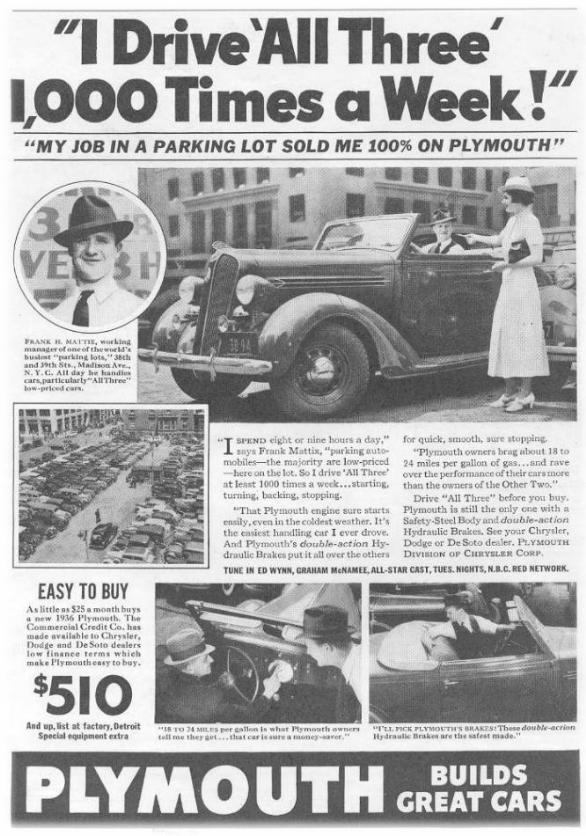
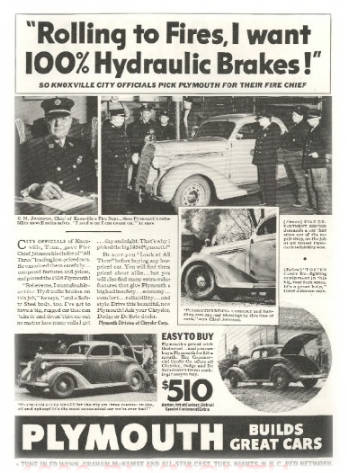
First of all let me say, Overall I've always liked the
body lines of the 36 Plymouths, but they do appear to be somewhat top heavy.
I think people realized it back then too. Look at the sales literature
from 1936, the cars in the colored, hand drawn, dealer handouts always
appeared to be slightly chopped (see sample here).
They knew they could make the car look better in pictures, by shaving a
little off the top.
|
|
This is what I
started with. Now a 2 1/2 - 2 3/4" chop seems like it should
give the car a little more attitude.
|
|
|
|
I'm not a metal
fabricator and I wouldn't let just anyone start cutting on the 36 my family
has owned since the early 1970's
So I had been
talking to Craig, owner of Hershey's Hot Rod Shop for over a year about
getting my car scheduled in for the work. We finally got
together, so here we go.
I will keep posting a few of my latest chop
progress pictures here.
To see all of my chop pictures start to present 09/06/05 click here!

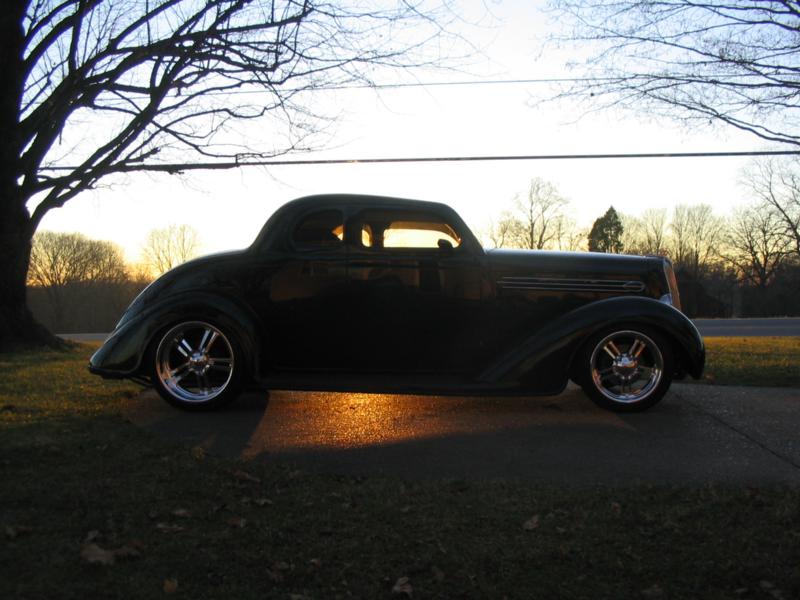
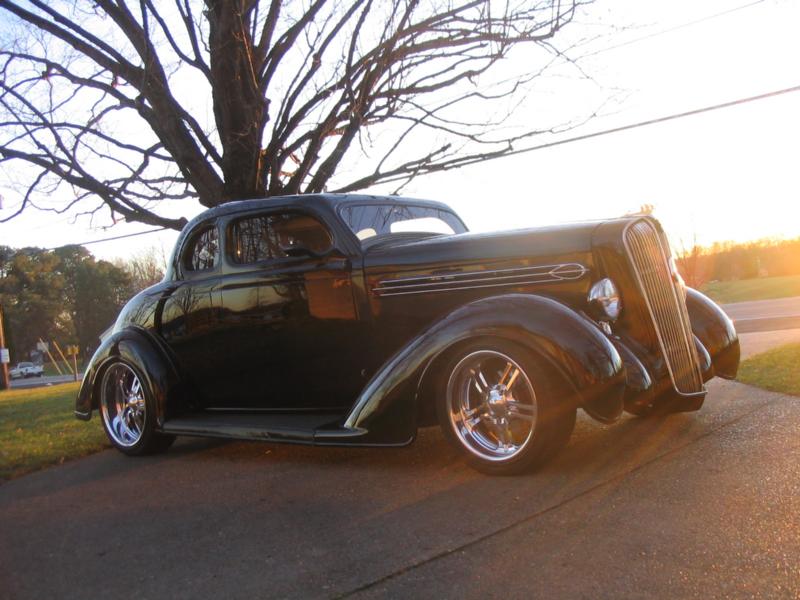
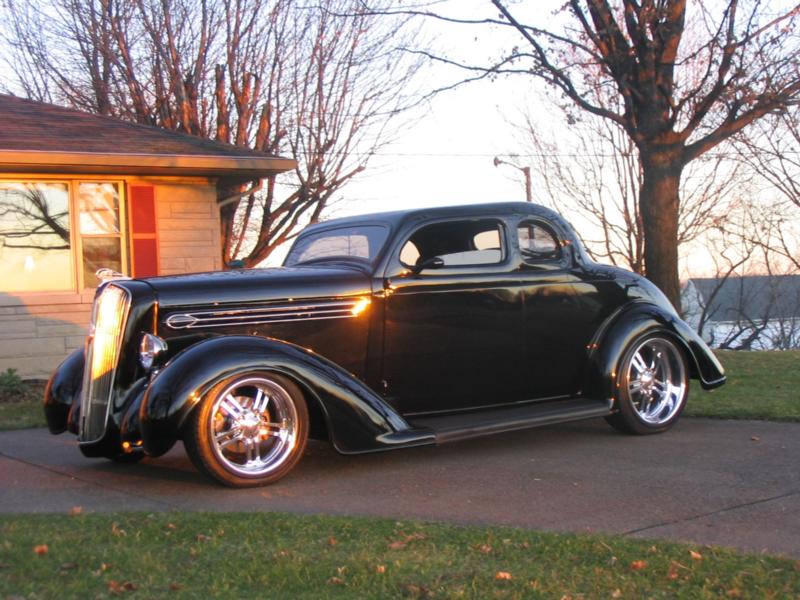
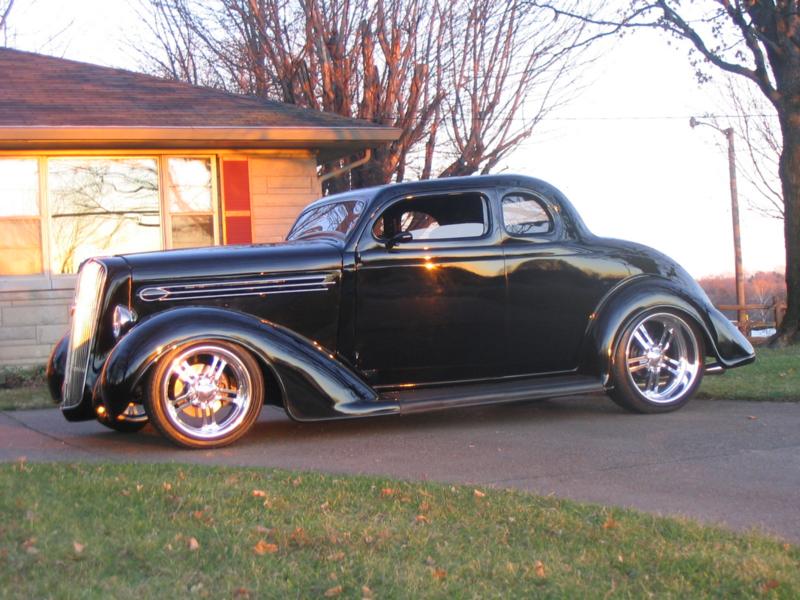
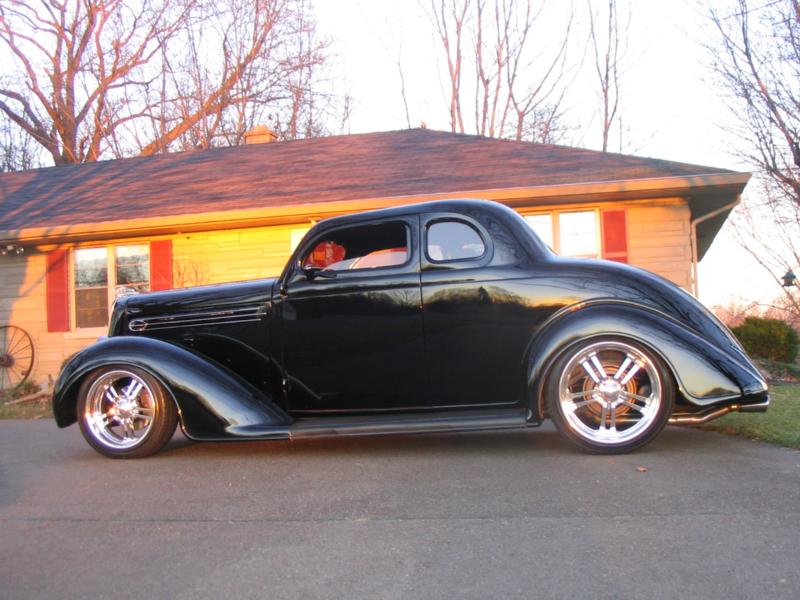
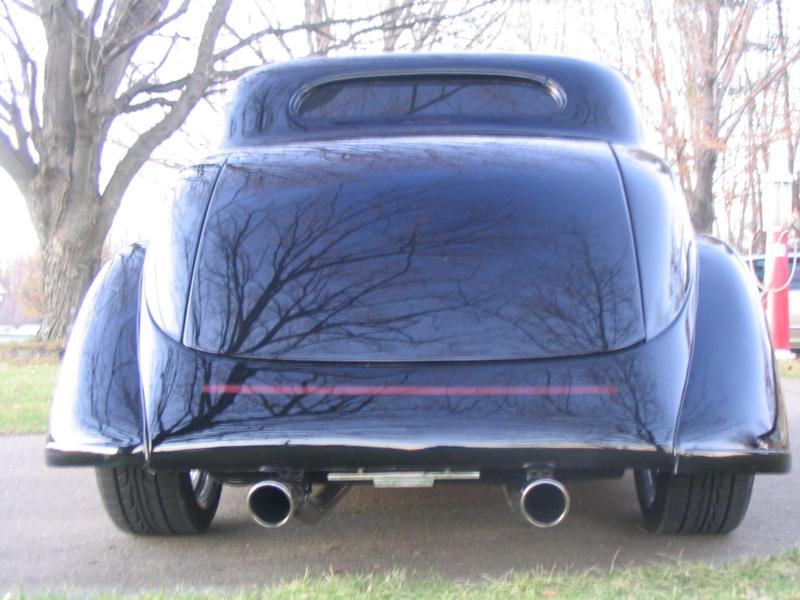
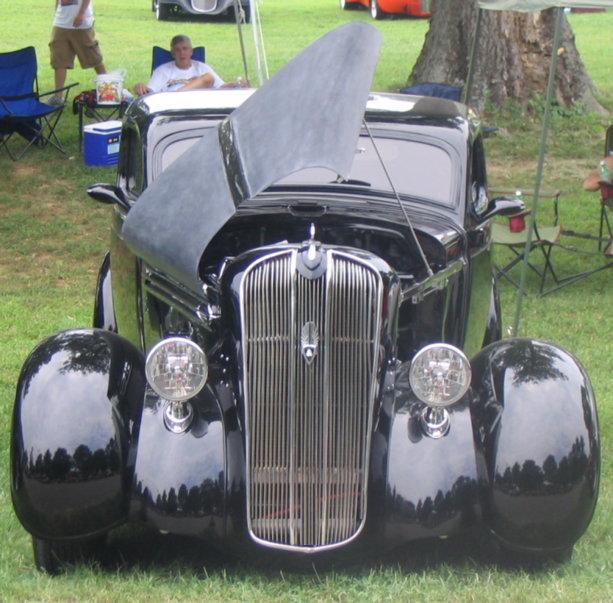
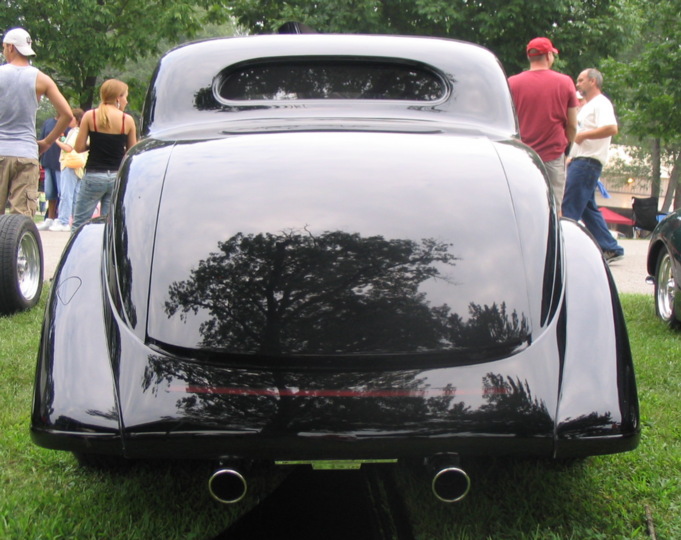
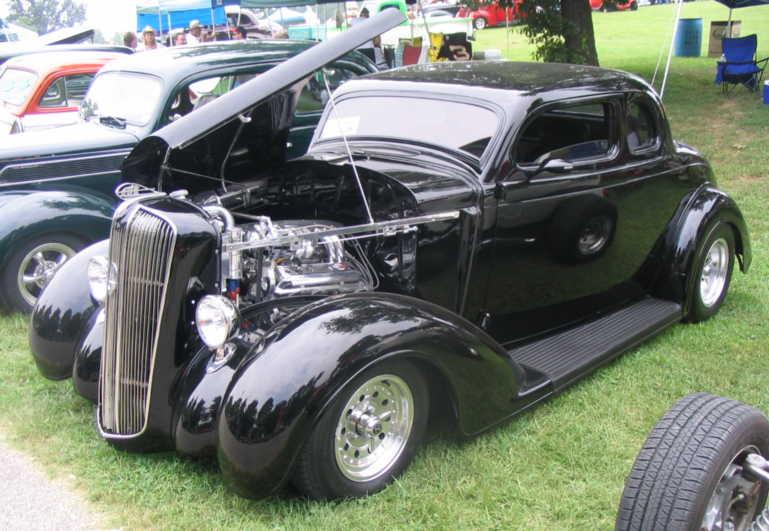
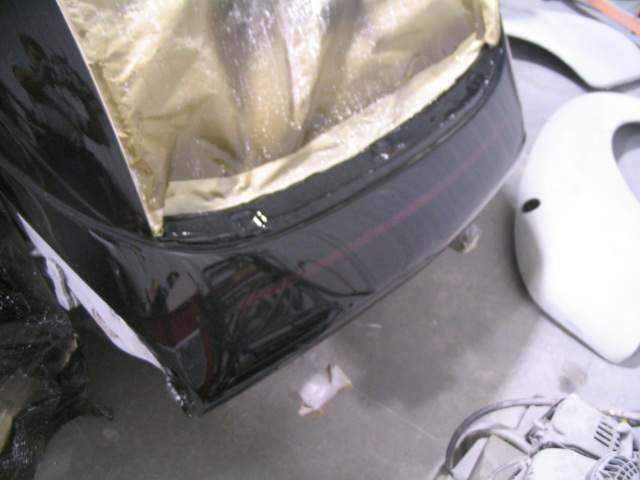
The body is painted now
Flush mount LED brake and tail light
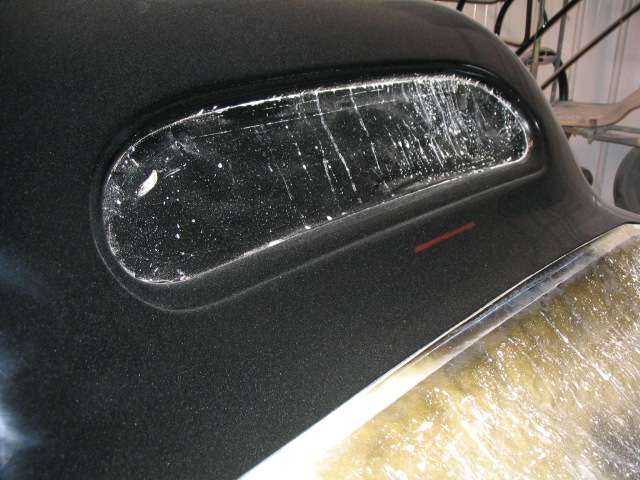
And... the third brake light
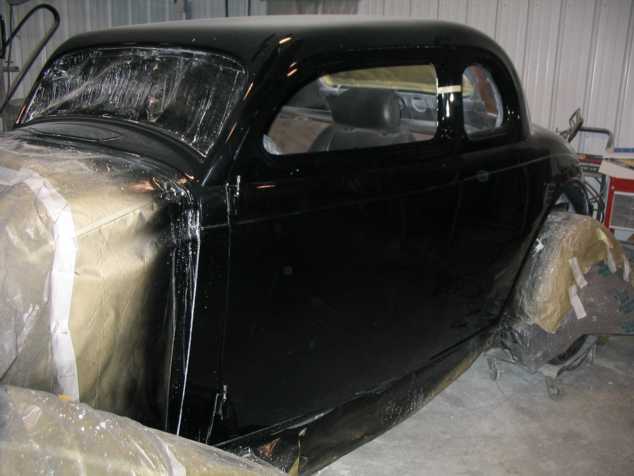
Another view of my new chop, 2 3/4" out of the window area and a little off
the top!
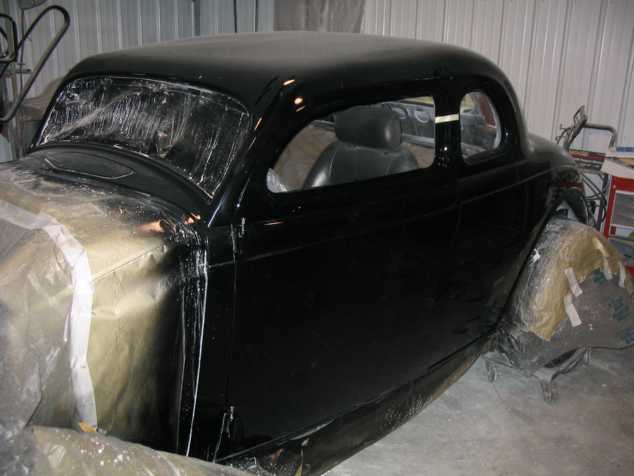
Another angle
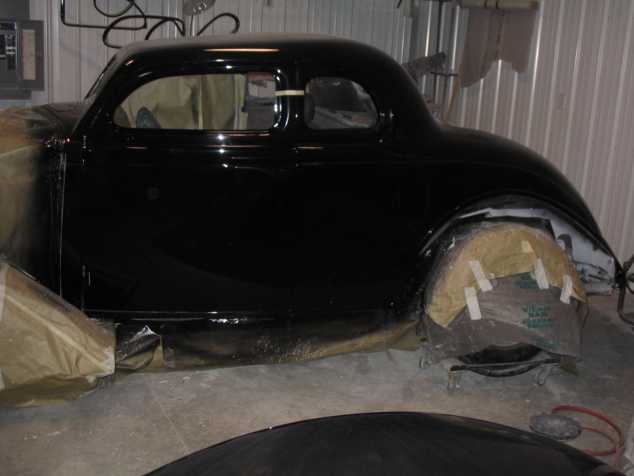
One more!
Color sanding the deck lid
Getting ready to color sand the passenger door
To see all the pictures of my chop
project Click here!
Stay tuned! More coming.
|

|
Pictures of my 36, a long time work in progress start below.
But if you want to see pictures of other 36 Plymouths I've
collected
over the years, (coupes, sedans, convertibles, sedan
deliveries, trucks, originals, hot rods, mild to
extreme in various stages of the
restoration, preservation, modification process)
pick one of the five slide shows below:
1) To see a short slide show of some cool 36's,
go
Here.
.
.
|
|
In 25 years I've driven less than 2,000 mile in this car as an
original,
so now I've decided it's time to Street Rod my
1936 Plymouth Coupe
|
|
Click on thumbnails to enlarge
|
|
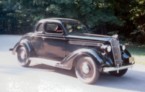
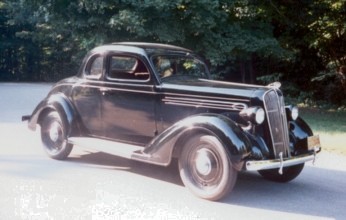
As purchased in 1976, 42,000
mile
|
After restoration in 1976-77
|
A better color in 1978 and we
finally found hubcaps!
|
For pictures of my work in progress keep scrolling down.
|
Click on the pictures below for larger views
and click here
for more info on the 1936 Plymouth!
|
|

|
|
|
|
|
|
|
a To see more old ads like above and learn about 36
Plymouth history click here!
Please check back often to see my progress!
|
Click on the little picture to supersize!
|
|

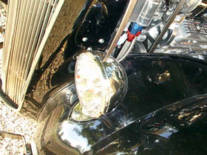
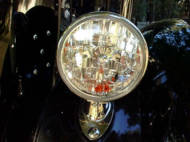
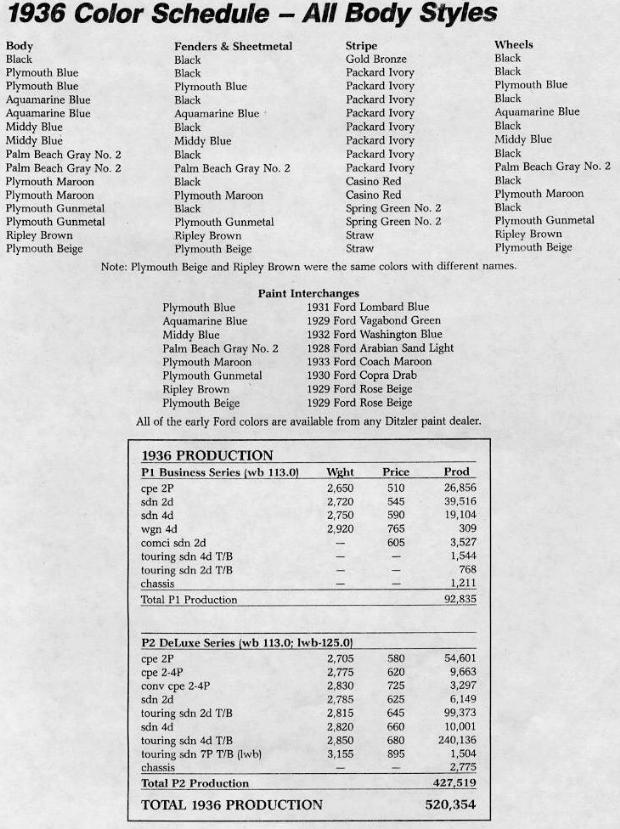
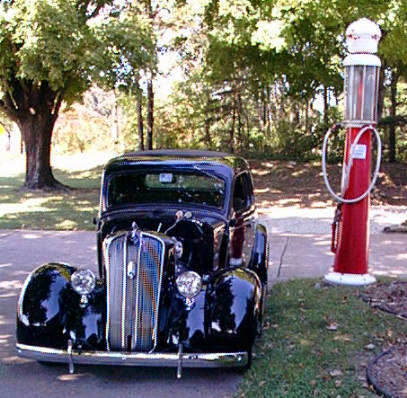
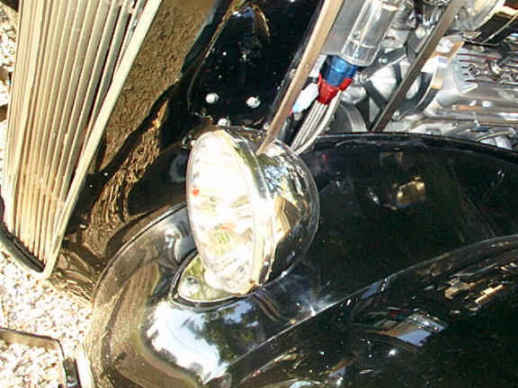
Here's a picture with the front
bumper on and sporting the new stainless King Bees with chopped stands
and Hagan Diamond Cut Prismatic headlamps
|
Just a slightly different angle
|
|
Another shot of the King Bee's
|
I also installed the Hagan
reflectors with turn signals
|
|

|
|
Ready to Rumble!
I did make it to the
Frog Follies
August 24-26 2001 with out being stranded--although, I was beginning to
wonder. The 350 seems to have developed a miss, that I'm guessing is
injector related.
|
|
|
|
In it's original state with the original 20"
rims, tires, flat head six, 3 speed tranny and that heavy straight axle,
I ran the car across the scales at the local Co-op. It weighed in at
2,840 lbs. As soon as I got it running I went back to the same
scale to weigh again with the Fatman front, Ford rear end, V8, 700R4,
power brakes, steering, and air unit it had only gained 40 lbs for a total
of 2,880 lbs.
|
|
Click on thumbnails to
enlarge.
|
|
|

|
|
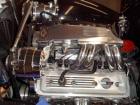
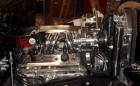
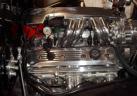
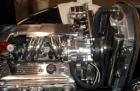
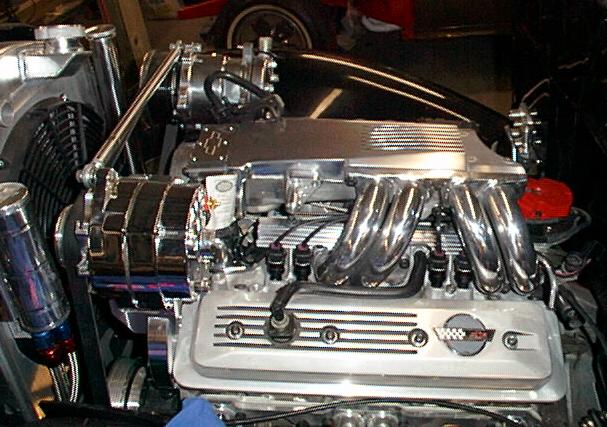
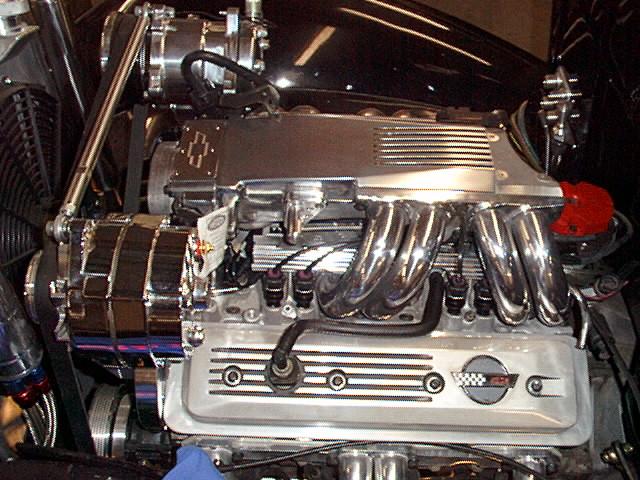
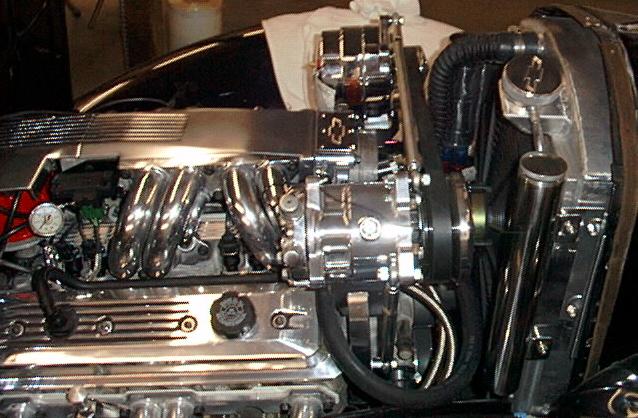
I can polish your plenum and runners! Please email for details!
|
|
|
|
|
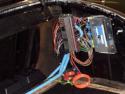
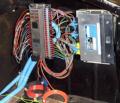
It runs! The initial fire up happened July 6, 2001.
I haven't figured all the sensors and computer stuff out yet. But I
had to crank it once just to keep motivated. The Ron Francis TPI harness took a little
time, but I liked the idea of having the TPI Telorvek panel and computer out
of the way in the trunk.
|
|
|
|
|
|
|
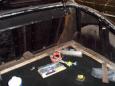
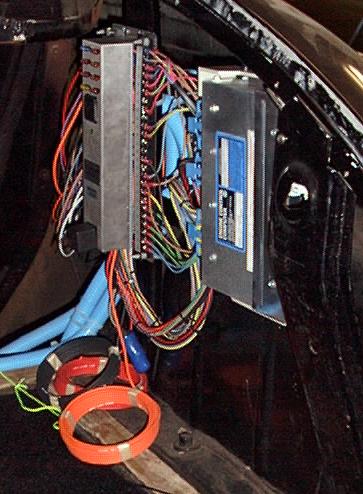
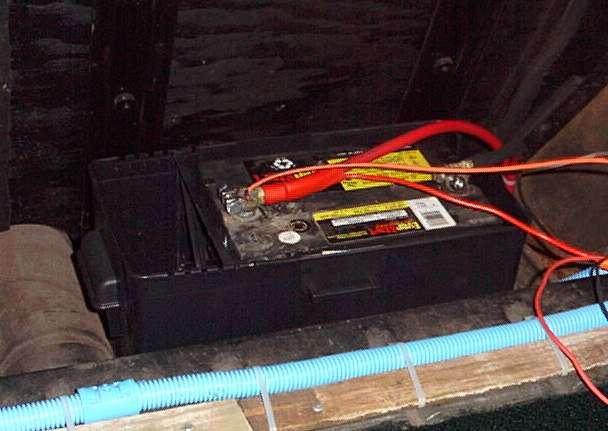
There is all kinds of room in the trunk, that is normally
wasted space. We had upholstered the trunk area years ago and it left
plenty of room between the passenger compartment, fender wells and the
upholstery. So this made an excellent location for the battery,
TPI panel and the ECM.
|
|
|
|
|
|
|
|

|

|
|
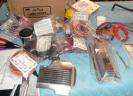
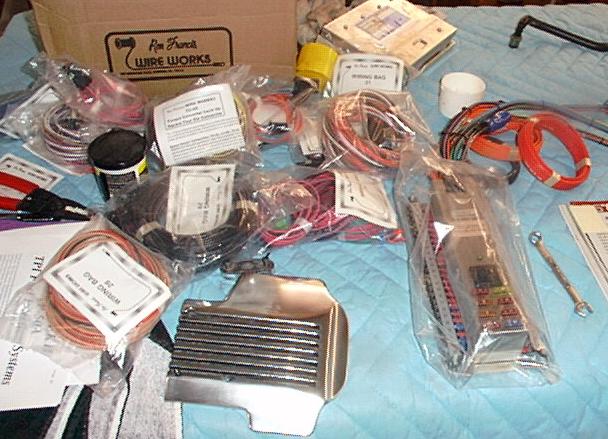
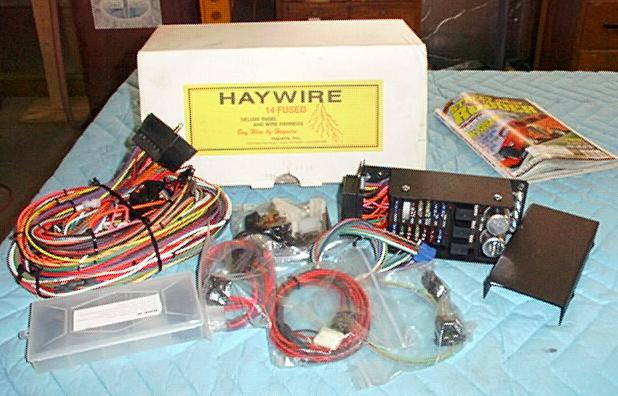
With the TPI harness installed it's time to start wiring the chassis.
I opted for the Haywire
14 circuit kit. About all I've done so far is open the box--and
I have read the instructions a couple of times.
|
|

|

|
|
I have a few bugs to work out yet before I get into the
body wiring:
1) positioning of the
steering column (done)
2) a leaky brake caliper (fixed)
3) making sure I've cured
a transmission line leak (cured)
4) getting residual
valves to cut down brake pedal travel
and... (now this
makes a world of difference--I went from about 4 inches of travel down to 1
inch)
5) Though I've started
the motor I had to do it by running a gas line from the frame mounted pump
to a five gallon gas can. I haven't figured out yet why it won't pull
gas from my new "Tanks" fuel cell. Hmmm... maybe I was suppose
to use those other pieces! Oh well nothing minor. I'll be
on the road in no time. (This one is
almost embarrassing... after tracing back from the fuel pump to the tank, I
found an obstruction in the last piece of braided fuel line we had to
check. I didn't get to see what it was-- just glad we advised my buddy
Jim who was looking into the end of the hose, as I was getting ready to
shoot 120lbs of air through it, to point the end out the door. When it
came out the end it sounded like a 22 went off! )
6) After fixing all the above
problems I discovered I had a bad transmission. The motor and
transmission came from a salvaged 1991 Corvette and were guaranteed to be
good. The tranny was actually fried and had internal damage. I swapped
with the dealer for another core and took it straight to the transmission
shop for a rebuild prior to reassembly.
7) Now that I can actually
shift gears and drive the car I've discovered another problem.
We should've routed the return fuel line all the way to the tank. (I thought
it would save material, drilling another hole in my new tank and time by
running the return from the injectors right into a "T" I placed between the
frame mounted fuel pump and the gas tank...Don't make that mistake. I
should've known if you could've saved time and a few bucks the GM wizards
would've discovered that cost saving step years ago. It appears the
hot fuel I was dumping right back into my supply line was causing cavitation
and starving the TPI when I pushed it. Now (08/20/01) I've discovered a
miss, that probably is from a dirty injector. Number six and eight (at
190 degrees) seem to be running much cooler than all the other cylinders
(around 260 degrees) It looks like now I need to run a compression check if
all is well there I guess I will be removing the plenum, runners and rail to
get the injectors tested and possibly cleaned again. (Now I know what embarrassing is--who would've thought a 350 with
TPI could run that good with the # 6 and 8 plug wires backwards???
Every thing I've done so far
seems to be working really well--I've just been driving the car a little.
I bought one of the Vintage Air air/heat/defrost units, but I haven't
tackled mounting it yet. Mainly because I can't decide what kind of
gauges I want to use and I need to lay all the dash out at the same time.
Errr...that and the fact, I've gotten a little tired of spending $500 bucks
every time I turn around on this car.
So for now I just want to drive
it a little.
I made another purchase the
Ford 8" seems to be fine but the 2.77 gears have got to go. Since the
rear end is an open unit (not posi) I can do a heck of a smoke show
with one wheel but at 55 I'm only turning about 1200 rpms.
According to GM the most efficient operating range for the 350 is 1800 -
2800 rpm at 60 mph. So I found another rear end with a posi unit and
have bought a new set of Richmond 4.11's. That may be a little
steep if I decide to go cross country but, for while I'm getting the car the
way I want it, it's going to be a HOT ROD!
For a cool calculator to figure out tire size,
gear ratio and rpm check out this link to Randy's Rear Ends
|
|
|


