 Click image to see more murals |
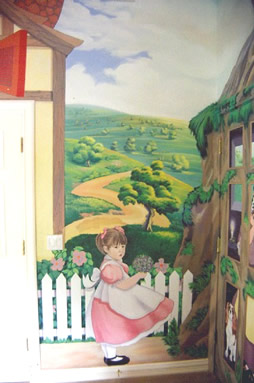
Nothing equals the excitement and splendor of walking into a child’s
room and seeing the walls adorned with a hand painted mural. Unfortunately,
hiring
a professional muralist can be very costly.
I’m going to teach you how you can do a professional mural for your child’s room for less than half the cost you would pay a professional for one days work. You will learn all the basics for putting the design together, transferring the design to the wall, mixing the paint, and finally painting the design mural on your wall. Last, but not least, will be the reward of seeing the happiness reflected in your child’s eyes at the finished project, and the rewards of having done this yourself. |
||
• Classes are limited to six people • Everyone will experience hands on work and professional instruction. • Classes are held once weekly for two hours. The course runs for four weeks. • The first and second Saturday of the month, Two four hour sessions (eight hours), covering the same material is available for those who work. • Special times can be booked for a party of six to work with your schedule. • Cost for the course is $250. Materials used in class are provided. Materials used to paint the mural in your home are not provided. A list of all needed supplies will be handed out in class. • A deposit of $50 holds your reservation to attend. • I am also available for in-home consultation and assistance. My fee is $50 per hour. |
 Click image to see more murals |
||
 Click image to see more murals |
CLASS I: As you will see, you do not have to know how to draw a thing! The first step is deciding what to paint, or choosing the design elements… Where to find them and what to do with them. Some examples: Trees, fences, sky, clouds, sports, figures, underwater scene, cartoons, space, airplanes, animals, or other. If you have something in mind that you know you want to paint you can bring it to the first class. Next is learning how to put the design together. We will review the material list and discuss preparing the wall. All your fears will disappear after this first class. CLASS II: We will be transferring the design to the wall to use as an example and hands on training. Learn to mix paint you’re using without fear or fainting. I’m going to teach you how to paint a sky, clouds, trees, and grass. These are good warm ups for shaky hands. |
||
CLASS III: This is the class where we will be looking at everyone’s mural design projected large on the wall. During this review time we will systematically learn how to mix the colors and paint elements in the mural. We will not be panting the murals to completion, but will pick portions of the design and learn how to paint them. Each person will have the opportunity to participate. CLASS IV: We will continue painting some of the mural elements from CLASS III. This is the time to review what we have done. If there is any technique that has not been covered that you would like to learn or review, then this is the class to do it. I will go over a simple lesson about color theory and why you should follow a few simple rules. I will show you how to apply a final clear coat over your mural. Remember, I’m available by appointment if you need any help, however, I’m convinced by the time you have finished this class you will be a mural artist… Congratulations! |
 Click image to see more murals |
||
 Click image to see more murals |
|